2 4 0 8 M K 3 F R O N T P A N E L O P E R A T I O N
61
There are three variations for the analog source
setting. Press the SET button repeatedly to choose
the desired variation as explained below:
Figure 5-7: The three variations for the analog input source setting.
SPDIF
When you want to transfer from SPDIF, there is
only one choice: Bank C (since SPDIF can only be
used on Bank C.)
Figure 5-8: Choosing SPDIF as a source for a transfer.
The SPDIF input is mapped to the rest of the
channel pairs of the bank, and then it is also
mapped to all three ADAT banks and all three
Tascam banks.
ADAT and TDIF
When you want to transfer from either ADAT or
TDIF, you can choose Bank A, B or C, or all three
banks at once, as shown below in Figure 5-9.
Figure 5-9: Choosing a source for a transfer. Press the SET button
repeatedly to choose Bank A, B or C, or all three combined as shown.
When you choose an individual bank, it is mapped
to all three output banks, duplicated on each bank.
For example, if ADAT Bank B is the source, it will
be sent to TDIF banks A, B and C. (It will also be
sent to ADAT banks A, B and C.)
When you choose all three banks together as the
source, they pass audio straight through, i.e. Bank
A to A, B to B, and C to C.
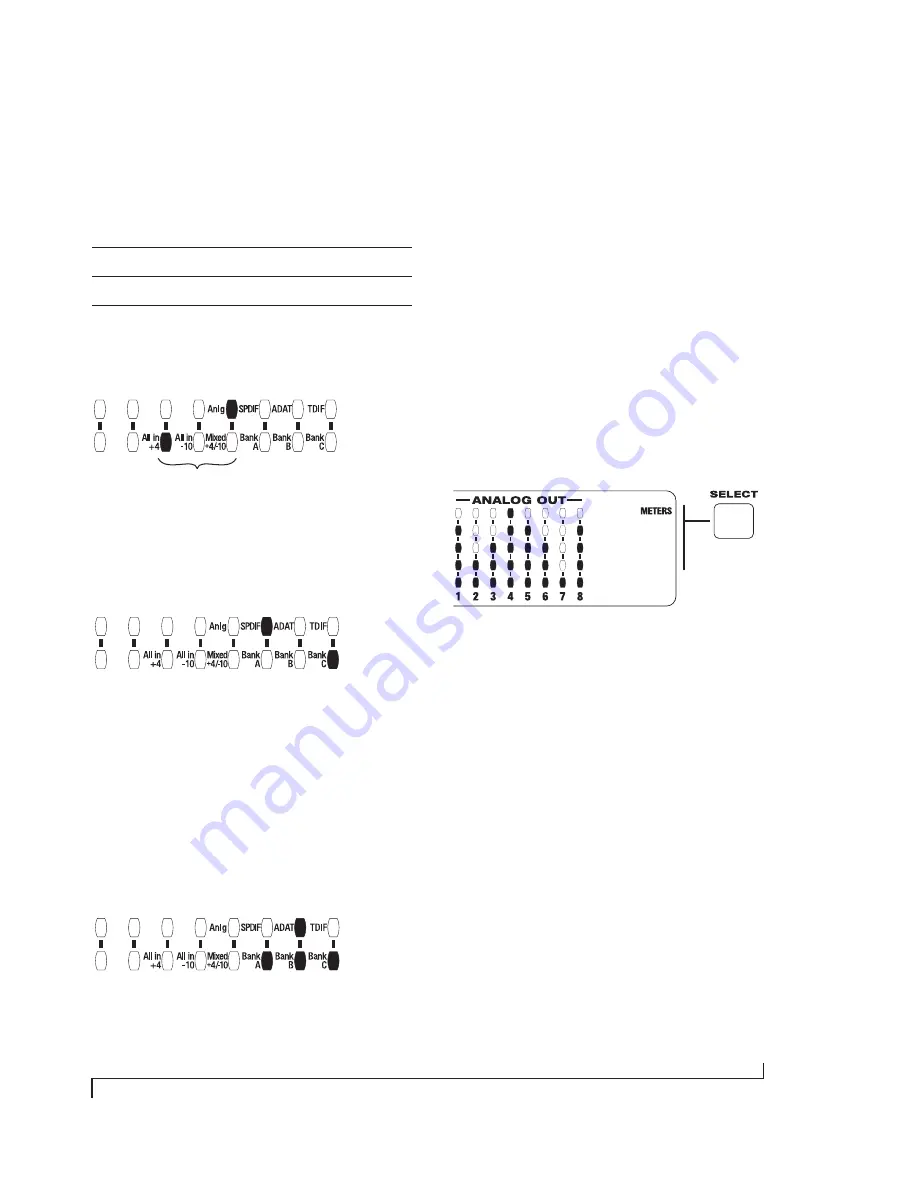
Analog metering
Press the SELECT button repeatedly (if necessary)
to illuminate the METERS LED as shown in
Figure 5-10 below. This LED indicates that the
LEDs in the ANALOG OUT section are serving as
five-segment output level meters.
Figure 5-10: You can ignore the LED labels in the ANALOG OUT
section of the front panel when the LEDs are acting as output level
meters.
LOCK AND TACH
When the 2408mk3 is resolving to video or SMPTE
time code (via its built-in sync features), the LOCK
light glows green when lockup has been achieved.
The TACH light blinks once per second when the
2408mk3 is successfully reading address (time
code) information. For details, see “Syncing to
SMPTE time code” on page 43 and “Syncing to
video” on page 44.
DIGITAL ACTIVITY LEDs
The Activity LEDs in the ADAT/TDIF section show
input and output activity on all three banks of
digital input and output. A signal of -40dB or
stronger illuminates these LEDs.
Analog
source setting
Explanation
All in +4
All analog inputs are set to a +4 dB input level.
All in -10
All analog inputs are set to a -10 dB input level.
Mixed +4 /-10
Analog input levels match the settings
specified in the MOTU PCI Audio Console (as
explained in “Input Reference Level” on
page 70).
Содержание PCI-424
Страница 35: ...6 ...
Страница 43: ...14 ...
Страница 45: ...16 ...
Страница 53: ...P A C K I N G L I S T A N D P C S Y S T E M R E Q U I R E M E N T S 24 ...
Страница 83: ...I N S T A L L I N G T H E P C I 4 2 4 H A R D W A R E 54 ...
Страница 103: ...M O T U P C I A U D I O C O N S O L E 74 ...
Страница 111: ...C U B A S E N U E N D O A N D O T H E R A S I O S O F T W A R E 82 ...
Страница 115: ...S O N A R A N D O T H E R W D M S O F T W A R E 86 ...
Страница 119: ...E X P A N D I N G Y O U R P C I 4 2 4 S Y S T E M 90 ...
Страница 125: ...R E D U C I N G M O N I T O R I N G L A T E N C Y 96 ...
Страница 131: ...C U E M I X C O N S O L E 102 ...
Страница 148: ...6 ...
Страница 156: ...14 ...
Страница 158: ...16 ...
Страница 166: ...P A C K I N G L I S T A N D M A C I N T O S H S Y S T E M R E Q U I R E M E N T S 24 ...
Страница 194: ...I N S T A L L I N G T H E P C I 4 2 4 H A R D W A R E 52 ...
Страница 230: ...A U D I O D E S K 88 ...
Страница 246: ...E X P A N D I N G Y O U R P C I 4 2 4 S Y S T E M 104 ...
Страница 258: ...C U E M I X C O N S O L E 116 ...


