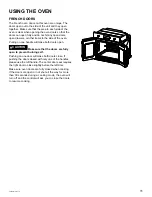
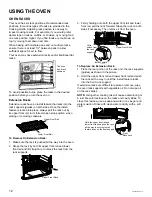
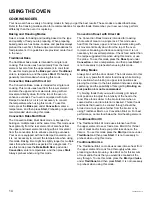
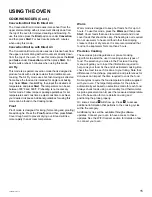
Monogram ZTDX1FPSN1SS Скачать руководство пользователя страница 19

49-2000712  Rev. 0

19

CARE AND CLEANING

Be sure electrical power is off and all surfaces are cool before cleaning any part of the oven

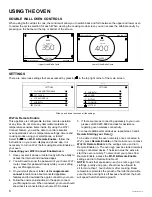
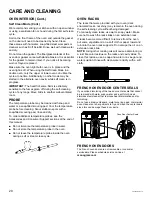
CONTROL PANEL

To lock the controls, press 

SETTINGS

LOCK CONTROL

SABBATH

SOUND

SET CLOCK

Wi-Fi & REMOTE ENABLE

12:30 PM

 in the bottom left corner and 

follow instructions on the display. Instructions for unlocking 

are visible when the display is locked. It’s a good idea to 

wipe the control panel after each use. Clean with mild soap 

and water or vinegar and water, rinse with clean water and 

polish dry with a soft cloth. Do not use abrasive cleansers, 

strong liquid cleansers, plastic scouring pads or oven 

cleaners on the control panel—they will damage the finish.

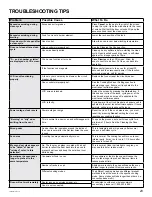
OVEN EXTERIOR

Do not use oven cleaners, abrasive cleansers, strong 

liquid cleansers, steel wool, plastic scouring pads, or 

cleaning powders on the interior or exterior of the oven. 

Clean with a mild soap and water or vinegar and water 

solution. Rinse with clean water and dry with a soft cloth. 

When cleaning surfaces, make sure that they are at room 

temperature and not in direct sunlight.
If stain on the door vent trim is persistent, use a mild 

abrasive cleaner and a sponge-scrubber for best results.
Spillage of marinades, fruit juices, tomato sauces and 

basting liquids containing acids may cause discoloration 

and should be wiped up immediately. Let hot surfaces 

cool, then clean and rinse.

Painted Surfaces And Black Stainless Steel

 (on 

some models)

Painted surfaces may include the door and trim around 

the control panel. Clean these with soap and water or a 

vinegar and water solution.
Do not use commercial oven cleaners, cleaning powders, 

steel wool or harsh abrasives on any painted surface, 

including Black Stainless Steel.

Stainless Steel - Excluding Black Stainless Steel 

(on some models)

Do not use a steel wool pad; it will scratch the surface.
To clean the stainless steel surface, use warm sudsy 

water or a stainless steel cleaner or polish. Always wipe 

the surface in the direction of the grain. Follow the cleaner 

instructions for cleaning the stainless steel surface.

Cleaners with oxalic acid such as Bar Keepers Friend Soft 

Cleanser™ will remove surface rust, tarnish and small 

blemishes. Use only a liquid cleanser free of grit and rub in 

the direction of the brush lines with a damp, soft sponge.
To inquire about purchasing cleaning products including 

stainless steel appliance cleaner or polish, see the 

Accessories and Consumer Support sections at the end of 

this manual.

OVEN INTERIOR

The interior of your new oven can be cleaned manually or by 

using Steam Clean or Self Clean modes.
Spillage of marinades, fruit juices, tomato sauces and basting 

liquids containing acids may cause discoloration and should 

be wiped up immediately. Let hot surfaces cool, then clean 

and rinse.

Manual Cleaning

Do not use oven cleaners, strong liquid cleansers, steel 

wool, or scouring pads on the interior of the oven. Clean 

with a mild soap and water, or vinegar and water solution. 

Rinse with clean water and dry with a soft cloth. When 

cleaning surfaces, make sure that they are at room 

temperature.

Steam Clean Mode

Steam clean is intended to clean small spills using water 

and a lower cleaning temperature than Self-Clean. 
To use the Steam Clean feature, wipe grease and soils 

from the oven. Pour one cup of water into the bottom of 

the oven. Close the door. Press the 

More

 option, then 

select 

Steam Clean

, and press 

Start

 to the right of the 

screen. The oven door will lock. You cannot open the door 

during the 30 minute steam clean as this will decrease the 

steam clean performance. At the end of the steam clean 

cycle the door will unlock. Wipe out any excess water and 

any remaining soil.

 NOTE: 

Water in the bottom of the oven 

may be hot right after finishing the cycle.

Self Clean Mode

Read Self-Cleaning Oven Safety Instructions at the 

beginning of this manual before using Self Clean Mode. 

Self clean uses very high temperatures to clean the oven 

interior. The oven door will lock when using this feature. 

Before operating the self clean cycle, wipe up grease and 

soils from the oven. Remove all items from the oven other 

than enameled (dark color) racks. Shiny or silver racks, 

the meat probe, and any cookware or other items should 

all be removed from the oven before initiating a self clean 

cycle. Close the door. If using a double oven, select which 

oven you would like to clean. Select the 

More

 option, then 

Self Clean

. Choose a 3, 4, or 5 hour cycle, and select 

the illuminated Start pad to the right of the screen. For 

heavily soiled ovens, the maximum 5 hour clean time is 

recommended. If you wish to use the default time, press 

Start

 immediately after selecting Self Clean.  

The oven will show that the door has locked and display the 

amount of time remaining in the cycle. Press the illuminated 

Cancel

 pad to the right of the screen if you wish to stop 

the cycle. The oven will turn off automatically when the self 

clean cycle is complete. The door will stay locked until the 

oven has cooled down. After the oven has cooled down 

wipe any ash out of the oven.

Содержание ZTDX1FPSN1SS

Страница 1: ...OWNER S MANUAL 30 Single Twin Convection with Direct Air French Door Wall Oven 30 Double Twin Convection with Direct Air French Door Wall Oven MONOGRAM COM...

Страница 2: ...el Number Serial Number MODEL NUMBERS ZTSX1FPSN1SS ZTDX1FPSN1SS TABLE OF CONTENTS MODEL INFORMATION 2 CONSUMER SUPPORT 3 SAFETY INFORMATION 4 USING THE OVEN 6 Oven Controls 7 Double Wall Oven Control...

Страница 3: ...emote enable visit our website at Monogram com or call 800 444 1845 in the US only PARTS AND ACCESSORIES Individuals qualified to service their own appliances can have parts or accessories sent direct...

Страница 4: ...nterior area of the oven allow sufficient time for cooling first Other surfaces of the appliance may become hot enough to cause burns Potentially hot surfaces include the oven vent opening surfaces ne...

Страница 5: ...Do not leave items such as paper cooking utensils or food in the oven when not in use Items stored in an oven can ignite Never place cooking utensils pizza or baking stones or any type of foil or line...

Страница 6: ...circuit different from that to which the receiver is connected Consult the dealer or an experienced radio TV technician for help b accept any interference received including interference that may cau...

Страница 7: ...tings GET CONNECTED 12 30 PM Press the GET CONNECTED 12 30 PM to access the Settings See the Settings section for more information Favorite GET CONNECTED 12 30 PM This option allows the user to save t...

Страница 8: ...ting your Wi Fi Connect Enabled oven 1 Have your smart phone or tablet ready with the ability to access the internet and download apps 2 You will need to know the password of your home Wi Fi router Ha...

Страница 9: ...en shows the options for brightness clock off and energy saver Clock off will remove the clock from the display when the screen is inactive but it will be shown after pressing the screen Cooking The o...

Страница 10: ...en will display the settings that you programmed for your Sabbath Bake Adjust the Temperature During a Sabbath Bake If the temperature needs to be adjusted after programming the oven for a Sabbath Bak...

Страница 11: ...ling on one handle will make both doors open CAUTION Make sure that the doors are fully open to prevent burning self Pushing on one door will make both doors close If pushing the doors closed with onl...

Страница 12: ...en 2 Grasp the rack by both its upper front rail and lower front rail and lift straight up to unlock the rack from the rack supports 3 Firmly holding onto both the upper front rail and lower front rai...

Страница 13: ...e a discoloring or a rust like color residue on the racks and cavity sides To clean this residue use a soap and water or a vinegar and water solution Rinse with clean water and dry with a soft cloth C...

Страница 14: ...ess the Bake Multi Rack pad under Convection enter a temperature and then press Start Always preheat when using this mode Convection Roast with Direct Air The Convection Roast mode is intended for roa...

Страница 15: ...rise more rapidly than at room temperature Warm Warm mode is designed to keep hot foods hot for up to 3 hours To use this mode press the Warm pad then press Start Cover foods that need to remain mois...

Страница 16: ...e probe into the probe outlet in the oven 3 Select the desired cooking mode and temperature Before pressing start press the Probe icon at the bottom right of the screen The probe setting screen will b...

Страница 17: ...nd cookies Glass and ceramic pans heat slowly but retain heat well These types of pans work well for dishes such as pies and custards Air insulated pans heat slowly and can reduce bottom browning Keep...

Страница 18: ...Convection Broil Move food down for more doneness less searing and up for greater searing browning when broiling For best performance when broiling center food below the broil heating element Whole t...

Страница 19: ...Consumer Support sections at the end of this manual OVEN INTERIOR The interior of your new oven can be cleaned manually or by using Steam Clean or Self Clean modes Spillage of marinades fruit juices...

Страница 20: ...ee the Accessories and Consumer Support sections at the end of this manual Do not immerse the temperature probe in water Do not store the temperature probe in the oven Do not leave the temperature pro...

Страница 21: ...nts or scratches REPLACING THE LOWER OVEN DOOR NOTE The oven door is heavy You may need help lifting the door high enough to slide it into the hinge slots Do not lift the door by the handle 1 Lift the...

Страница 22: ...ions Food being cooked in a hot pan Make sure cookware is cool Cookware not suited for broiling Use a pan specifically designed for broiling Aluminum foil used on the broiling pan and grid has not bee...

Страница 23: ...r and ensure unit is updated to the most recent software update If issue persists call service to assess the issue Power outage clock resets Power outage or surge Reset the clock If the oven was in us...

Страница 24: ...your receipt here Proof of the original purchase date is needed to obtain service under the warranty Servicing your appliance may require the use of the onboard data port for diagnostics This gives a...

Страница 25: ...n elements Light bulbs Probe ACCESSORIES Looking For Something More Monogram offers a variety of accessories to improve your cooking and maintenance experiences Refer to the Consumer Support page for...

Страница 26: ...49 2000712 Rev 0 01 20 GEA Printed in the United States...

Страница 27: ...MANUEL DE L UTILISATEUR Four encastr simple convection de 30 po 76 2 cm porte fran aise avec air direct Four encastr double convection de 30 po 76 2 cm porte fran aise avec air direct MONOGRAM COM...

Страница 28: ...s rie NUM ROS DE MOD LE ZTSX1FPSN1SS ZTDX1FPSN1SS TABLE DES MATI RES RENSEIGNEMENTS SUR LE MOD LE 2 SERVICE LA CLIENT LE 3 CONSIGNES DE S CURIT 4 UTILISATION DU FOUR 6 Commandes du four 7 Commandes d...

Страница 29: ...notre site Web Monogram com ou appelez le 800 444 1845 aux tats Unis seulement PI CES ET ACCESSOIRES Les personnes ayant les comp tences requises pour r parer elles m mes leurs appareils peuvent recev...

Страница 30: ...evenir suffisamment chaudes pour causer des br lures Les surfaces qui peuvent tre chaudes comprennent les ouvertures des vents les surfaces situ es autour de ces ouvertures de m me que les interstices...

Страница 31: ...ustensiles de cuisine ou des aliments dans le four lorsque celui ci n est pas utilis Les articles entrepos s dans le four pourraient s enflammer Ne placez jamais d ustensiles de cuisson des pierres d...

Страница 32: ...u r cepteur Demander de l aide du d taillant de l appareil ou d un technicien en radio t l vision exp riment b accepter toute interf rence re ue y compris les interf rences risquant d engendrer un fon...

Страница 33: ...les lampes de la cavit du four appuyez sur GET CONNECTED 12 30 PM Les lumi res des deux fours s allumeront si vous utilisez un four double R glages GET CONNECTED 12 30 PM Appuyez sur GET CONNECTED 12...

Страница 34: ...intelligent ou d une tablette en mesure d acc der Internet et de t l charger des applications 2 Vous aurez besoin de conna tre le mot de passe de votre routeur Wi Fi Pr voyez avoir ce mot de passe po...

Страница 35: ...de l horloge et d conomie d nergie La d sactivation de l horloge l enl ve de l affichage lorsque l cran est inactif mais elle s affiche apr s que vous avez appuy sur l cran Cooking cuisson Le four est...

Страница 36: ...art mise en marche L cran suivant affichera les param tres que vous avez programm s pour votre cuisson en mode sabbat R glage de la temp rature du four pendant une cuisson en mode sabbat Si la temp ra...

Страница 37: ...deux portes ATTENTION Assurez vous que les portes sont compl tement ouvertes pour viter de vous br ler Pousser sur l une des portes permettra de fermer les deux portes Si vous fermez les portes avec...

Страница 38: ...sez la grille la fois par son rail avant sup rieur et par son rail avant inf rieur et soulevez la en ligne droite pour la d verrouiller des supports 3 En tenant fermement le rail avant sup rieur et le...

Страница 39: ...e sur les grilles et les c t s de la cavit Pour nettoyer ce r sidu utilisez du savon et de l eau ou une solution de vinaigre et d eau Rincez l eau claire et ass chez avec un chiffon doux et propre ATT...

Страница 40: ...ature puis appuyez sur la touche Start mise en marche Ce mode de cuisson exige toujours de pr chauffer le four R tissage convection avec air direct Le mode de r tissage convection est destin au r tiss...

Страница 41: ...viter qu elle ne s che Le pain l vera plus rapidement qu temp rature ambiante Maintien au chaud Le mode Warm maintien au chaud est destin conserver la chaleur des aliments cuits pendant une dur e max...

Страница 42: ...rieur du four 3 S lectionnez le mode de cuisson d sir ainsi que la temp rature Avant d appuyer sur Start mise en marche appuyez sur l ic ne Probe sonde situ e dans le coin inf rieur droit de l cran L...

Страница 43: ...r plus longtemps Ces types d ustensiles de cuisson conviennent parfaitement aux tartes et croustades Les ustensiles de cuisson isol s se r chauffent lentement et peuvent r duire le brunissement des al...

Страница 44: ...aliments dans le four pour une cuisson plus en profondeur moins grill e et disposez les plus haut dans le four pour les griller et les brunir davantage Pour de meilleures performances lors de la cuiss...

Страница 45: ...ions Accessoires et Service la client le la fin de ce manuel INT RIEUR DU FOUR L int rieur de votre nouveau four peut tre nettoy la main ou en utilisant les fonctions de nettoyage la vapeur ou d auton...

Страница 46: ...la sonde thermique dans le four Ne laissez jamais la sonde thermique l int rieur du four pendant l autonettoyage ou le nettoyage la vapeur GRILLES DE FOUR Les grilles fournies avec votre four grilles...

Страница 47: ...REMISE EN PLACE DE LA PORTE DU FOUR INF RIEUR REMARQUE La porte du four est tr s lourde Vous aurez peut tre besoin d aide afin de la soulever assez haut pour la faire glisser dans les encoches de char...

Страница 48: ...des grilles Les aliments sont cuits dans un ustensile chaud Assurez vous que l ustensile de cuisson est froid Un ustensile de cuisson inappropri pour le gril est utilis Utilisez un ustensile de cuisso...

Страница 49: ...version Si le probl me persiste appelez le service la client le pour faire valuer le probl me Panne de courant r initialisation de l horloge Coupure de courant ou surtension Remettez l horloge l heur...

Страница 50: ...preuve de la date d achat d origine est requise pour obtenir des services sous garantie La r paration de votre appareil peut n cessiter l utilisation d un acc s embarqu aux donn es pour d terminer le...

Страница 51: ...oules Sonde thermique ACCESSOIRES Vous manquez de quelque chose Monogram propose une panoplie d accessoires qui permettent d am liorer votre exp rience de cuisson et de nettoyage Reportez vous la page...

Страница 52: ...49 2000712 R v 0 01 20 GEA Imprim aux tats Unis...

Отзывы: