Environment Control Option Operations
5014166 D
17
Setting Up the Carbon Dioxide
A pre-mixed CO
2
tank with a regulator must be set up and connected to
the carbon dioxide controller. The carbon dioxide controller then controls
the flow rate of carbon dioxide delivered to the water reservoir within
the environmental enclosure.
Before you begin, make sure the water reservoir is set up. See
the Water Reservoir on page 15
To set up the carbon dioxide
1.
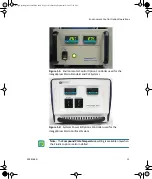
Connect the tubing from the pre-mixed CO
2
tank to the
Environmental Control Option Controller or the Systems Power &
Options Controller.
2.
Verify that the tubing from the Environmental Control Option
Controller or the Systems Power & Options Controller to the
instrument is connected.
3.
Connect the regulator to the CO
2
tank.
4.
Turn on the CO
2
regulator to approximately 15 PSI to 20 PSI.
5.
From the top of the ImageXpress Micro System, lift the insert
surrounding the top door and remove it. Keep the top door of
the instrument closed.
6.
Verify that there is a steady flow of bubbles in the water
reservoir.
7.
Replace the insert surrounding the top door.
8.
Check the environmental control settings to verify that the CO
2
pressure is OK. See
Environment Control Software on page 21
.
After setting up the carbon dioxide
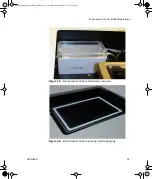
Load an unlidded plate with the live-cell sealing ring on top. If there are
concerns about contamination, a breathable seal can be used over the
top of the plate. See
Loading the Sample Plate on page 18
Note:
Before you do imaging experiments, wait for the system and
plate to reach equilibrium. Allow at least two hours for the system and
30 minutes for the plate. Because focus settings and offsets change with
temperature, you might need to optimize them after the system and
plate have reached equilibrium.
ImageXpressOptionsUserGuide.book Page 17 Wednesday, September 9, 2015 3:54 PM

