Digidata 1550 Low-Noise Data Acquisition System User Guide
8
5023399 A
Installing the pCLAMP Security Key (pCLAMP Only)
If you install pCLAMP software, insert the provided pCLAMP 10 security
key (dongle) into any USB port on your computer. The dongle must be
connected to a USB port on your computer for authorized pCLAMP
Clampex 10.4 software use.
Installing the Digidata 1550 Digitizer
1.
Connect the power cord to the wall, and then to the Digidata
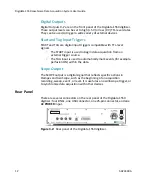
1550 digitizer rear panel AC power input connector.
2.
Attach the USB 2 cable to a USB 2.0 port on your computer, and
then to the digitizer.
3.
Switch on the power on the Digidata 1550 digitizer.
4.
Let the Digidata 1550 digitizer warm up for one hour before
performing experiments.
5.
Windows automatically finds the new hardware and installs the
drivers.
6.
Configure AxoScope 10.4 or pCLAMP 10.4 software for use with
the digitizer.
Configuring Software for Digidata 1550 Digitizer Use
This configuration procedure applies to AxoScope 10.4 and pCLAMP
Clampex 10.4 software. By default the Demo digitizer mode is active.
1.
Run AxoScope or Clampex by double-clicking on the icon on the
Windows desktop.
2.
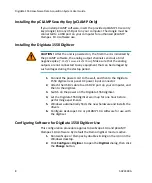
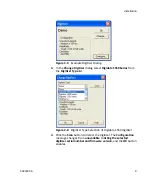
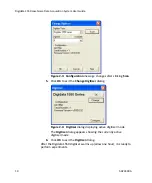
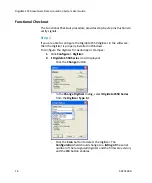
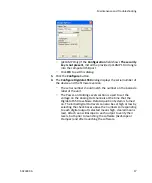
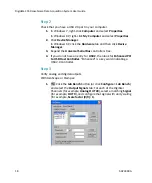
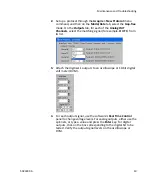
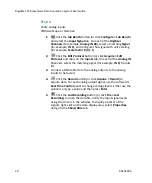
Click
Configure > Digitizer
to open the
Digitizer
dialog, then click
the
Change
button.
CAUTION!
After the unit is powered on, the first time it is initialized by
the pCLAMP software, the analog output channels send out a brief
negative spike (
~-10 V/25 ms and -5 V/270 ms
). Make sure that the analog
outputs are not connected to any equipment that can be damaged by
such voltages during the startup period.
Содержание Digidata 1550
Страница 14: ...Digidata 1550 Low Noise Data Acquisition System User Guide 14 5023399A...
Страница 28: ...Digidata 1550 Low Noise Data Acquisition System User Guide 28 5023399A...
Страница 39: ......


