P a g e
|
1
Innovated by
Please ensure you read this document along with the GreenBox & ZB Connection devices technical user manuals
before removing the GreenBox from its packaging and powering it up.
Important Note:
When the GreenBox has been powered up, do not remove power from the GreenBox unit at any time without
properly shutting it down by selecting “Shutdown” from the Administrator menu. As this could corrupt data and make the
system unusable.
Default Settings
IP Address
: 192.168.1.100
Port:
8092
Administrator Username
: admin
Administrator Password
: password
Important Note
:
Ensure you have the information to a valid and accessible SMTP Server; if authentication is required then you
should have a valid username and password for the SMTP server, to ensure GreenBox can send out emails. Also ensure that
GreenBox has access to the internet to allow it to synchronise its date & time and communicate via emails.
Network Settings
GreenBox provides a user interface via the HTTP protocol and so is only accessible via a browser from a PC or laptop. The first step
is to set up GreenBox to conform to your LAN settings so that it is accessible from within your LAN:
Accessing GreenBox for the first time
There is more than one way to access your GreenBox for the first time:
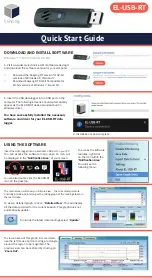
USB stick to change the IP address of the Greenbox.
Insert a USB stick on your PC/laptop
that runs on Windows OS
. From the Windows
Explorer, navigate to the USB drive. Double click on the GreenboxUtility.exe application
to display the following Network Configuration Tool dialog.
Important Note
Download IP Configuration Utility -
GreenboxUtility.exe
from the ZB-
Connection Technical Centre
It will display the LAN settings from your PC/Laptop and you need to complete the Network Address field’s last box (in green).
Ensure that this number is unique for your network. Click on OK. This will generate a special file on the USB stick. Now safely eject
the USB stick from your PC/Laptop. Ensure that the Greenbox is NOT powered up, insert the USB stick in the USB slot and apply
power to the Greenbox. Wait for 2-3 minutes and then open a Browser on your PC/Laptop and enter the URL with the new IP
Address you entered in the Dialog above. Remember to also enter the port 8092 in the URL. You should now see the web interface
which will be the setup wizard (see below).
Direct Connection to GreenBox
Connect to the GreenBox from your PC/Laptop using a Cross-wired Ethernet cable and change your PC/Laptop’s static IP address
to say 192.168.1.10. Apply power to Greenbox and wait for a couple of minutes. You may now enter the URL
and access the Web-interface which will be the setup wizard. (see below)
Using the default IP Settings
Connect the GreenBox to your LAN and change the IP Address of your PC/Laptop to a static one of say 192.168.1.10. Apply power
to GreenBox and wait for a couple of minutes. You may now enter the URL
interface which will be the setup wizard. (See below)


