TOUCH NAVIGATION
... touch the
ESC Button
to start at Main Menu
touch a
Menu Icon
... to open a
Function Screen
... to check or change a
Function
TOUCH NAVIGATION
... touch the
ESC Button
to start at Main Menu
touch a
Menu Icon
... to open a
Function Screen
... to check or change a
Function
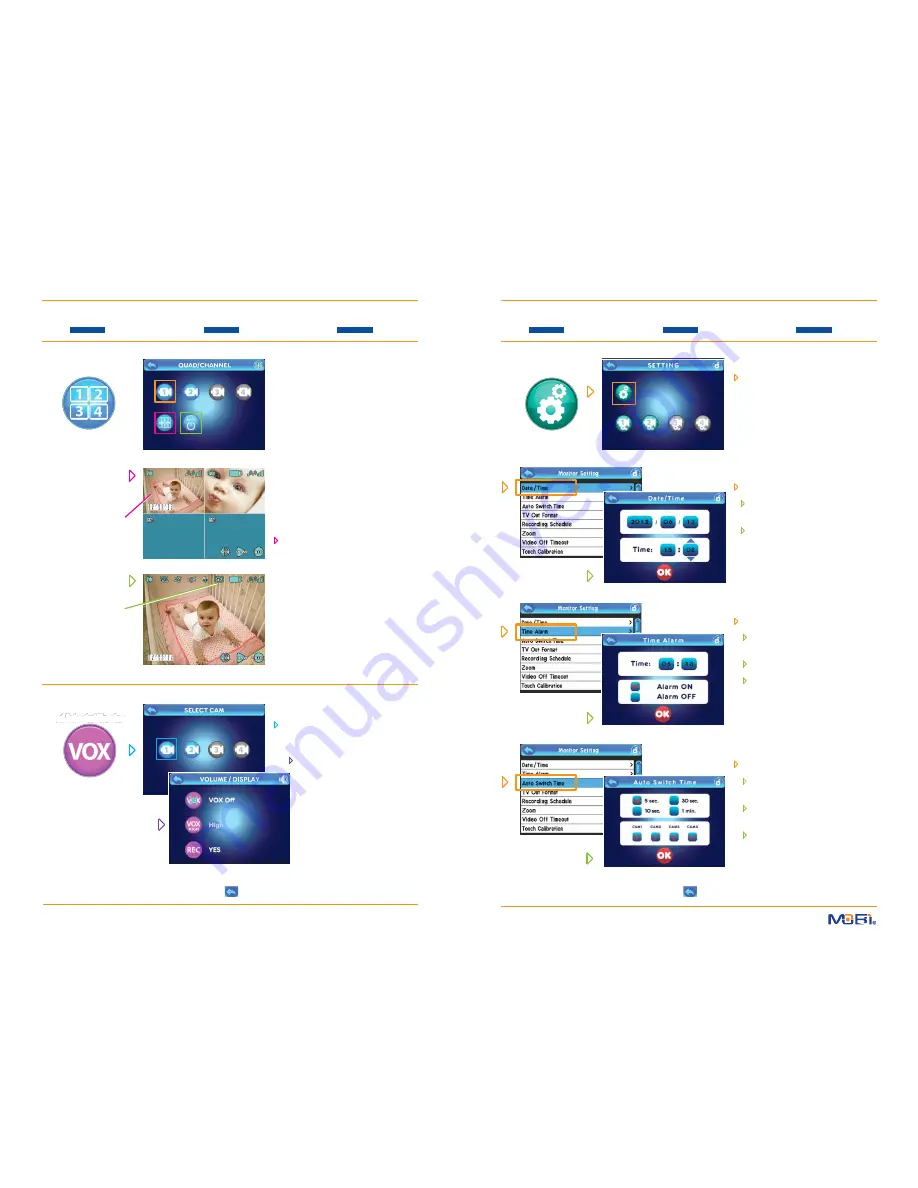
QUAD / CHANNEL
A
B
C
NOTE: All cameras
must be
Paired
to
the monitor for view-
ing access.
(Refer to
Pairing on page 5.)
NOTE: In
Quad
mode,
touching any active
camera image changes
to that full screen single
camera view. Also sound
only from the last came-
ra in full screen mode
can be monitored.
NOTE: In
Auto Scan
mode (indicated by
this symbol) you can
select which cameras
to include and the scan
time between each
camera.
(Refer to Auto
Switch Time on page 11.)
choose from these options...
Single Camera View
A
from Quad/Channel screen, select an
active
Camera
icon (shown in color if
actively paired) to be your only video
channel in this mode. The screen will
then show the view from that camera.
Quad View
B
from Quad/Channel screen, select the
Quad
icon which then shows you all
currently paired camera views (up to
4) on screen simutaniously.
Note: Only paired cameras will show
on the quad with any unused camera
views left blank.
Auto Scan View
C
from Quad/Channel screen, select the
Auto
icon to begin alternating full
screen views from each paired came-
ra (up to 4) automatically changing
from one camera view to the next
SETTINGS
Monitor Setting
on the Setting Screen, simply touch
the
System Setting
icon (two gears)
to access monitor functions...
F
rom
the
Monitor Setting
list...
select
Date/Time
touch
any value
, then touch the
arrows
to adjust
value up
or
down
press
OK
to
save changes
F
rom
the
Monitor Setting
list...
touch
Time Alarm
touch
any value
, then touch the
arrows
to adjust
value up
or
down
touch
Alarm On
or
Alarm Off
touch
OK to set
VOX
Sound Activated Monitoring
NOTE:
VOX
keeps monitor
(picture and sound) off
until the camera detects a
sound, which automatic-
ally turns the monitor back
on. This helps prevent false
alarms and allows parents
more rest.
Sound Activated Mode
(
VOX)
select a paired
Camera
icon
(the ones in color)
then select from 3 options...
VOX
(set to On or Off )
VOX Sound Sensitivity
(set to High, Med or Low)
Sound-Activated Recording
(set to Yes or No - must have an
SD card in the Monitor to record)
F
rom
the
Monitor Setting
list...
touch
Auto Switch Time
select a
camera switching
interval
(5 sec to 60 sec)
check the
cameras
to be included in
auto switching
mode
touch
OK to set
HINT: To move back one screen touch
Return
icon
or go to camera view by pressing the
ESC Button
.
10
HINT: To move back one screen touch
Return
icon
or go to camera view by pressing the
ESC Button
.
11


