FX-TRN-BEG-E
Operation 3
C-16
3.2
Editing the Program
3.2.1
Insert and Delete
•
Insert line and delete line
Insert a line as follows.
1) Place the cursor where a line is to be inserted.
2) Press the [Shift] + [Insert] keys.
One line is inserted in the cursor position.
Delete a line as follows.
1) Place the cursor where a line is to be deleted.
2) Press the [Shift] + [Delete] keys.
One line is deleted in the cursor position.
•
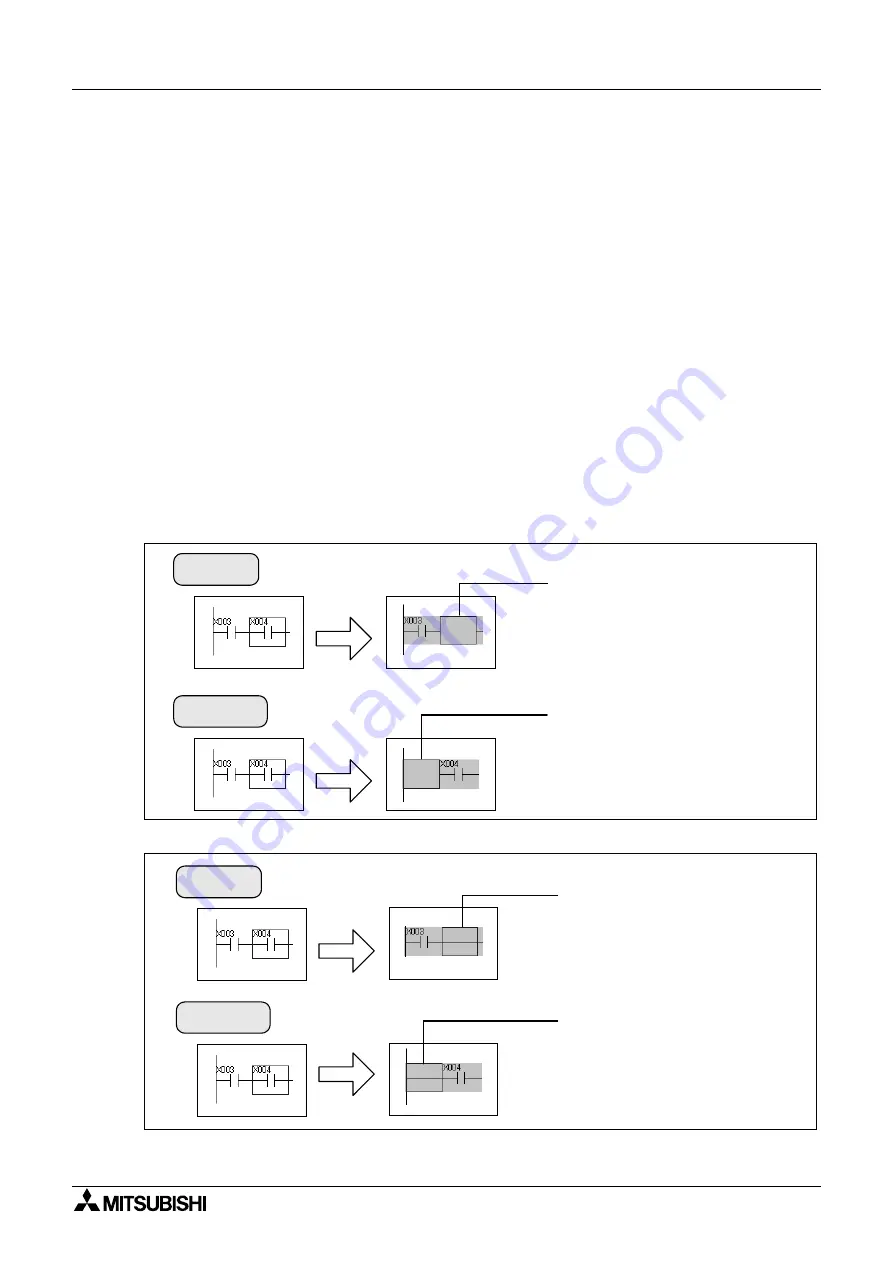
Deleting contacts
Delete a contact pressing the [Delete] or [Back space] key.
The result displayed on the screen differs depending on the mode as shown below.
The contact in the cursor position
is deleted and the position
becomes blank.
The contact on the left side of the
cursor position is deleted and the
position becomes blank.
Delete
Back space
Overwrite mode
Insert mode
The contact in the cursor position
is deleted and a horizontal line is
displayed.
The contact on the left side of the
cursor position is deleted and a
horizontal line is displayed.
Delete
Back space
Содержание MELSEC-F FX-TRN-BEG-E
Страница 1: ...USER S MANUAL FX TRN BEG E Sections INTRODUCTION A EXERCISES B LADDER PROGRAMS C APPENDIX D ...
Страница 2: ...FX TRN BEG E ...
Страница 3: ...i FX TRN BEG E USER S MANUAL Manual number JY997D02901 Manual revision C Date April 2003 FX TRN BEG E ...
Страница 4: ...FX TRN BEG E ii ...
Страница 6: ...FX TRN BEG E iv ...
Страница 8: ...FX TRN BEG E INTRODUCTION A 2 MEMO ...
Страница 10: ...FX TRN BEG E Introduction 1 A 4 MEMO ...
Страница 28: ...FX TRN BEG E Outline of the Lesson Plan 2 A 22 MEMO ...
Страница 40: ...FX TRN BEG E A Let s Learn the FX Series PLC 1 B 12 MEMO ...
Страница 52: ...FX TRN BEG E B Let s Study the Basics 2 B 24 MEMO ...
Страница 76: ...FX TRN BEG E D Beginner Challenge 4 B 48 MEMO ...
Страница 90: ...FX TRN BEG E E Intermediate Challenge 5 B 62 MEMO ...
Страница 106: ...FX TRN BEG E F Advanced Challenge 6 B 78 MEMO ...
Страница 110: ...FX TRN BEG E Outline 1 C 4 MEMO ...
Страница 162: ...FX TRN BEG E D 32 MEMO ...
Страница 163: ......


