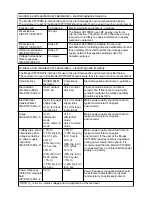


12
BEFORE OPERATION
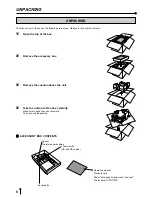
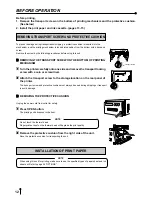
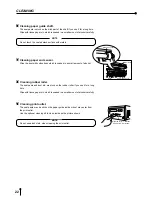
REMOVING TRANSPORT SCREW AND PROTECTIVE CUSHION
To prevent damage during transportation/shipping, a protective cushion is inserted into the
mechanism, and the printing mechanism is locked into position from the bottom with a transport
screw.
Remove the screw by the following procedures before using this unit.
2
2
2
2
2
REMOVING THE TRANSPORT SCREW ON THE BOTTOM OF PRINTING
MECHANISM
1
1
1
1
1
Turn the printer carefully onto one side and remove the transport locking
screw with a coin or screwdriver.
2
2
2
2
2
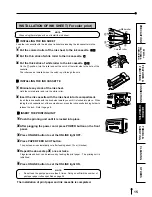
Attach the transport screw to the storage location on the rear panel of
the printer.
The transport screw and protective cushion must always be used during shipping or transport
to avoid damage.
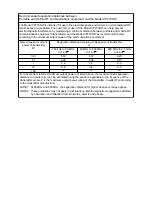
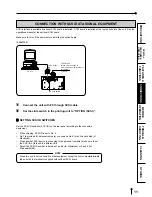
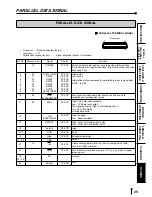
SCREW
AC LINE
PARALLEL DATA IN
1 2 3 4 5 6 7 8
OFF
ON
OFF
1 2 3 4 5 6 7 8
REMOTE
Before printing,
1. Remove the transport screw on the bottom of printing mechanism and the protective cushion.
(See below)
2. Install the print paper and ink cassette. (pages 13-15)
Transport screw
2
2
2
2
2
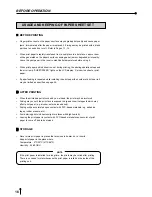
REMOVING THE PROTECTIVE CUSHION
Unplug the power cord from outlet for safety.
1
1
1
1
1
Press OPEN button.
The printing unit advances to the front.
NOTE
Do not touch the thermal head.
Fingerprints or dust on the thermal head will degrade the print quality.
2
2
2
2
2
Remove the protective cushion from the right side of the unit.
Save the protective cushion for transporting the unit.
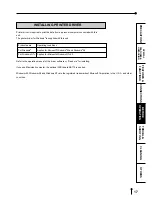
INSTALLATION OF PRINT PAPER
NOTE
When using this unit for printing, make sure to use the specified types of paper sheet and ink
sheet set. Refer to page 24 “OPTIONS”.