REV 1.0
31
Color
b
ala
nc
e a
dju
stm
en
t
•
Adjust the values so that the sums of the following
items don’t exceed 1023 respectively.
R
G
B
Sums
R-R (1023) G-R (0)
B-R (0)
< 1023
R-G (0)
G-G (1023)
B-G (0)
< 1023
R-B (0)
G-B (0)
B-B (1023) < 1023
•
However, in case of over the range, the sensor
function, described later (page 33), controls the
luminance automatically to fit into the range while
still ensuring that the tint (the R G B mixture ratio) is
maintained.
•
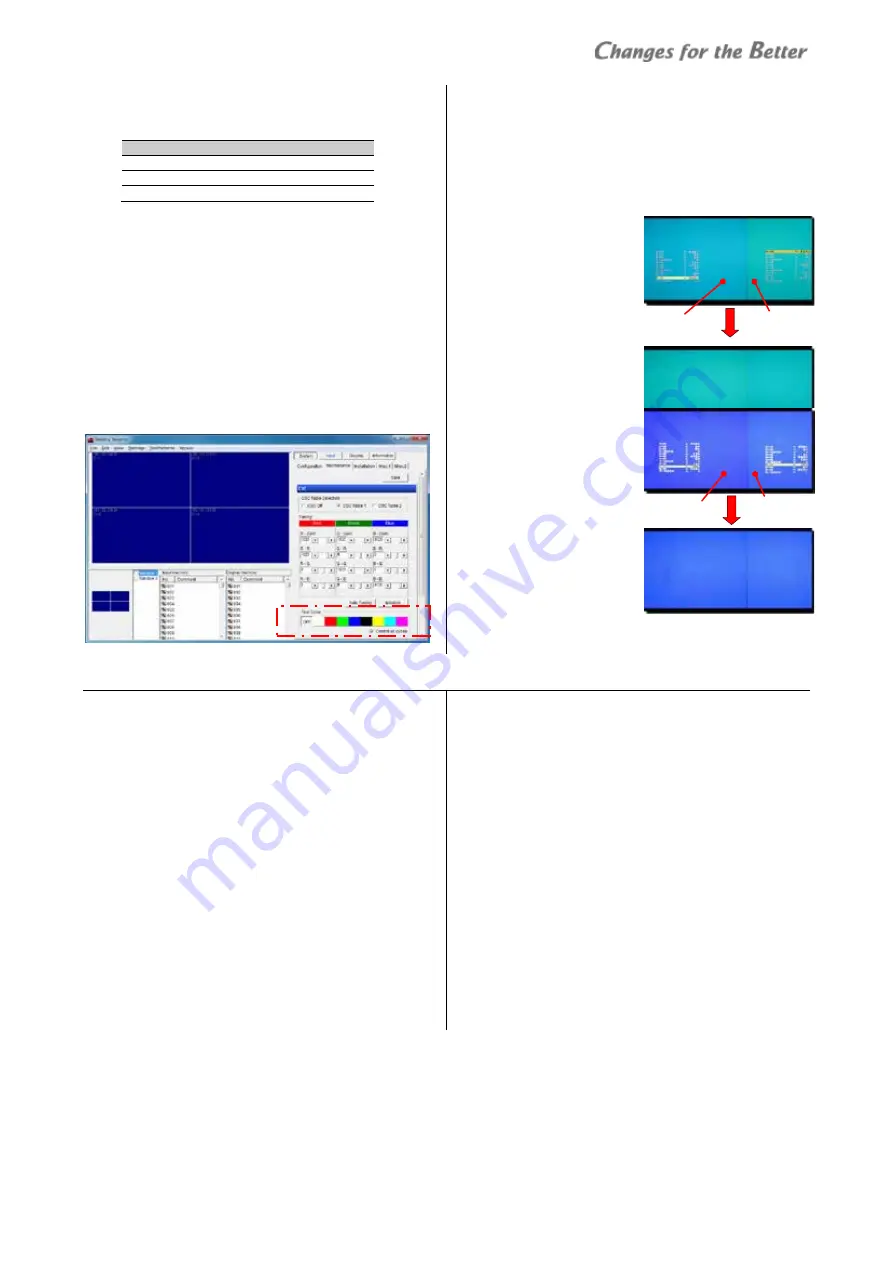
Wallaby also can adjust the colors as well as on
screen menus. Select a target panel and adjust the
color values. “Test color” changes the color to be
displayed on monitors. When “Control all cubes” is
checked on, the colors change all together on all
monitors regardless of panel selection.
[Adjustment tips]
In the manual color adjustment, blue is always the
most difficult to get uniformed. If you have difficulties
to get a good result with the procedure above, the
following way may help you to have good color
balance in blue.
1
In CSC adjustment, adjust the single red and the
single green between
the screens. The blue
color will be adjusted
later.
2
Switch to the cyan color
(green + blue)
to align
by reducing B-B on the
monitors which show
bluish cyan, leaving
green
ingredient
(G-GAIN, etc.) as is.
3
Switch to the single blue
to align. (The blue color
has not been matched
at this moment yet
because of the
adjustment step 2.)
Balance it by increasing
B-G on dark blue
monitors, and increasing
B-R on light blue
monitors.
3.4.4
Light source output adjustment
This adjustment is needed when ECO or BRIGHT mode
is used in LED POWER (page 34).
It compensates the light source output level on each
monitor, which uniforms the luminance and tint in the
display wall even when the mode is switched to ECO or
BRIGHT.
•
This should be compensated after CSC adjustment in
NORMAL mode.
•
The compensated values are stored in each mode.
When you switch the mode, adjust the gain values in
each mode.
LED POWER gain adjustment
SYSTEM SETTING > MISC.1 > LED POWER
1
Select ECO or BRIGHT mode. Set the same mode in all
monitors in the display wall.
2
Display the adjustment white in the internal test
patterns (page 8, 55).
3
Display a single color with [R], [G] and [B] buttons.
•
[MENU1] button switches the adjustment menu to
the simple one (page 9).
•
Regardless of remote ID setting (page 8), one of
those buttons mutes (switches off) a color on all
monitors. When muted / un-muted monitors are
mixed in a display wall, these buttons may just
alternate the effect. To un-mute a color on all the
monitors in the same time, press and hold the
button of the color.
4
Press [NORMAL] button on each R-, G- and B-GAIN in
LED POWER menu to reset each GAIN value to 100 on
all monitors in the display wall.
5
Align the gain level on all screens with the darkest
one in each single color.
6
At last, display the adjustment white and balance the
entire color level on it.
Bluish (greenish)
Reduce B-B
Dark blue Light blue
Increase B-G. Increase B-R.
Содержание VS-60HS12U
Страница 1: ...DLPTM Display Wall Cube VS 60HS12U Set up Manual REV 1 0 Dec 22 2014 ...
Страница 57: ...REV 1 0 57 Menu trees Installation Installation White Balance Detail Misc 1 ...
Страница 63: ...REV 1 0 63 Revision history M E M O ...
Страница 64: ......


