


3-73
Parallel I/O unit
3 Controller
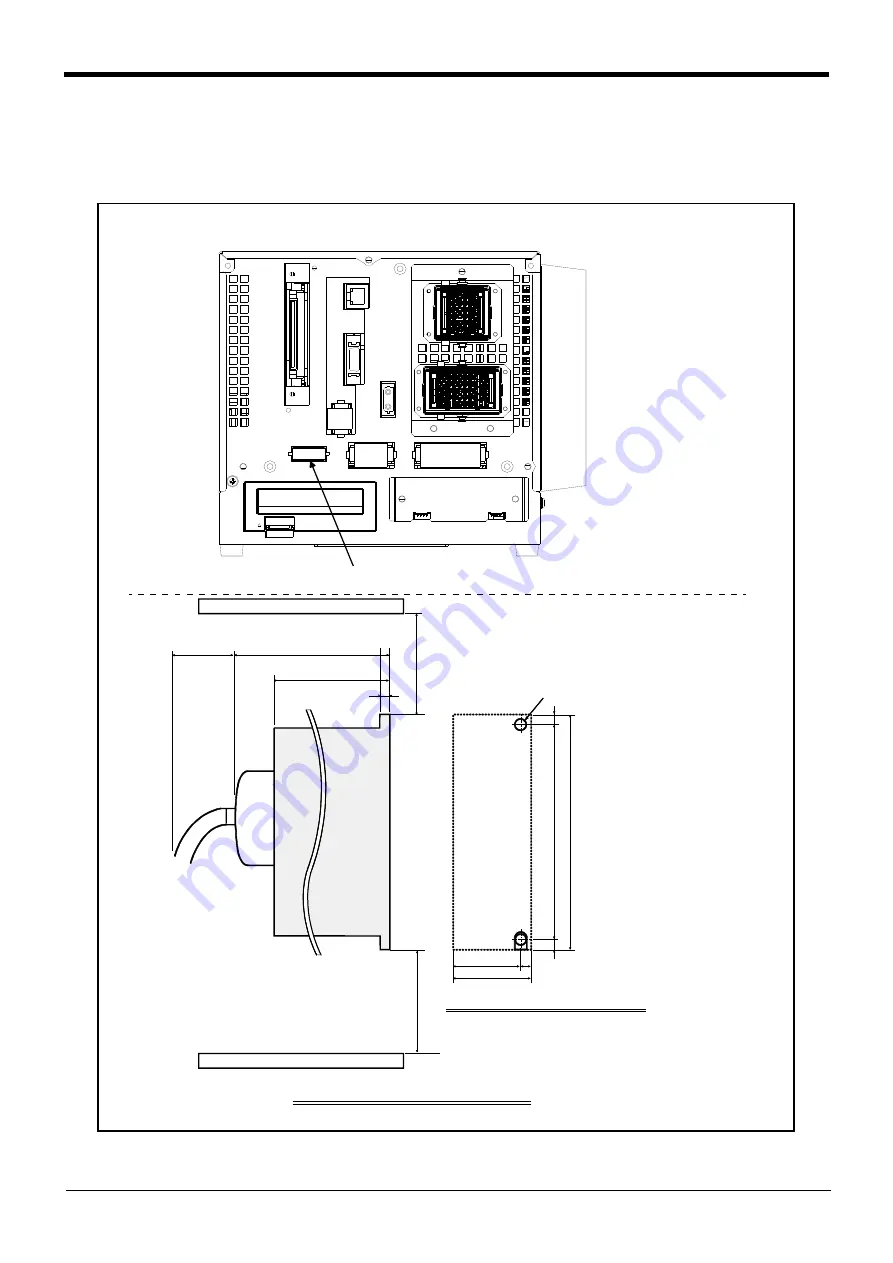
■ Installation method
The expansion parallel input/output unit is installed outside of the controller. Connect with the network
connection cable (NETcable-1) from the RIO connector in the rear/into of the controller.(Terminator is connected
at the time of shipment)
Fig.3-25 : Installing the parallel I/O unit
60
54
6
R
adi
at
io
n/
w
ir
in
g
sp
ace
15
0
6
15
6
2-M5 screw
6
16
8
Heat
r
adia
ti
on
s
pace
128
(175)
10
0
Wiring
space
(40)
<2A-RZ361>
Installation dimensions of 2A-RZ361
6
downside
upside
Control panel installation dimensions
RIOコネクタ
コントローラ背面
(The controller outside installation.)
Controller rear
RIO
*The connector of machine cable connection
has some from which form differs.
Содержание CR1DA-7A1-S15
Страница 2: ......
Страница 118: ......
Страница 119: ......
Страница 120: ......
Страница 121: ......
Страница 122: ......
Страница 123: ......
Страница 124: ......
Страница 125: ......
Страница 126: ......
Страница 127: ......
Страница 128: ......
Страница 129: ......
Страница 130: ......
Страница 131: ......
Страница 132: ......
Страница 133: ......
Страница 134: ......
Страница 135: ......
Страница 136: ......
Страница 137: ......
Страница 138: ......
Страница 139: ......
Страница 140: ......
Страница 141: ......
Страница 142: ......
Страница 143: ......


