Kaleido-X16
Hardware Description & Installation Manual
35
When you change the DHCP mode, the device must be restarted for the new option to take effect. This is
done automatically but only after you exit the
Configuration
menu. You can make other changes using
the
Configuration
menu, and only exit, once you are done with the changes.
Setting an IP Address, Subnet Mask and Gateway
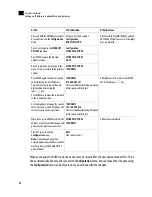
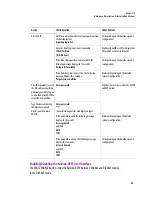
The table below shows how to set a fixed IP address for a Kaleido-RCP2 unit. As an example, the IP address
will be changed from 10.0.3.191 to 192.168.0.10. This task is performed by using the
Configuration
menu.
Action
LCD indication
Other Buttons
Press and hold the ENTER key for at least
8 seconds to access the
Configuration
menu.
At the end of the 8 seconds:
Configuration
ROOM SELECTION
Digit keys
2
(UP) and
8
(DOWN), and the
ENTER and ESC buttons, are lit; other
digit keys are dimmed.
Press 8 once to go to the
ETHERNET
OPTIONS
submenu.
Configuration
ETHERNET OPTION
Press ENTER to open the Ethernet
parameter menu.
ETHERNET OPTIONS
DHCP
Press ENTER again to see the current
DHCP status.
DHCP
ENABLE
Press 8 to go to the DISABLE option.
(Press 2 to go back to the previous
selection.)
DHCP
DISABLE
Press ENTER to select this option, or press
ESC to cancel. In either case, you will
return to the previous menu level.
ETHERNET OPTIONS
DHCP
Press ESC twice to exit the
Configuration
menu.
Note:
If you changed the DHCP
parameter, the Kaleido-RCP2 unit will
reboot.
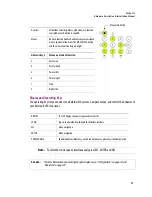
RMC
All buttons are dimmed.
Note:
The method is the same for the
Subnet Mask
and
Gateway
menus.
Содержание Kaleido-X16
Страница 4: ......
Страница 32: ...26 Kaleido X16 Installation Replacing a Defective Power Supply 1 ...
Страница 80: ...74 Specifications Physical Dimensions 3 ...
Страница 82: ......

