GUIDE TO INSTALLATION AND OPERATION
HMP-1801 |
31
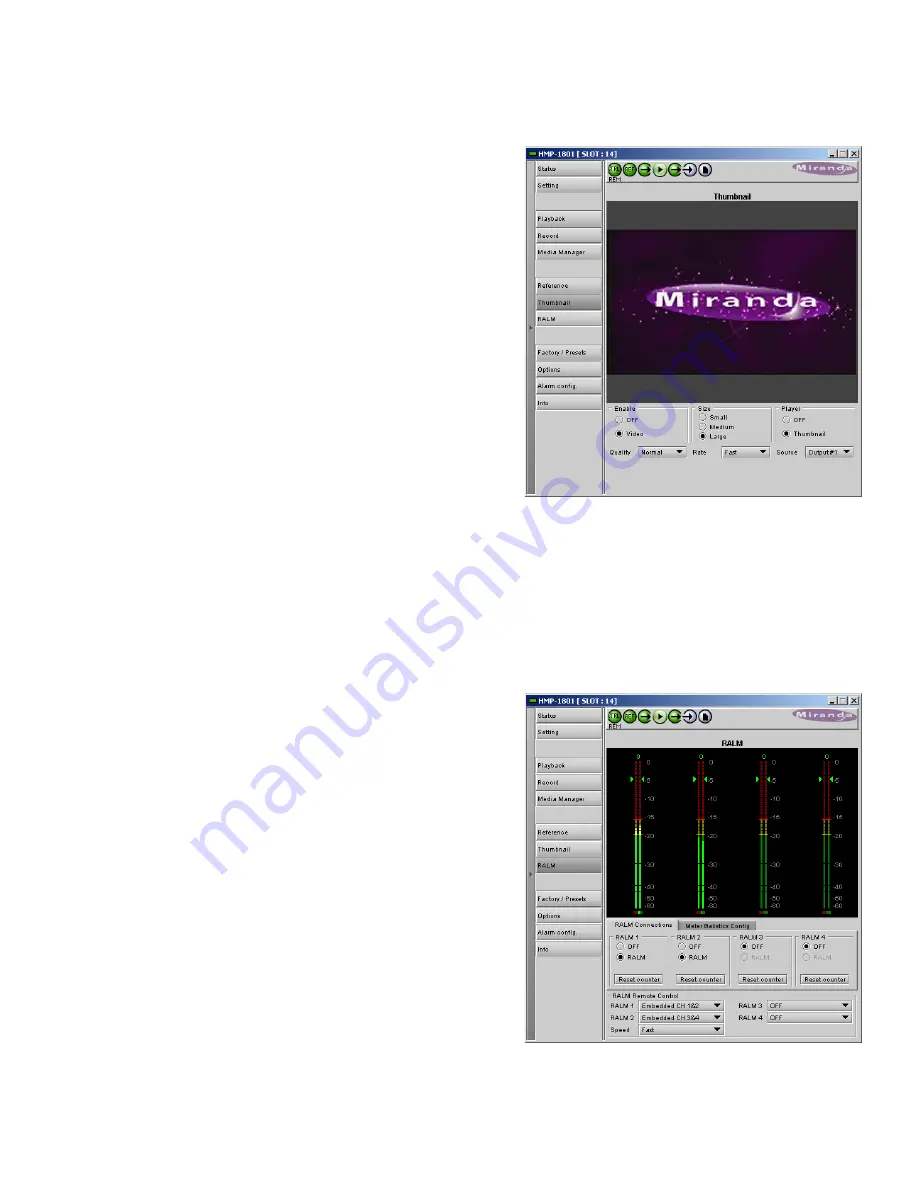
3.4.8 The Thumbnail panel
The thumbnail panel displays a thumbnail image of the HMP-
1801 output.
Enable
– Click the radio buttons to select whether the
thumbnails will be streamed from this HMP-1801
•
OFF – streaming is disabled
•
Video – streaming is enabled
Size
– choose the thumbnail size:
•
small, medium, large
Player
– Click the radio buttons to select whether the thumbnails
will be displayed in this HMP-1801 panel.
Quality
– choose the quality of the displayed image
•
Poor, Normal, HiQ
Rate
– select the desired refresh rate from the pull-down box.
The choices are:
[Fast, 1 sec, 2 sec, …, 9 sec, 10 sec.]
Source – Use the pulldown to select the source of the thumbnail, from among these choices:
[Output #1, Output #2]
3.4.9 The RALM panel
The Remote Audio Level Meter (RALM) panel displays audio level meters that can be assigned to the audio channels
of the HMP-1801.
•
Each of the four meters displays two audio channels
•
Use the pulldowns in the RALM Remote Control section at
the bottom of the panel to select the source for each meter
display Options are:
OFF
Embedded Ch 1&2
Embedded Ch 3&4
….
Embedded Ch 15&16
Once the meter display is enabled, use the controls in the RALM
Connections tab to turn individual meter-pairs on and off.
Speed –
select the meter response from the pull-down list,
options are [slow, medium, fast]
RALM Connections tab
Use the radio buttons to turn the meter display ON (RALM) or
OFF for the indicated channels. The meter appears directly
above the controls.
Reset Counter:
click this button to reset the overload counter on
Figure 3.23 Thumbnail panel
Figure 3.24 RALM panel


