18
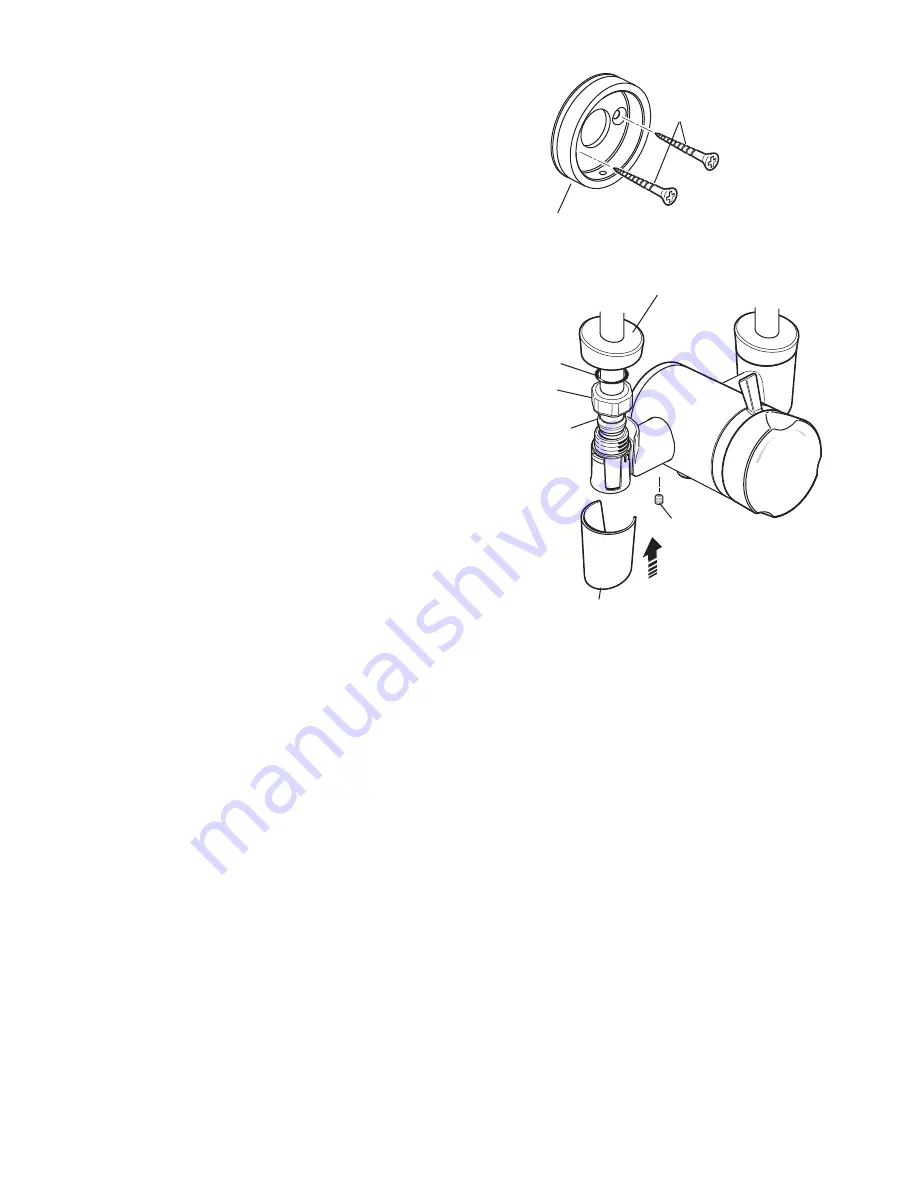
Securing Screws
Backplate
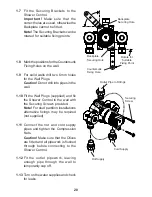
Connector cover
Compression
Nut
Olive
Elbow Shroud
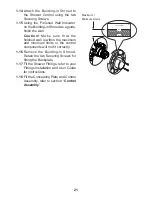
Secure the Control
to the Backplate
with the Grubscrew
‘O’ Seal
2.7
Attach the Backplate to the wall using
the Fixing Screws (supplied).
Note!
The Grubscrew should be at
the bottom.
Caution!
It is essential at this point
that the supply pipework is thoroughly
flushed through before connection to
the Shower Control. Failure to do so
may result in product malfunction.
2.8
Fit the Connector Covers and ‘O’
Seals onto the pipework.
2.9
Fit the Compression Nuts and Olives
onto the pipework.
2.10
Align the Shower Control with the
pipework and fit onto the Backplate.
2.11
Tighten the Compression Nuts onto
the Shower Control with the Spanner
(supplied).
Caution!
Take care not to damage
the chrome surfaces.
2.12
Tighten the Grubscrew to secure the
Shower Control to the Backplate.
2.13
Fit the Shower Fittings, refer to your
Fittings Installation and User Guide
for Instructions.
2.14
Turn on the hot and cold water
supplies and check for leaks.
2.15
Refit the Elbow Shrouds.
2.16
Position the Connector Covers so
that they slope away from the wall
and slide them down the pipework,
until they are flush with the Elbow
Shrouds.
2.17
The shower control is preset to
approximately 43 °C at the factory.
If adjustment is required, refer to the
section
‘Commissioning’
.
Содержание DISCOVERY
Страница 42: ...42 NOTES ...
Страница 43: ...43 NOTES ...


