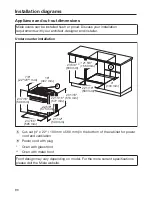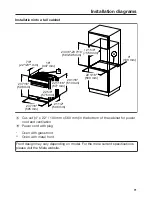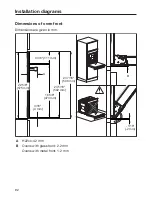
Cooker installation
93
The cooker must not be
operated until it has been correctly
installed.
The cooker requires a sufficient
supply of cool air for efficient
operation.
Make sure that the supply of cool air
is not hindered in any way (e.g. by
fitting heat insulation strips in the
cabinet carcase).
Furthermore the required supply of
cool air must not be excessively
heated by other heat sources (e.g.
solid fuel stoves).
Before installation
Ensure that there is no power to the
socket.
Please observe the wiring diagram on
the cooker.
Installing the cooker
Connect the cooker to the electrical
supply.
Place the cooker in front of the
cabinet carcase.
Insert the plug of the built-in cooktop
into the connection on the cooker.
Lifting the cooker by the door handle
could cause damage to the door.
Use the handle cut-outs on the side
of the housing to lift the appliance.
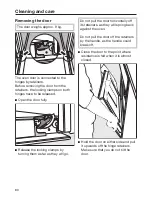
It is a good idea to remove the door
(see "Cleaning and care – Removing
the door") and to remove the
accessories before installing the
appliance. The cooker is then easier to
push into the cabinet carcase and you
do not run the risk of lifting it by the
door handle.
Push the cooker into the cabinet
carcase and align it.
Open the door, if you have not
removed it.
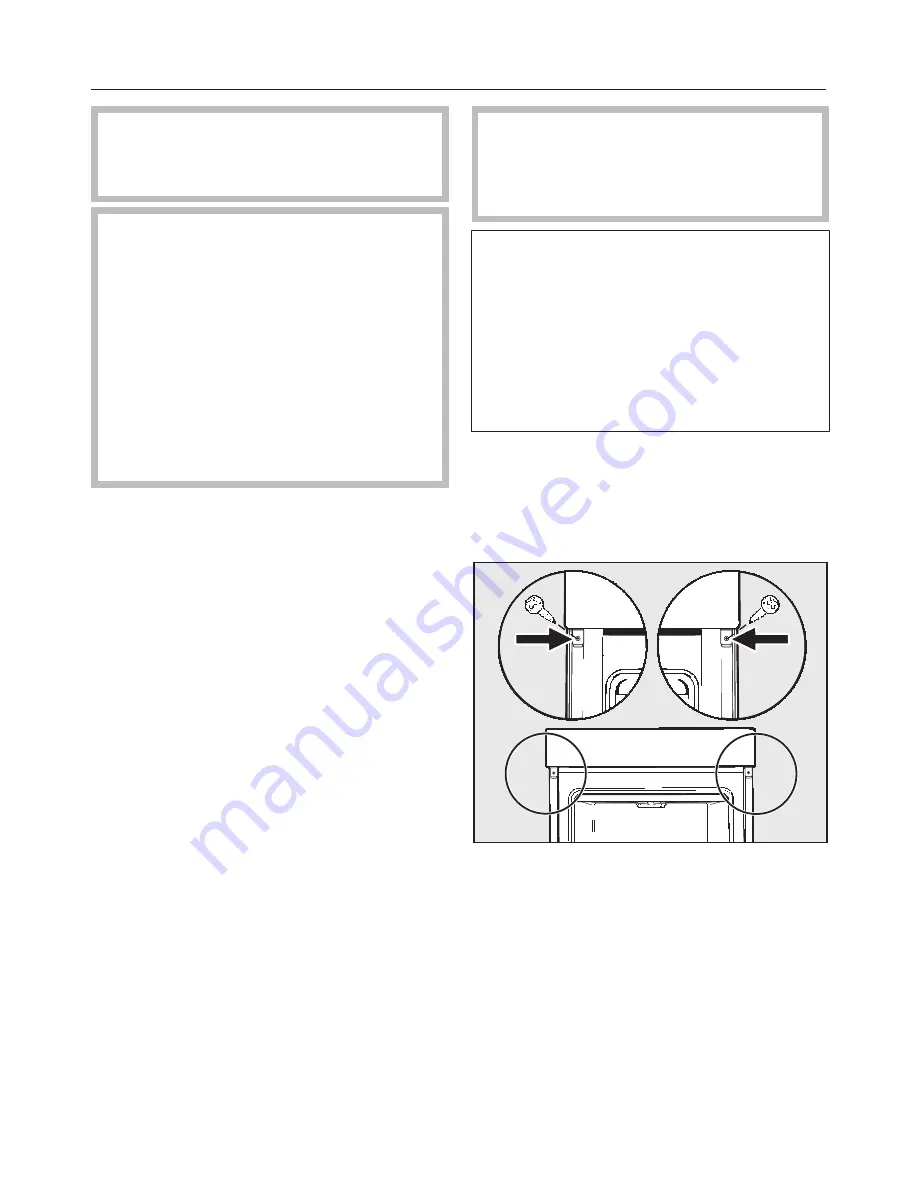
Secure the cooker to the side walls of
the cabinet carcase using the screws
supplied.
Refit the door if necessary (see
"Cleaning and care – Fitting the
door").
Содержание H2265B
Страница 96: ...M Nr 10 571 570 00 en CA H2265E H2265B ...


