


Chapter 12 Homepage Functions
159
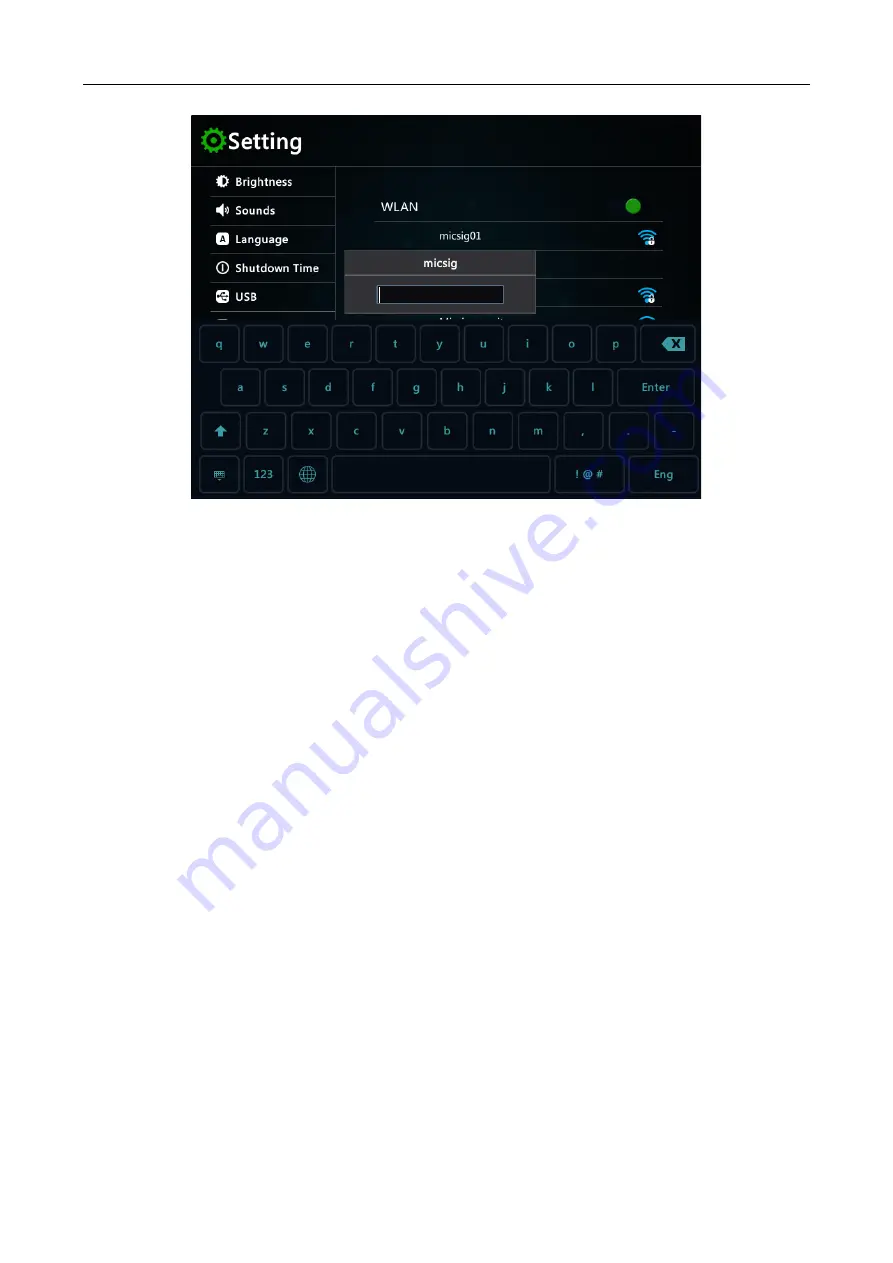
Figure 12-5 WLAN Connection Setting
Tap the upper right switch to turn on the WLAN function. The oscilloscope automatically scans the surrounding
wireless network and displays the name of the surrounding wireless network according to the list.
Tap the wireless network you need to connect, and the password input box will pop up. After entering the password
with the virtual keyboard, tap enter to connect, and the oscilloscope is connected to the wireless network.
Automatic configuration
Select "automatic" for IP acquisition mode. Oscilloscope automatically obtains IP address, subnet mask,
gateway IP and DNS IP.
Manual configuration
The steps of network setting are:
1) Set the IP address. The IP address should be set in the same network segment as the current network and
cannot be duplicate.
2) Set the subnet mask, which is generally the default and does not need to be set manually.
3) Set the gateway to be consistent with the routing gateway of the current network.
4) Set DNS to be consistent with the routing gateway of the current network.
WLAN AP
Tap the hotspot icon to enter the WLAN AP setting interface.
Tap the switch in the upper right corner to turn on the hotspot function.
Tap the hotspot name and password setting input box, use the virtual keyboard to enter the hotspot name and
password for setting, and other devices can share the oscilloscope file by connecting the oscilloscope hotspot.
Содержание ATO1000 Series
Страница 1: ......
Страница 2: ...Version Info Version Date Remarks V1 0 2020 06 ...
Страница 52: ...Chapter 3 Automotive Test 49 Figure 3 30 Electronic fuel pump test ...
Страница 67: ...64 Figure 3 45 CAN BUS Test The figure below is the actual measurement of the CAN bus of a certain model ...
Страница 71: ...68 Figure 3 49 K line test ...
Страница 79: ...76 Figure 3 57 Mazda 6 Cylinder internal pressure measurement ...
Страница 169: ...166 Figure 12 15 Locking Interface ...


