background image

6

SySTEM

3.  SySTEM

This section describes the specifications, components, and theory of the ROS 1.

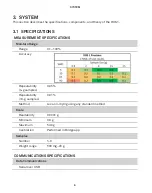
3.1  SPECIFICATIONS

MEASUREMENT SPECIFICATIONS

Moisture Range

Range

0.1−100%

Accuracy

Repeatability 
(4-g samples)

0.05%

Repeatability 
(10-g samples)

0.01%

Method

Loss-on-drying using any standard method

Scale

Readability

0.0001 g

Minimum

0.0 g

Maximum

50.0 g

Calibration

Performed in Bridge app

Samples

Number

1–9

Weight range

500 mg–20 g

COMMUNICATIONS SPECIFICATIONS

Data Communications

Serial over USB

Содержание ROS 1

Страница 1: ...ROS 1 ...

Страница 2: ...ns 6 3 2 Components 8 3 3 Theory 11 3 3 1 Introduction to Moisture Content 11 3 3 2 Analysis of the Drying Process 12 3 3 3 Temperature Dependence of Water Activity 13 4 Service 14 4 1 Calibration 14 4 2 Maintenance and Cleaning 14 4 3 Repair 18 4 4 Troubleshooting 19 4 5 Customer Support 20 4 6 Terms and Conditions 20 Index 21 18459 00 11 2021 ...

Страница 3: ......

Страница 4: ...lyzer This manual includes instructions for setting up verifying the scale calibration preparing samples taking readings and maintaining the ROS 1 Verify all ROS 1 components are included and appear in good condition ROS 1 Moisture Analyzer Certificate of calibration factory temperature Power cord METER USB A to USB A cable 1 28 m 6 ft 100 sample cups Filter papers 2 0000 g NIST traceable standard...

Страница 5: ...tion NOTE Always ensure the sample chamber is empty prior to moving the instrument Installation Plug In Instrument Plug the power cord into the back of the ROS 1 unit and into an outlet Only use the supplied power cord or one rated for ROS 1 and certified for the country of use The cord must be a minimum of 18 AWG and have a rating for 10 A or greater WARNING An incorrect main power voltage can da...

Страница 6: ...s possible to ensure good contact with the heating surface The nature of some samples results in longer reading times and may require additional preparation to ensure accurate readings Crush slice or blend coated or dried samples before testing to increase the surface area of the sample thus decreasing testing times Follow the steps listed below to prepare samples 1 Make sure the sample to be meas...

Страница 7: ... is plugged in and turned on 2 In the Bridge app select the METER USB COM port 3 Click Connect 4 Select sample test settings in the Bridge app 5 Open the ROS 1 sample chamber lid 6 Verify that the sample chamber is clean and free from debris If the sample chamber is dirty please follow the cleaning steps listed in Section 4 2 7 Place empty sample cups in the sample chamber in any of the positions ...

Страница 8: ... that is to be replaced shown in the Bridge app Follow the prompts in the Bridge app to tare a new sample cup and replace the sample 13 Once the last sample has been weighed all of the LEDs on the ROS 1 will pulse and the internal air flow and heating process will begin automatically During the test the ROS 1 Bridge app window will display the in process readings clicking the Graph button will sho...

Страница 9: ...ture Range Range 0 1 100 Accuracy Repeatability 4 g samples 0 05 Repeatability 10 g samples 0 01 Method Loss on drying using any standard method Scale Readability 0 0001 g Minimum 0 0 g Maximum 50 0 g Calibration Performed in Bridge app Samples Number 1 9 Weight range 500 mg 20 g COMMUNICATIONS SPECIFICATIONS Data Communications Serial over USB ...

Страница 10: ... 173 mL 1 124 fl oz ROS 1 Weight 12 5 kg 27 6 lb Operating Temperature Range Minimum 4 C Typical NA Maximum 50 C NOTE Sensors may be used at higher temperatures under certain conditions contact Customer Support for assistance Operating Environment 0 90 noncondensing Power 110 220 VAC 50 60 Hz COMPLIANCE Manufactured under ISO 9001 2015 EM ISO IEC 17050 2010 CE Mark ...

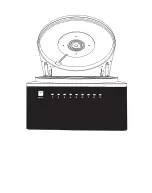
Страница 11: ...position individually using controlled contact drying and tracks the weight loss of each sample over time The instrument consists of an enclosure that houses the power supply air flow control the sample chamber and scale The power switch and communications ports are located on the rear of the ROS 1 There are LEDs on the front of the ROS 1 that correspond to each of the nine sample positions on the...

Страница 12: ...9 ROS 1 Carousel sample chamber Figure 3 Sample chamber Scale pan Figure 4 Scale and scale pan ...

Страница 13: ...10 System COM port USB ports Power switch cable plug Figure 5 Power Switch and COM ports Figure 6 Front panel ...

Страница 14: ...defined operationally since there is no way to actually determine the exact amount of water in a sample One way to determine moisture content is to measure the difference between the mass of a sample and its mass in a reference state The reference state is generally specified as the state of the sample after it is placed in an oven at a specified temperature for a specified time This state is ofte...

Страница 15: ...ls the vapor pressure of the air in the laboratory where the oven resides The vapor pressure of air is the product of the air humidity expressed as a fraction and the saturation vapor pressure at air temperature In a typical laboratory it is assumed that the relative humidity is 0 4 and the air temperature is 25 C the vapor pressure of the oven air would be 1 27 kPa 0 4 3 17 kPa 1 27 kPa where 3 1...

Страница 16: ...t 3 Moisture content measurements will be most accurate if there is a specified dry water activity and a requirement that drying methods bring samples to that water activity The challenge is to find a method that rapidly dries samples to a specified water activity while minimizing sample oxidation and volatile loss that occurs with heating in an oven 3 3 3 TEMPERATURE DEPENDENCE OF WATER ACTIVITY ...

Страница 17: ... the scale NOTE Do not touch the table or ROS 1 during calibration to prevent disturbing the calibration routine 6 When prompted in Bridge open the sample chamber lid 7 Add an empty sample cup to sample position 1 on the carousel 8 Shut the lid 9 Select Next from Bridge 10 When prompted open the sample chamber lid 11 Add the 2 0000 g standard to the empty sample cup 12 Shut the lid 13 Select Next ...

Страница 18: ... this area free of liquid and debris may result in degraded performance and or costly repairs Area below scale pan Sample reservoir Keep this area free of liquid and debris Figure 8 Sample reservoir Use a moist towel sponge or KIMWIPE tissue and a gentle liquid detergent or isopropyl alcohol to remove most nonburnt debris To remove burnt or dried substances try gently scrubbing using a very fine s...

Страница 19: ...ng use the following steps to wash rinse and dry each area 1 Turn the ROS 1 power off 2 Open the sample chamber lid to expose the sample chamber 3 Clean rinse and dry the sample chamber lid 4 Remove the carousel by removing the two thumb screws in the center of the carousel Figure 9 and Figure 10 Figure 9 Remove Thumb Screws ...

Страница 20: ...17 ROS 1 Remove carousel Figure 10 Remove Carousel 5 Clean rinse and dry the heating plate 6 To access the scale well remove the scale pan by removing the screw from the center Figure 11 ...

Страница 21: ... in the center 9 Clean rinse and dry the carousel 10 Replace the carousel 11 Screw in the two thumb screws to secure the carousel 4 3 REPAIR METER repairs manufacturer defects and instruments within the 1 year warranty at no charge Repairs outside of the warranty window are charged based on cost of parts labor and shipping An extra fee may be charged for rush work Contact Customer Support for an e...

Страница 22: ...be issued upon completion of all repair work 4 4 TROUBLESHOOTING Table 2 lists common problems and their solutions If the problem is not listed or these solutions do not solve the issue contact Customer Support Table 2 Troubleshooting the ROS 1 Problem Possible Solutions Unable to acquire weight reading from scale Make sure that the ROS 1 is on a steady platform and there is no vibration occurring...

Страница 23: ...tatives are available for questions problems or feedback Monday through Friday 8 00 to 17 00 Central European time Email support europe metergroup com sales europe metergroup com Phone 49 89 12 66 52 0 Fax 49 89 12 66 52 20 Website metergroup de If contacting METER by email please include the following information Name Address Phone Email address Instrument serial number Description of the problem...

Страница 24: ...USB cable 1 19 customer support 20 D drying process 12 F filter paper 1 I indicator light 4 5 installation 2 M moisture content 11 R reference moisture method 11 repair 18 RMA number 19 S sample cups 1 4 19 sample preparation 3 scale pan 9 specifications 6 accuracy 6 communications 6 compliance 7 measurements 6 physical 7 sample cups 20 standard weight 1 2 0000 g NIST traceable 1 T terms and condi...

Страница 25: ...F 1 509 332 5158 E info metergroup com W metergroup com METER Group AG Mettlacher Straße 8 81379 München T 49 89 1266520 F 49 89 12665220 E info europe metergroup com W metergroup de 2021 All Rights Reserved KIMWIPES is a registered trademark of Kimberly Clark Worldwide Inc Used with Permission ...

Страница 26: ......

Отзывы: