5
ROS 1
After an empty sample cup has been tared, the LED on the ROS 1 will turn green, and a
prompt in the Bridge app will appear instructing the user to add a sample.
10. Add a sample.
NOTE: For samples prone to spilling, remove the sample cup and add the sample to ensure the drying chamber
stays clean.
A rough weight will appear at the bottom of the Bridge app window.
11. Close the sample chamber lid.
12. Follow the onscreen prompts in the Bridge app.
The ROS 1 will move the sample cups into the weight position and take tare-weight readings.
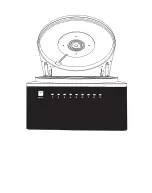
When the sample weight has been recorded, the LED for that sample position on the
ROS 1 will turn white and the image on the Bridge app window will show a blue circle around
that sample position.
The LED for any unused sample positions will not light up.
If a sample needs to be replaced, click on the blue sample cup image that is to be
replaced shown in the Bridge app. Follow the prompts in the Bridge app to tare a new
sample cup and replace the sample.
13. Once the last sample has been weighed, all of the LEDs on the ROS 1 will pulse and the
internal air flow and heating process will begin automatically.
During the test, the ROS 1 Bridge app window will display the in-process readings
(clicking the
Graph button will show the same data in graph format).
When a sample has dried, the corresponding LED on the front of the ROS 1 will turn blue.
The light turns blue on the Bridge app window. Sample Drying window, and the moisture
content result shown in the % Moisture column will stop changing.
14. Click the
OK button on the Test complete message that appears in the Bridge app when
the test is complete.
Export data or click on the
New test button.
The testing data can be exported at any time during or after a test by clicking the
Export
data button.
NOTE: If on the Bridge app Test Prep screen, click the Previous test results button to recall previous tests and export
previous test data.
Содержание ROS 1
Страница 1: ...ROS 1 ...
Страница 3: ......
Страница 12: ...9 ROS 1 Carousel sample chamber Figure 3 Sample chamber Scale pan Figure 4 Scale and scale pan ...
Страница 13: ...10 System COM port USB ports Power switch cable plug Figure 5 Power Switch and COM ports Figure 6 Front panel ...
Страница 26: ......


