26
OPERATION MANUAL
6.4 REMOVING THE BLADES
It may be necessary at some time during the life of the machine, to remove the blades for
sharpening or replacement. Below is the procedure.
1..
Inch the machine to its upper limit and position the manual back stop into its maximum
rear position, and remove the clamp beam.
2. DISCONNECT THE MACHINE FROM THE POWER SUPPLY
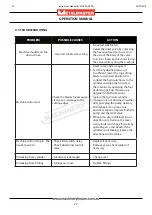
UNDER NO CIRCUMSTANCE PLACE HANDS, FINGERS OR
OTHER PARTS OF THE BODY BETWEEN THE SHEAR BLADES.
When handling the blades, gloves should be worn to protect the hands.
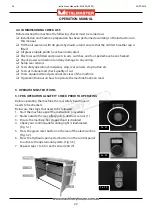
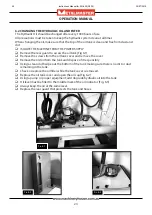
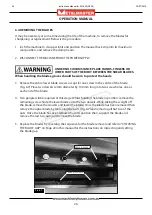
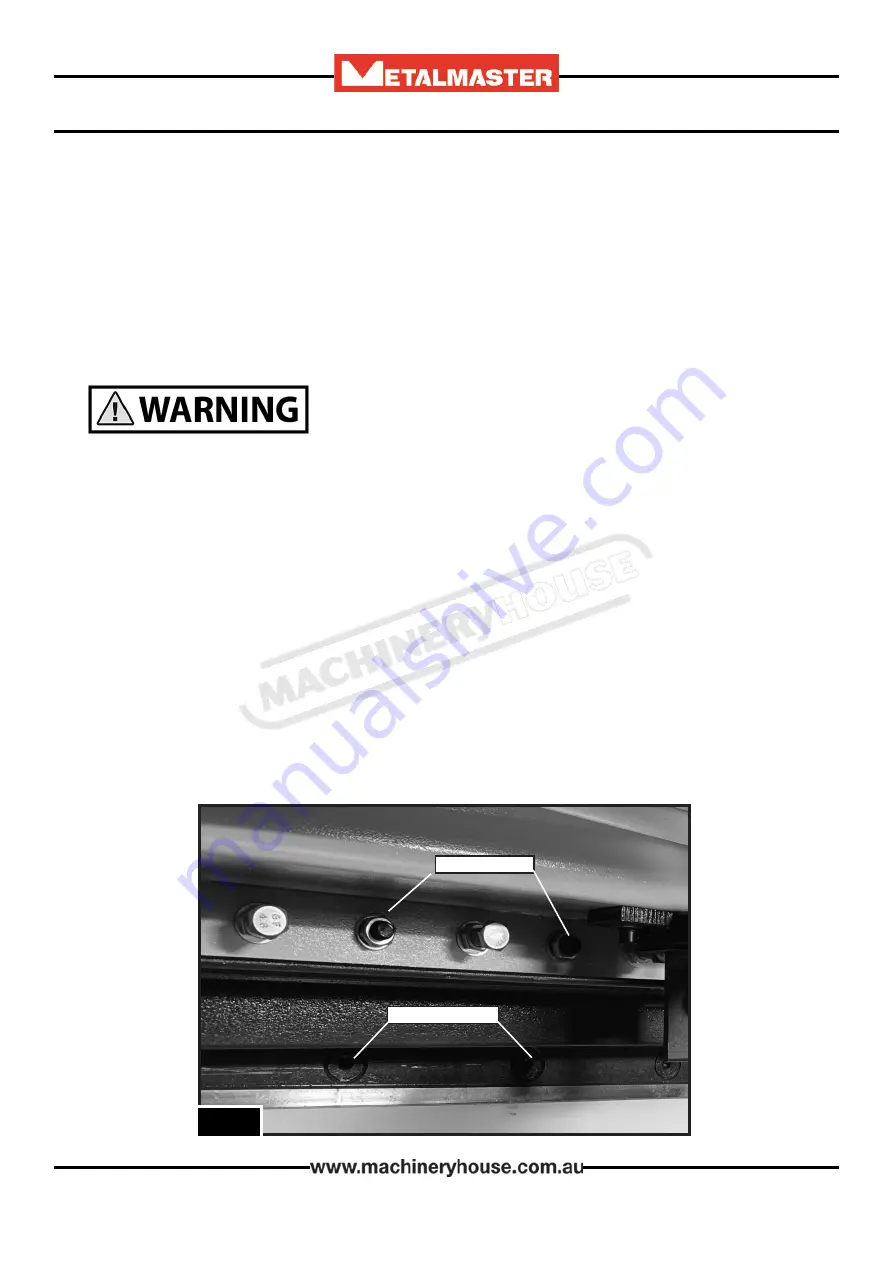
3. Release the entire lower blade screws, accept for one screw in the centre of the blade.
(Fig. 6.7) Place two dowels 12mm diameter by 100 mm long into two screw holes, one at
each end of the blade.
4. Two people will be required at this stage. Whilst holding the blade in position, remove the
remaining screw. Slide the lower blade onto the two dowels. While taking the weight off
the blade, remove the dowels and lower the blade. Once the blade has been removed then
remove the upper blade by loosening the nuts, (Fig. 6.7)and removing all but two of the
nuts. Once the blade has been released from its position then, support the blade and
remove the last two nuts, and remove the blade.
5. Replace the blades by reversing the sequence for the blade removal and refer to “CHECKING
THE BLADE GAP” on Page 22 in this manual for the instructions on inspecting and setting
the blade gap.
L
ower
bLAde
screws
u
pper
bLAde
nuts
F
ig
. 6.7
22/07/2019
Instructions Manual for SG-420 (S535)
26


