


CDS G3 INTERFACE KIT
Page 6 / 8
90-8M0101386 DECEMBER 2014
IMPORTANT: Ensure that the correct termination resistor is installed on the CAN P bus. The CAN P bus must be
properly terminated for the tool to communicate. Improper termination will result in communication errors or a complete
loss of communication.
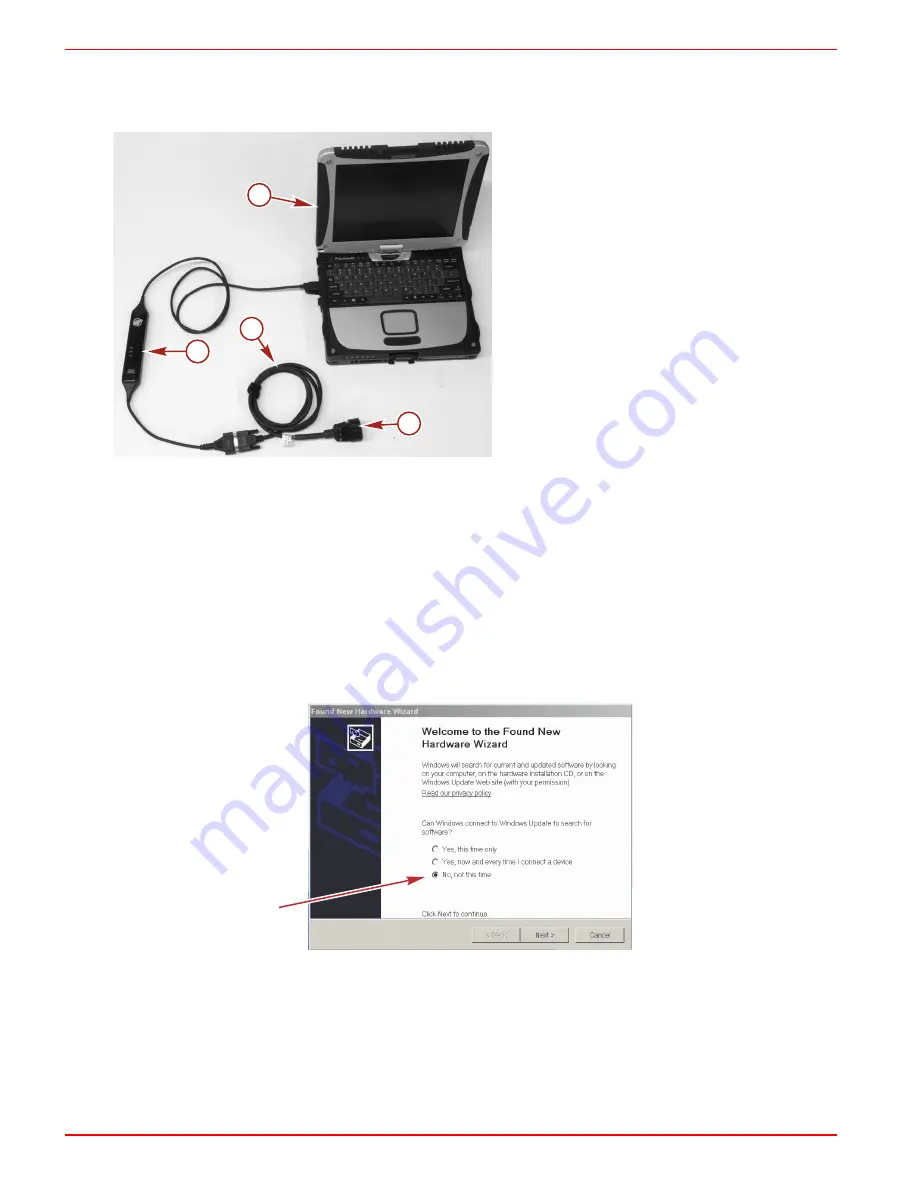
a -
Computer
b -
CDS G3 SmartCraft diagnostic interface
c -
CAN P/CAN H adapter harness
d -
Connector—to junction box
Driver Troubleshooting
When installing CDS G3, the software will check for a previous installation of the SmartCraft diagnostic interface cable, also
known as a Kvaser cable. If CDS G3 does not recognize the SmartCraft diagnostic interface cable, the CAN P and CAN H
status indicators will be shown in red on the CDS G3 screen, and the green power (PWR) light on the CDS G3 SmartCraft
diagnostic interface will flash. Follow these instructions to install the driver.
1. Close all running computer programs, including CDS G3.
2. Unplug the SmartCraft diagnostic interface cable from the computer if it is plugged in.
3. Wait a few moments, then plug the SmartCraft diagnostic interface cable into the computer.
4. When the
Found New Hardware
indicator opens in the lower right‑hand corner of the screen, click on the indicator.
5. The
Found New Hardware Wizard
window will open, and it will ask if Windows can connect to Windows Update to
search for software. Select
No, not this time
. Click
Next
to continue.
52810
a
b
c
d
47946


