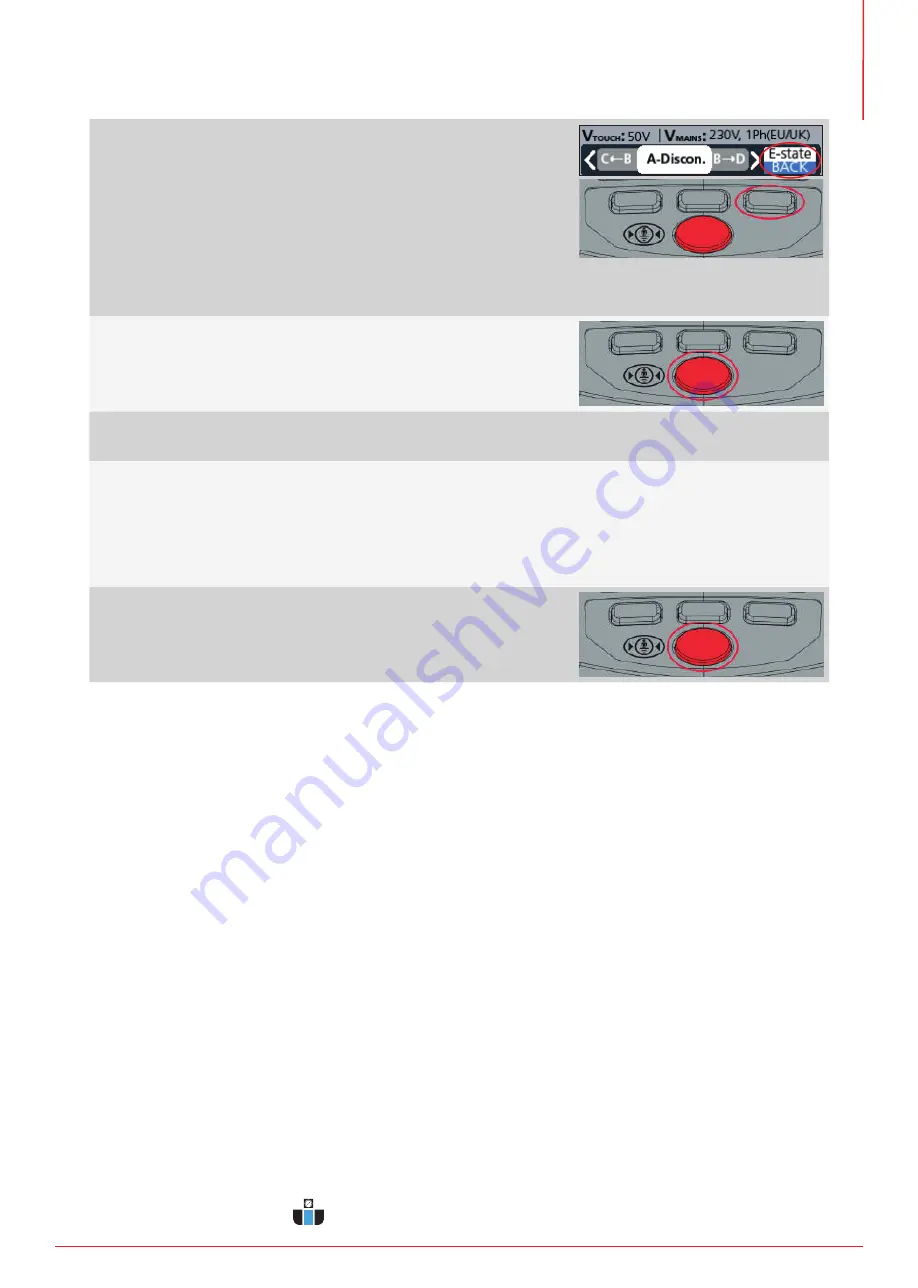
8. Press softkey 3 to set a CP short to E to test the chargers
response.
At this point no measurements are taken, only the CP code
applied to the charger.
9. Press and hold softkey 3 to use the BACK function that will
exit the EVSE interface screen
10. Long press the TEST button to start the test and take
measurements.
11. The test will take a few seconds to perform and measure all of the required parameters.
12. When complete the EVCC300 will also indicate the CP state measured back from the charger along the
bottom of the white part of the display.
Note
: each press of the TEST button will take one set of measurements. The test results are not a continuous
measurement.
13. Re-pressing the TEST key will repeat the test measurements
Repeating the measurements will assist in looking for stability in
voltages etc.
5.7.3 Interpreting test results
Generally the user should check that all of the measured parameters are as expected. The EVCC300 performs a single
measurement of each parameter every time the test button is pressed.
1. The output charging voltages and frequency should be as expected for the type of supply the charger is
connected to.
2. The polarity of the charger should read OK. If the polarity is incorrect the result will be INV.
3. The IMAX read by the EVCC300 should match what the rating of the charger is or the rating of the connecting
cable used.
NOTE:
when EVCC300 is plugged directly into a charger the PP resistance applied sets the lead rating to 32A.
4. The control pilot voltage, duty cycle and frequency measurements should be repeatable when the test
is repeated.
5. The CP state read from the charger by the EVCC300 should match the code set for the test. Should the code
measured be different from that set the charger indicates it is faulty.
6. Should the read back control pilot indicate a code “F – Fault” it means that there is a fault or error with the
charger itself.
33
Tests
www.calcert.com
1.800.544.2843
0
5
10
15
20
25
30


