background image


AP-1301 i/t


Operator’s Guide 

Document Revision: 100102 


Page 18


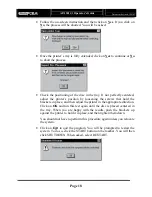
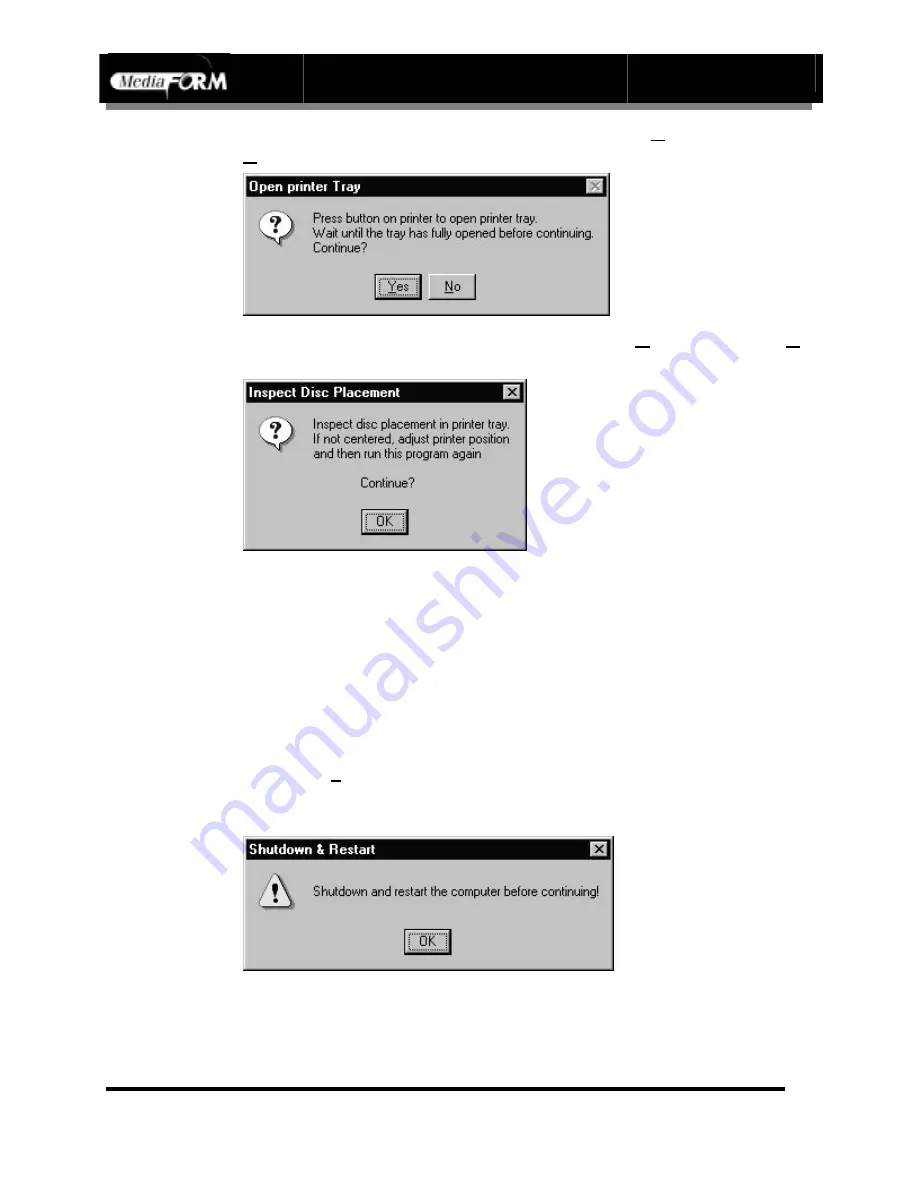
Follow the on-screen instruction and then click on 

Yes

. If you click on 

No

, the process will be aborted. You will be asked: 


Once the printer’s tray is fully extended, click on 

Yes

 to continue or 

No


to abort the process. 


Check the positioning of the disc in the tray. If not perfectly centered, 
adjust the printer’s position by loosening the screws that hold the 
brackets in place, and then adjust the printer in the appropriate direction. 
Click on 

OK

 and run this test again until the disc is placed centered in 

the tray. When you are happy with the results, push the brackets up 
against the printer to hold it in place, and then tighten them down. 

You should not have to perform this procedure again unless you relocate 
the system. 


Click on 

Exit

 to quit the program. You will be prompted to restart the 

system. To do so, click the START button on the taskbar. You will then 
click SHUTDOWN. When asked, select RESTART.  


Содержание AP 1301

Страница 1: ...AP 1301 Operator s Guide...

Страница 2: ...time following the purchase and the warranty is NOT transferable This warranty does not apply to malfunctions caused by misuse negligence accident or alteration nor is MediaFORM Inc USA responsible f...

Страница 3: ...ng the Printer Cable 9 THE BEST PLACE TO PUT YOUR SYSTEM 10 SAFETY PRECAUTIONS 10 ORIENTATION TO THE DIFFERENT PARTS AP 1301I 11 Front View 11 Rear View 11 ORIENTATION TO THE DIFFERENT PARTS AP 1301T...

Страница 4: ...AP 1301 i t Operator s Guide Document Revision 100102 Page 3 COMMENTS 28 OPEN SAVE AND SUBMIT JOB 28 STATUS SCREEN 30 JOB QUEUE 30 JOB QUEUE SCREEN 31 RUNNING JOBS 32 COMPLETED JOBS 32...

Страница 5: ...dicated duplication appliance The removal or addition of any software components may compromise this unit s operation Please make every attempt to leave this unit as is and dedicated to the task of pr...

Страница 6: ...while the AP 1301i includes the Primera Signature III and IV CD R Printer Ink jet AP 1301t PDS Printer docking station AP 1301t Only Options If the AP 1301i is purchased the AP 1301t PDS docking stat...

Страница 7: ...01t PDS docking station or Primera Signature III or IV printer AP 1301i Parallel printer cable included with printer Various included cables Quality blank CD R s Thermal white printable is recommended...

Страница 8: ...on the AP 1301 base unit Connect the monitor s power cable to the AC wall jack Reference the documentation that accompanied the monitor if you need help Attaching the Mouse Either a Microsoft compati...

Страница 9: ...e large DIN located on the back of the AP 1301 base unit Attaching the Network Cable If you wish to connect the AP 1301 to your network connect a suitable patch cord to the RJ 45 network port on the b...

Страница 10: ...printer cable included with your printer to the female DB 25 connector on the back of the AP 1301 base unit Connect the other end to the port on the back of the printer Use only IEEE 1284 compatible p...

Страница 11: ...he unit for ventilation Safety Precautions Your system shipped with a three prong power connector and is intended for use with properly grounded AC receptacles only Do NOT try to defeat the third grou...

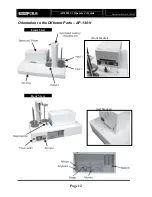
Страница 12: ...AP 1301 i t Operator s Guide Document Revision 100102 Page 11 Orientation to the Different Parts AP 1301i Front View Rear View...

Страница 13: ...AP 1301 i t Operator s Guide Document Revision 100102 Page 12 Orientation to the Different Parts AP 1301t Front View Rear View front bracket rear bracket...

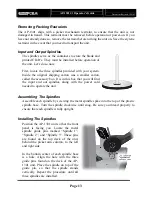
Страница 14: ...ccessory box It is in this box that you will find the input and out spindles along with the power cord needed to operate the unit Assembling The Spindles Assemble each spindle by screwing the metal sp...

Страница 15: ...and output To start place the desired number of discs to be printed on spindle 1 If you wish to do a quantity greater than one spindle allows place the remainder on spindle 3 The processing of discs b...

Страница 16: ...selector switch is set correctly on each module it is located between the two power receptacles The AP 1301 supports both 115 VAC and 230 VAC at 50 60 Hz Please confirm that the appropriate voltage 1...

Страница 17: ...Windows 98 you will find it to be virtually the same user interface Note You may want to consider supplementing this manual with a Windows NT 4 0 Workstation guide many of which are readily available...

Страница 18: ...lf as it will conflict with the Printer Alignment Utility Locate the Printer Alignment ICON depicted to the left on the desktop Double click on it to launch the Printer Alignment Utility The splash sc...

Страница 19: ...y loosening the screws that hold the brackets in place and then adjust the printer in the appropriate direction Click on OK and run this test again until the disc is placed centered in the tray When y...

Страница 20: ...ide Document Revision 100102 Page 19 Startup the AP 1301 Software When the system restarts logon as you did before After logging on click the AP 1301 ICON to bring up the main AP 1301 application The...

Страница 21: ...is running what is queued to run and what has been completed Before a print job can be submitted the CD design must be produced This can be done in two basic ways The primary way is to use the Label D...

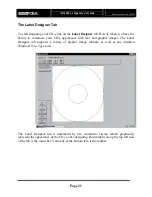
Страница 22: ...s appearance with text and graphic images The Label Designer tab supports a variety of graphic image formats as well as any installed Windows True Type font The Label Designer tab is dominated by two...

Страница 23: ...LBL Allows you to save the label currently displayed Allows you to delete an object currently selected with the pick tool described in the toolbar section Not currently implemented The Tool Bar At th...

Страница 24: ...Type Text tool Allows you to add a dynamic date field that will reflect the current date when printed Using Type Text Tool The text tool allows you to create a text element for your CD It can be repo...

Страница 25: ...Select Font option Using Import Bitmap Tool The Import Bitmap tool allows you to import a graphic image from a file To use the Import Bitmap tool Select Import Bitmap by clicking on that button Choose...

Страница 26: ...er This work order defines how many discs are to be produced and which artwork is to be used New jobs are created here In addition you may recall and use previously saved jobs In this way job files of...

Страница 27: ...e a print job Fill in the fields as described below JOB ID This field can contain up to 20 user defined characters While the contents of this field are up to you it is a mandatory field and cannot be...

Страница 28: ...ties port setting is set to PRINT TO FILE This allows other applications to create printable files These files must be created with the appropriate printer either the Primera or the MediaFORM Spectrum...

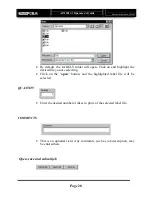
Страница 29: ...highlight the desired file you are selecting Click on the open button and the highlighted label file will be selected QUANTITY Enter the desired number of discs to print of the selected label file COM...

Страница 30: ...ons on the horizontal tool bar appearing at the top left of the Job Tab The buttons function as follows Open Job Performs the same task as Open does in the top horizontal toolbar Allows you to open an...

Страница 31: ...pane shows you which jobs are pending the second pane shows which job is running and the third and bottom most pane shows which jobs have been completed or have failed Job Queue Within Job Queue ther...

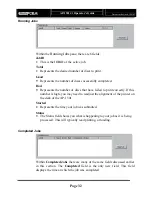
Страница 32: ...rs To reiterate what was mentioned earlier in the Job Screen we recommend that you give each job a set of unique identifying numbers letters or a combination of both In addition to the 3 features ment...

Страница 33: ...failed to print correctly If this number is high you may need to readjust the alignment of the printer on the deck of the AP 1301 Started Represents the time your job was submitted Status The Status...

Отзывы: