4
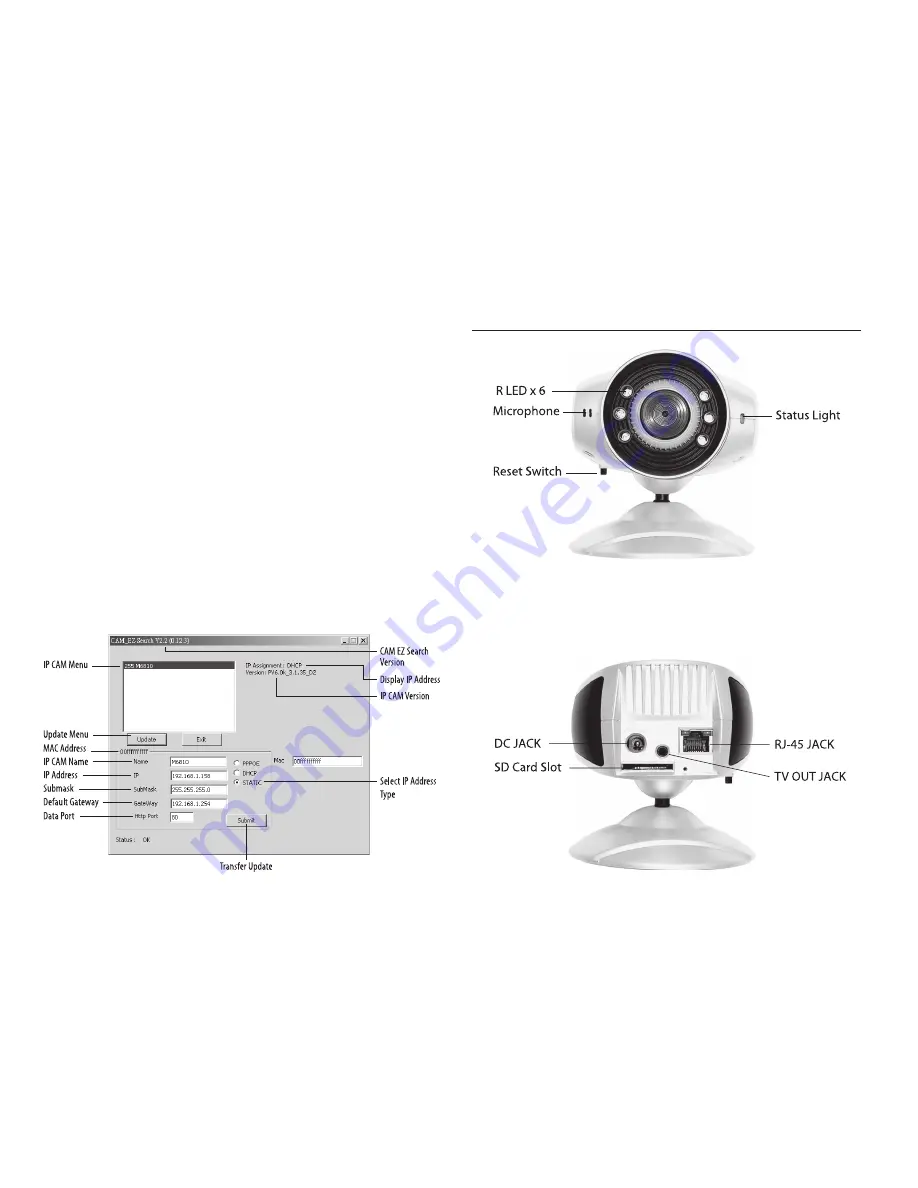
Step 1: Name: The user can rename the MT4009 EZ IP WE-
BCAM.
Step 2: IP: The IP address of the MT4009 EZ IP WEBCAM (for
example with a computer with an IP of 192.168.1.159, the
user would have to set the MT4009 EZ IP WEBCAM IP to
192.168.1.* (* = 1~254).
Step 3: Sub Mask (U): Usually set to 255.255.255.0
3. Step 4: Gateway: Change to correspond with the gate-
way settings of the network.
4. Step 5: HTTP Port: Change to 80
After settings are complete, press Submit, and the MT4009
EZ IP WEBCAM settings will take eff ect.
Press Update to update the MT4009 EZ IP WEBCAM menu.
Left click twice with your mouse on the desired name from
the list, and a browser window will open automatically,
displaying the CAM EZ Search network surveillance feed
icon:
2.2 MT4009 Exterior Function Introduction
Reset Switch button operation:
When in operation, press
Switch button for 3 seconds the system will reboot. If you
press and hold down the SW button for longer than 5 sec-
onds, the system will return to factory default settings.
TOP
Содержание IP WEBCAM MT4009
Страница 1: ...IP WEBCAM Instruction manual Remote Surveillance IP Camera MT4009 ...
Страница 24: ...TOP ...
Страница 25: ...IP WEBCAM Instrukcja obsługi Remote Surveillance IP Camera MT4009 TOP ...


