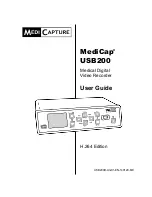
MediCap
®
USB200 User Guide – English
5 of 20
USB200H-UG01-EN-140120-MC
Introduction
The MediCap
®
USB200 allows you to easily capture digital medical
images and video clips from virtually any analog medical imaging device
that has standard BNC or S-Video output.
To get started, connect your USB200 as shown on page 7 and then
insert the included MediCapture USB flash drive into the
front panel
.
Now you can use your medical imaging device as you normally do while
capturing images and video clips with your USB200.
To turn on the USB200, first turn on the Master Power Switch on the
back panel and then press the
Power
button on the front panel.
Capturing Still Images
When you see an image on your monitor that you would like to capture,
press the
Capture Photo
button. This will save a still image. You can
continue pressing this button to save more images.
Capturing Video Clips
When you see a video stream on your monitor that you would like to
capture, press the
Capture Video
button once to begin recording and
then press the button again to stop recording.
Important Note:
There is a
very brief
delay (0.06 second)
between the time when the video signal enters the
USB200 and when it is displayed on a monitor connected
to the USB200. If this delay is not suitable for your medical
environment, do not connect your monitor to the USB200.
Instead, connect your monitor directly to your video source;
then connect the USB200 to the secondary output on your
video source or use a “Y-Splitter” (not included).
Ordering Information
MediCapture recommends MediCapture
®
brand USB flash drives. Please visit medicapture.com for
information on how to purchase flash drives.
Technical Support
For technical support and other questions, please visit medicapture.com or call 888-922-7887 (toll free from
within the USA) or 503-445-6935 (from outside the USA).
MediCapture
®
Inc.
580 West Germantown Pike, #103
Plymouth Meeting, PA 19462 USA
Quick Start: Review the
front and back panels,
and the connection
diagrams on the
following pages. Then
refer to the “Quick Start
Guide” on page 8.
Note: The first time you
turn on your new
MediCap, you will need to
set the clock. To do so,
press the Menu button on
the front panel, go to the
Setup Menu, and select
Date/Time. To ensure
that the clock remains
accurate, leave the
Master Power Switch on
the back panel in the
ON position at all times.
You can use the Power
button on the front panel
to turn the unit on and off
during daily use without
affecting the clock.
Important Note: If you do
not see a video image on
your monitor, use the
Menu button to access the
Main Menu. In the Setup
Menu, make sure the
NTSC and PAL settings
are properly selected.


