19
Playing Voices
Playing Different Voices with Both Hands
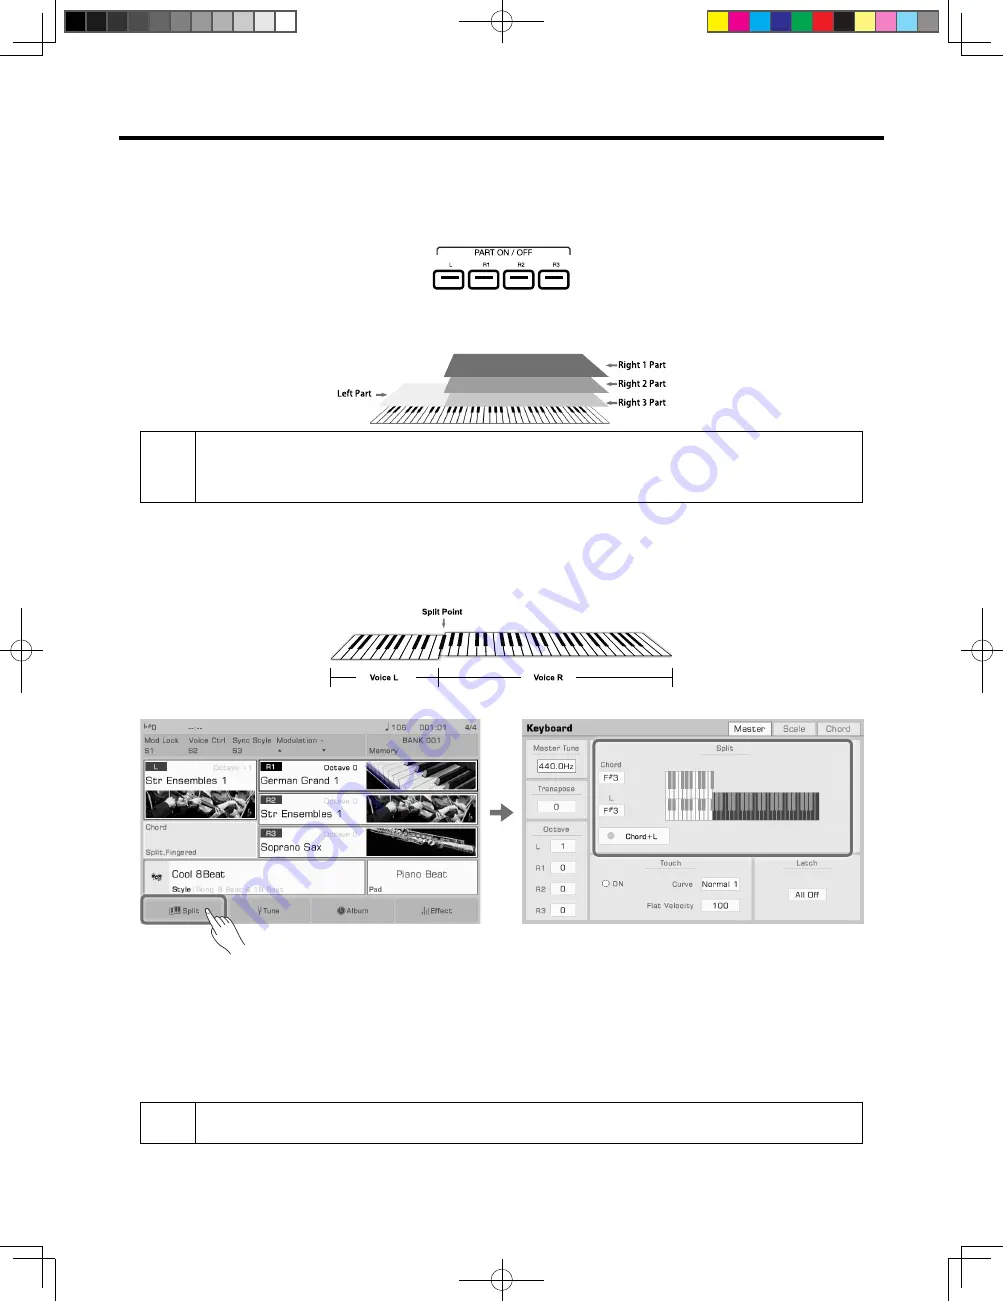
This instrument supports up to 4 parts simultaneously, one for the left hand and three for the right hand.
1.
First, turn the upper (R1-R3) parts on.
2.
To set a voice for the left hand, make sure the [L] button is turned on.
3.
Select a lower (left hand) voice by pressing the [VOICE SELECTION] button.
4.
Play the keyboard into the two areas to hear the different voices played by either hand.
Tips:
When L is turned off, you can play the R voices across the full keyboard. When L is turned on, the keyboard
separates into two sections, L and R1/R2/R3. This is called the “split point”.
The split point is set to F#3 by default. However, you can set this to any position you wish.
You can set the volume of each part in the “Mixer” menu.
Setting the Split Point
The point on the keyboard that separates L and R1/R2/R3 is called the “split point”.
The split point is set to F#3 by default.
However, you can set this to any position you wish by following these steps:
1.
Press “Split” on the main display or press the [GLOBAL SETTING] button and select the “Keyboard” function to bring
up the Split Settings menu.
2.
Select the key name of the Left area to make it the split point. You can do this on the touch screen or by using the
[DATA DIAL] or [</>] buttons. Or, press the actual keyboard key to set your desired split point.
If you want to set the split point for both the Lower part and chord area, just turn on the “Chord+L” switch. Then you can
set the Split Point (Chord) and the Split Point (Left) at the same time.
Tips:
The Split Point of the LEFT/RIGHT part sections and the Chord Split Point section are generally same, but
also can be assigned separately. Split Point (Chord) cannot be set higher than Split Point(Left).
AKX10_OM05_EN_190816.indd 19
2019/8/16 13:37
Содержание AKX10
Страница 1: ...AKX10_OM05_EN_190816 indd 1 2019 8 16 13 37 ...
Страница 194: ...194 AKX10_OM05_EN_190816 indd 194 2019 8 16 13 38 ...
Страница 195: ...195 AKX10_OM05_EN_190816 indd 195 2019 8 16 13 38 ...
Страница 196: ...AKX10_OM05_EN AKX10_OM05_EN_190816 indd 196 2019 8 16 13 38 ...


