background image

19

The D1100 has two modes of operation. The default 

mode of operation is as a Digital Preamplifier. Refer 

to page 20 for “How to Operate the D1100 as a Digital 

Preamplifier”.

The second mode of operation is as a Digital to 

Analog Converter (DAC) to be used with components 

such as an Analog only Preamplifier. Some of those 

Preamplifiers have a special “EXT CONTROL DATA 

CABLE CONNECTION” between the D1100 and the 

separate Analog only Preamplifier. Refer to page 8 for 

Connection information.

When the Analog only Preamplifier is switched 

On, it will automatically switch power On to the 

D1100. The D1100 Front Panel Left and Right Output 

Level Meters, Information Display and the STAND-

BY/ON Push-button are active. The remainder of the 

Front Panel Controls, Push-buttons and Remote Con-

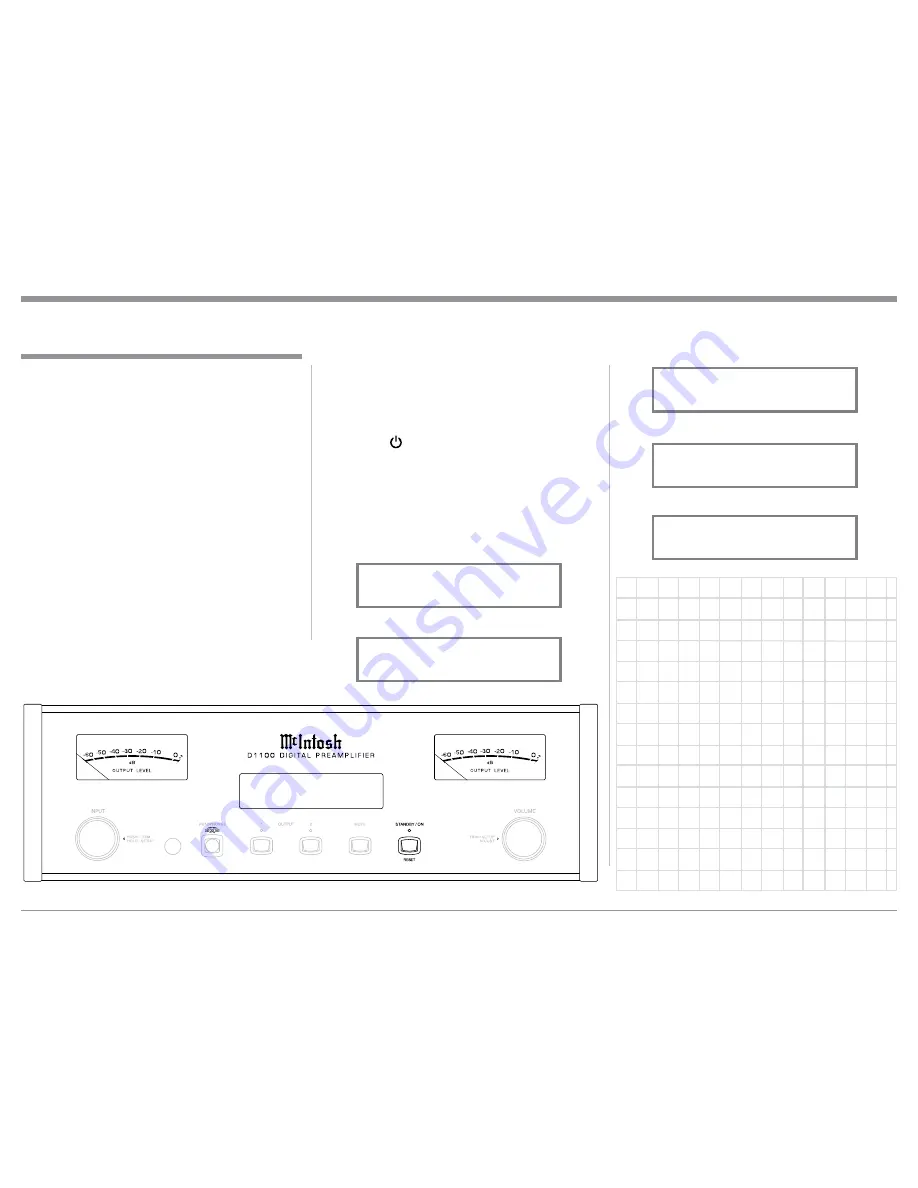
trol IR Sensor are all deactivated. Refer to figure 60.

     The Analog only Preamplifier selects the desired 

D1100 Input Source Component and passes on any 

Remote Control Commands to the selected Source 

Component. At any time, power to the D1100 can be 

How to Operate the D1100 when in the 

DAC Mode

Figure 60

How to Operate the D1100 when in the DAC Mode 

_ _ _ _ _ _

switched Off using the Front Panel STANDBY/ON 

Push-button. If power is switched Off to the connected 

Analog only Preamplifier, Power to the D1100 will 

also switch Off. If D1100 Power is switched On using 

the Front Panel STANDBY/ON Push-button or the Re-

mote Control      (Power On) Push-button, the D1100 

will return to the Digital Preamplifier Operation 

Mode. The following images are some examples of the 

Front Panel Information Display Indications during 

the time the D1100 is operating in the DAC Mode. For 

additional Information refer to “Control Panel Set-

tings” and “USB Music Playback” on page 24.

     44.1kHz

      SACD

     352.8kHz

     DSD128

     DSD256

Содержание D1100

Страница 1: ...McIntosh Laboratory Inc 2 Chambers Street Binghamton New York 13903 2699 Phone 607 723 3512 www mcintoshlabs com D1100 Digital Preamplifier Owner s Manual ...

Страница 2: ...vice The spaces below have been provided for you to record that information Serial Number ________________________________ Purchase Date ________________________________ Dealer Name _________________________________ Safety Instructions 2 Separate Sheet Important Additional Operation Information Guide Thank You and Please Take a Moment 2 Technical Assistance and Customer Service 2 Table of Contents...

Страница 3: ...s 4 The D1100 internal Digital Circuitry is designed to decode 2 channel PCM Pulse Code Modulation and DSD Direct Stream Digital Digital Signals The Coaxial Optical and AES EBU Digital Audio Inputs are for PCM Digital Signals The Digital MCT and USB Audio Inputs are for PCM and DSD Digital Signals Other Digital Audio Signal Format Types will cause the Audio Outputs of the D1100 to be muted and the...

Страница 4: ...e level steps with no noise as the volume level is changed Variable Rate Volume and Balance Controls The D1100 Preamplifier s Volume and Balance Con trol Circuitry provides an ideal rate of change with control rotation HXD for Headphones The D1100 Headphone Crossfeed Director Circuitry HXD improves the sound localization for Head phone Listening HXDTM restores the directionality component of the s...

Страница 5: ...information on the next page pertaining to installing the D1100 into cabinets 17 1 2 44 4cm 13 1 4 33 7cm 17 1 8 43 5cm 3 16 0 48cm 13 16 2 1cm 10 9 16 26 8cm 14 1 2 36 8cm 1 15 16 4 9cm 2 5 1cm Front View of the D1100 Rear View of the D1100 Side View of the D1100 6 15 2cm 5 3 8 13 7cm 4 5 8 11 8cm 4 13 16 12 22cm 15 7 8 40 3cm ...

Страница 6: ...set in maintaining all the system components at the coolest possible operating temperature A custom cabinet installation should provide the following minimum spacing dimensions for cool operation Allow at least 2 inches 5 1cm above the top 2 inches 5 1cm below the bottom and 1 inch 2 5cm on each side of the Preamplifier so that airflow is not obstructed Allow 19 inches 48 3cm depth behind the fron...

Страница 7: ... the D1100 Digital Preamplifier is located on a separate folded sheet contained in the Owner s Manual Packet Refer to separate sheet Mc3A for the Rear Panel Connections Rear Panel Connections D1100 Digital Preamplifer Rear Panel Rear Panel Connections ...

Страница 8: ...100 CD DATA PORT 3 Jack to the SACD CD Transport Data In Jack 8 Connect a Control Cable from the D1100 DATA PORT 1 Jack to the Media Server Data In Jack 9 Connect any additional McIntosh Components in a similar manner as outlined in steps 6 thru 8 Digital Audio Connections 10 Connect a Digital Coaxial Cable from the D1100 DIGITAL AUDIO INPUT COAX 1 Connector to the Digital Audio Player Digital Coa...

Страница 9: ... specific Function Commands issued by the Remote Control it is first neces sary to change the Data Ports Default settings for the Tuner Input Refer to Setup Data Port Assignment on page 17 10 Connect a Control Cable from the D1100 CD DATA PORT 3 Jack to the SACD CD Transport Data In Jack 11 Connect a Control Cable from the D1100 DATA PORT 1 Jack to the Media Server Data In Jack 12 Connect any addi...

Страница 10: ...ith McIntosh Models displaying instructions on a video screen Press to change broadcast band on a con nected Tuner Select certain functions on a variety of McIntosh Models Select the DEVICE to issue a remote control command to Direct access to stored Tuner PRESETs when used with the numeric Push buttons 0 thru 9 Press the Trim Push button and then the LEVEL DOWN Push button to select and adjust va...

Страница 11: ...signing the Data Ports refer to How to Setup on page 13 Trim Press the TRIM Push button until the desired Trim function Balance Trim Level etc appears on the D1100 Front Panel Display then press the LEVEL Up or Down Push button to adjust the Trim setting Note Press the TRIM Push button to recall the last Trim function selected For additional information on using the Trim Functions refer to How to ...

Страница 12: ...he audio from the Loud speakers and Headphones INPUT Control used to select a source for listening and recording The control is also used to enter the TRIM or SETUP Modes and select the various functions Meter indicates the Right Channel Output of the Preamplifier Meter indicates the Left Channel Output of the Preamplifier OUTPUT 1 and 2 Push buttons with indicators switch the Preamplifier Outputs...

Страница 13: ... internal software that is know as Firmware The Version of the How to Operate the Setup Mode The Default Settings Chart below indicates the Func tion Name Default Setting and the Page Number for additional information Default Settings Firmware Version Default Settings Function Name Setting Page No D1100 V_ _ _ _ _ 13 INPUTS On Name 13 OUTPUTS 1 2 Switched 15 TRIGGER 1 thru 4 On 16 DATA PORTS 1 thr...

Страница 14: ...X 3 Input On rotate the VOL UME Control until the display indicates SETUP COAX 3 On Rename Refer to figure 4 on page 13 10 Exit the SETUP Mode by several presses of the INPUT Control RENAME INPUT In the following example the Optical 1 OPTI 1 Input will be renamed to match up with the component con nected refer to page 9 step 16 The D1100 Default Input Names OPTI 1 COAX 1 MCT etc as indicated on th...

Страница 15: ...0 Output 1 Output 2 and Headphones func tion OUTPUT 1 and 2 By defaut OUTPUT 1 and 2 are set to go On Off by using the Front Panel OUTPUT 1 and 2 Push buttons or by using the OUTPUT 1 and 2 Push buttons on the Remote Control If it is desirable to have OUTPUT 1 and or 2 always On regardless of the OUTPUT 1 and 2 Push button settings perform the following 1 Press and hold in the INPUT Control to ent...

Страница 16: ... D1100 is switched ON All four Triggers can also be reas signed to a given Input or Inputs In the first example the Power Control Triggers 1 and 2 will be reassigned from ON to OUTPUT 1 and OUTPUT 2 respectfully 1 Press and hold in the INPUT Control to enter the SETUP MODE Refer to figure 2 on page 13 2 Rotate the INPUT Control until SETUP Trig gers Hold INPUT appears on the Information Display Re...

Страница 17: ... per second perform the following steps 1 Press and hold in the INPUT Control to enter the SETUP MODE Refer to figure 2 on page 13 2 Rotate the INPUT Control until SETUP RS232 115200 Baud appears on the Information Dis play Refer to figure 42 3 Rotate the VOLUME ADJUST Control to select the desired Baud Rate Speed 4 Exit the SETUP Mode by several presses of the INPUT Control Setup con t Comm Port ...

Страница 18: ...l IR Sensor is connected To de activate the Front Panel IR Sensor perform the following steps 1 Press and hold in the INPUT Control to enter the SETUP MODE Refer to figure 2 on page 13 2 Rotate the INPUT Control until SETUP Front IR Enabled appears on the Information Dis play Refer to figure 45 3 Rotate the VOLUME ADJUST Control to select Disabled Refer to figure 46 5 Exit the SETUP Mode by severa...

Страница 19: ... IR Sensor are all deactivated Refer to figure 60 The Analog only Preamplifier selects the desired D1100 Input Source Component and passes on any Remote Control Commands to the selected Source Component At any time power to the D1100 can be How to Operate the D1100 when in the DAC Mode Figure 60 How to Operate the D1100 when in the DAC Mode _ _ _ _ _ _ switched Off using the Front Panel STANDBY ON...

Страница 20: ...1 62 63 and 64 To switch OFF the D1100 press the STANDBY ON Push button on the Front Panel or the Power Off Push button on the Remote Con trol Note For an explanation of the Remote Control Push button functions refer to pages 10 and 11 Adjustments The Trim Selections include Balance Meter Lights Meter Level Display Brightness and when Headphones are con nected HXD Mode The Trim Settings are stored...

Страница 21: ... by adjusting the TRIM LEVEL Refer to figure 73 After approximately 6 seconds the Information Display returns to indicate the Source Selection and Volume Level HEADPHONE HXD When headphones are connected to the D1100 Front Panel Jack an additional TRIM function becomes available McIntosh s HXD brings the acoustical depth and spatiality of music normally heard with loud speakers to your headphones ...

Страница 22: ...e it to select HEADPHONE HXD On Refer to figure 74 2 To deactivate the HXD Mode rotate the VOL UME Adjust Control until the Front Panel Display indicates HEADPHONE HXD Off Refer to figure 75 Mute Press the MUTE Push button on the D1100 Front Panel or on the Remote Control to Mute the Audio in all outputs Output 1 Output 2 and Headphones except the FIXED OUTPUT The Front Panel Infor mation Display ...

Страница 23: ... It is also compatible with Ap ple Macintosh Computers using OS 10 6 8 or later When using a PC Computer with Windows a spe cial McIntosh USB Audio Software Driver needs to be installed on the PC Computer The driver needs to be installed before connecting the D1100 USB Input to the USB Port on the computer Note If an Apple Macintosh computer is used with the D1100 no additional driver is required ...

Страница 24: ...s not connected to your computer the previous default Audio Device will be selected 2 If other McIn tosh Products with USB Audio Connections are also connected to the computer an ad ditional McIntosh USB Audio playback device will appear in the listing Make sure to select the McIntosh HD HS USB Audio from available playback devices listed when using this McIntosh Product for USB Audio Control Pane...

Страница 25: ...ecording being played back There are many third party Applications besides Applications like Windows Media Player for steam ing music from the computer to McIntosh D1100 USB Input An example of just one of the available applica tions is JRiver Media Center Reset of Microprocessors In the unlikely event the controls of the D1100 stop functioning the microprocessors can be reset by per forming the f...

Страница 26: ...0 watts 220 Volts 50 60Hz at 30 watts 230 Volts 50 60Hz at 30 watts 240 Volts 50 60Hz at 30 watts Standby Power less than 0 5 watts Note Refer to the rear panel of the D1100 for the correct voltage Overall Dimensions Width is 17 1 2 inches 44 5cm Height is 6 inches 15 2cm including feet Depth is 19 inches 48 3cm including the Front Panel Knobs and Cables Weight 26 pounds 11 8 kg net 41 pounds 18 6...

Страница 27: ...shipping damage Use the original shipping carton and interior parts only if they are all in good serviceable condition If a shipping carton or any of the interior part s are needed please call or write Customer Service Depart ment of McIntosh Laboratory Refer to page 2 Please see the Part List for the correct part numbers Quantity Part Number Description 1 033838 Shipping carton only 2 033837 Side...

Страница 28: ...ucts is the policy of McIntosh Laboratory Incorporated who reserve the right to improve design without notice Printed in the U S A McIntosh Laboratory Inc 2 Chambers Street Binghamton NY 13903 www mcintoshlabs com McIntosh Part No 04165300 ...

Отзывы: