40
It can be assumed that safe operation is no longer possible if:
• The appliance has visible signs of damage.
• The appliance is no longer working or working properly.
• The appliance has been stored under unfavourable conditions for a long period of time.
• The appliance has been subjected to excessive strain during transport.
• The appliance has come in contact with liquids, such as rain.
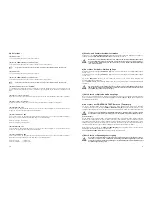
13. Troubleshooting
By purchasing the "Mc CRYPT DJ-2200 dual CD player", you have acquired a safe, state-of-the art prod-
uct. Problems and malfunctions can occur nevertheless. We would therefore like to show you how to elimi-
nate certain malfunctions yourself.
Observe the safety instructions by all means!
Problem
Cause
Solution
No display after switching
The mains cable is not inserted
Plug in the mains cable properly.
on the on/off switch.
properly in the mains socket or
the socket of the appliance.
The CD is not
CD has not been inserted properly.
Insert the CD with the written
played back.
side facing upwards.
CD is dirty.
Clean the CD with a soft cloth.
The inserted CD is not an audio CD.
Insert an audio CD.
There are drop outs when
The CD is dirty.
Clean the CD.
playing the CD.
The CD is scratched.
The CD is badly pressed.
Renew the CD.
The appliance is subjected to
Place the dual CD player on an
to vibrations.
appropriate stable surface.
LC displays are not working. The system connection cable has not been Establish a correct system connection.
inserted or has not been inserted properly.
The PITCH slide control
The PITCH button has not been pressed.
Switch on the PITCH function.
is not working.
No sound can be heard.
A playback appliance is not switched on.
Switch on the appliance.
The wrong input has been selected
Select the right input.
on the amplifier/mixer.
The volume controls of the amplifier/
Increase the volume.
mixer or the output stage are set to the
"MINIMUM" position.
A channel is not working.
A cinch cable has become
Connect the cinch cable properly.
disconnected from the audio output
of the CD player or from the amplifier/
mixer input.
The wrong balance has been selected
Set the balance properly.
on the amplifier/mixer.
The cinch connection cable is defective. Renew the cinch cable.
The fader-start function
CONTROL-UNIT sockets have not been Connect the CONTROL-UNIT
is not working.
connected to the mixer.
properly.
Missing audio connection between
Connect the audio output of the
the mixer and CD player.
CD player properly to the
mixer.
25
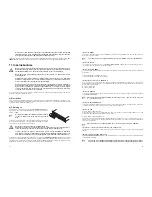
5. Table of contents
1. Introduction ............................................................................................................................................23
2. Intended use ............................................................................................................................................24
3. Equipment features ................................................................................................................................24
4. Scope of delivery ....................................................................................................................................24
5. Table of contents ....................................................................................................................................25
6. Explanation of signs ................................................................................................................................25
7. Safety instructions and danger warnings ................................................................................................26
8. Connection elements and controls..........................................................................................................28
9. Setting up/Rack installation of the device ..............................................................................................32
10. Connection ..............................................................................................................................................33
a) Connecting the control unit and drive unit ..........................................................................................34
b) Connection of the audio cinch outputs ..............................................................................................34
c) Connection of the digital audio outputs ..............................................................................................34
d) Connection of the CONTROL-START sockets (fader start) ................................................................34
e) Connection to the power supply ........................................................................................................34
11. Putting the appliance into service ..........................................................................................................35
a) Switching on the appliance ................................................................................................................35
b) Inserting CDs ......................................................................................................................................35
c) Playback ..............................................................................................................................................36
d) Title selection ......................................................................................................................................36
e) Selecting a section within a track ........................................................................................................36
f) SEARCH ..............................................................................................................................................37
g) CUEING ..............................................................................................................................................37
h) Synchronisation of the CD speed........................................................................................................38
i) Playback loop (LOOP function) ............................................................................................................38
j) RELAY operation ..................................................................................................................................38
k) Fader start function..............................................................................................................................39
l) Switching off the appliance ..................................................................................................................39
12. Maintenance and care ............................................................................................................................39
13. Troubleshooting ......................................................................................................................................40
14. Useful notes on handling CDs ................................................................................................................41
15. Disposal ..................................................................................................................................................41
16. Technical specifications ..........................................................................................................................41
6. Explanation of signs
The triangle containing a lightning symbol is used to indicate whenever your health is at risk (due
to electrocution, for example).
An exclamation mark in a triangle indicates particular risks in handling or operating the
appliance.
☞
The hand symbol refers to useful tips and additional information on using the appliance.


