46
9.12 CoNSole rePlaCemeNT
CHaPTer 9: ParT rePlaCemeNT GUide
1) Turn off power to the treadmill and disconnect the power cord.
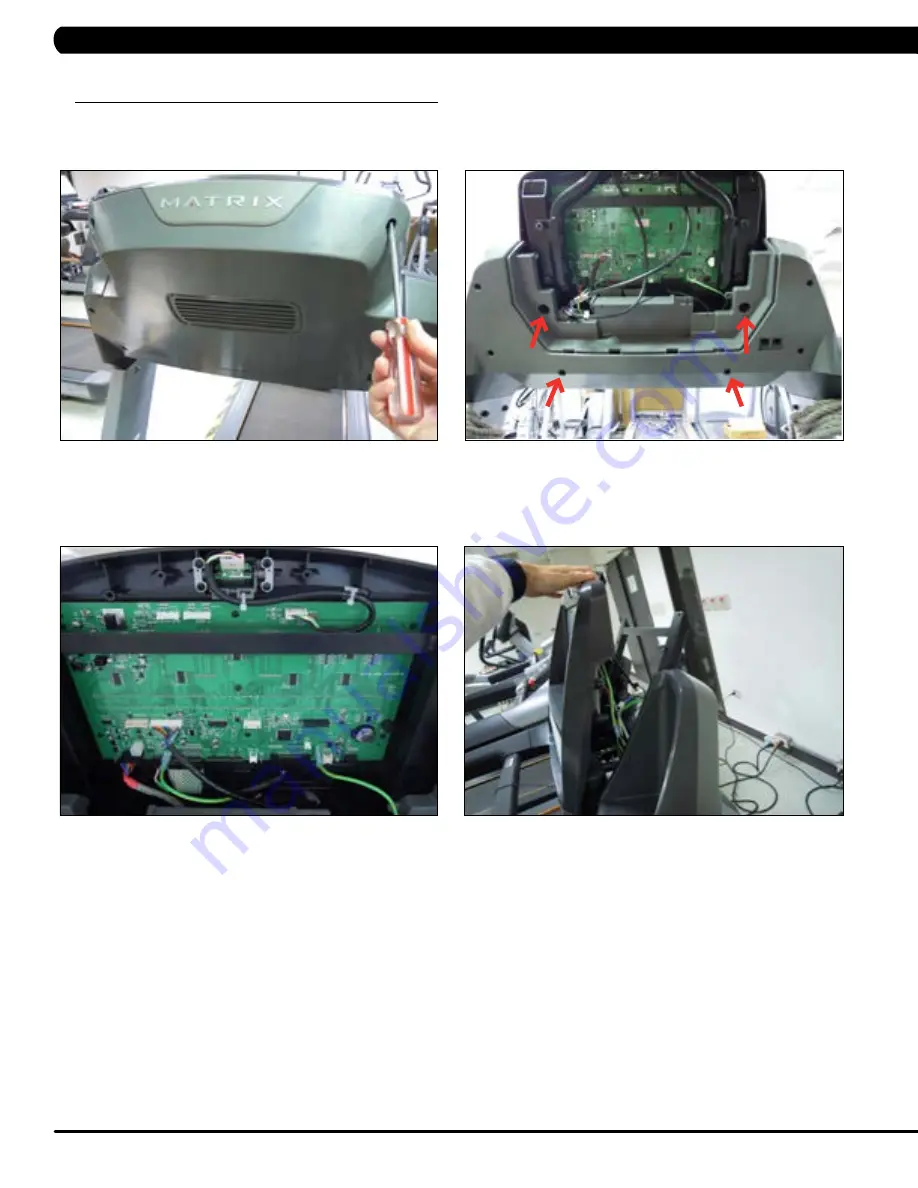
2) Remove the 2 screws holding the back cover onto the console (Figure A).
3) Remove the 4 screws holding the console onto the console frame (Figure B).
4) Disconnect the 6 wire connections from the console (Figure C).
5) Remove the console (Figure D).
6) Reverse Steps 1-5 to install a new console.
7) Test the treadmill for function as outlined in Section 9.21.
fiGUre a
fiGUre b
fiGUre C
fiGUre d
Содержание T3X-05
Страница 1: ...T 3 x 0 5 T r e a d m i l l S ER V I C E MA N U A l...
Страница 18: ...15 8 1 Electrical DiagramS Chapter 8 Troubleshooting...
Страница 19: ...16 8 1 Electrical DiagramS Continued Chapter 8 Troubleshooting DIgital Communication Wire Grip Sensor Wire...
Страница 20: ...17 8 1 Electrical DiagramS Continued Chapter 8 Troubleshooting H P WIRE KEYPAD Wire...
Страница 77: ...74 NOTES...


