background image

REGULAR MAINTENANCE PROCEDURES

DRAINING YOUR SPA

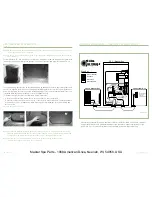
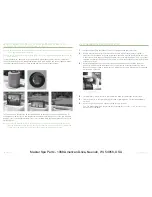
The drain is located behind the front panel on the far right side. You can access the drain by unscrewing
the black thumb screws and removing the corner panel. Grasp the drain cap, and pull the assembly out
all the way. Unscrew the cap, then push the assembly back in half way to start the flow of water. Attach
a garden  hose, if desired. Draining times may vary by model using the external hose bib. A sump pump
may also be used to drain the spa quickly. 

NOTE: When pushing or pulling the assembly in or out, water will drip from the drain during 

the transition. This is normal.

72

DO NOT DIVE.

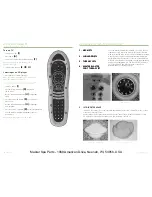
Spa Drain

REPLACING YOUR LIGHT BULB (NON L.E.D.)

If your light bulb goes out, it is very easy to replace.

Use a 12 volt, 6 watt bulb that should be available through your dealer.

First, make sure the power to the spa is off. You can access the spa light fitting by removing the spa
panel. 

Once the panel is removed, unfasten the black fitting inside the white light assembly, by turning it
counter clockwise.

Attached to the black fitting is the light bulb. Replace the bulb and reinsert the fitting, by turning it
clockwise.

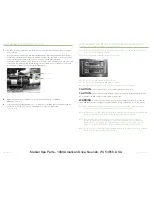
If the white lens cap needs to be removed, insert a flat head screw driver as shown in the picture below.

This may also be necessary 
when installing an LED light.

NOTE:

To prevent premature failure of your spa cover, always turn Laminar Flow Jets down so that they

do not hit the cover when the cover is closed. You do not want to completely turn jets off. Doing so
may cause a build up of stagnant water in the water line if not used often.

SAFETY INSTRUCTIONS

IMPORTANT SAFETY INSTRUCTIONS
(CONT.)

6.

WARNING.

Install the spa so that water can be easily drained out of the compartment

containing electrical components so as not to damage equipment. Also, when installing spa,
allow at least 2 feet of clearance around the perimeter of the spa to provide enough room to
access for servicing. Contact your local dealer for their specific requirements.

7.

WARNING - TO REDUCE THE RISK OF INJURY:

(A) Reminder - Never allow anyone to dive into a spa. Always enter feet first.

(B) Always enter and exit a spa slowly.

(C) Do not use the spa alone.

(D) Before entering the spa, always measure the water temperature with an accurate 

thermometer. Tolerance of water temperature regulating devices can vary as much as
plus/minus 5° F (3° C).

(E) Persons suffering from obesity or with a medical history of heart disease, diabetes, high 

or low blood pressure or circulatory system problems should consult a physician before 
using the spa.

(F) Since excessive water temperatures have a high potential for causing fetal damage during

early months of pregnancy, pregnant or possibly pregnant women should limit spa water
temperatures to 100° F (38° C).

(G) Excessive water temperature can be dangerous. The water in the spa should never exceed

104° F (40° C). Water temperatures between 100°F (38˚C) and 104°F (40˚C) are 
considered safe for a healthy adult. Lower water temperatures are recommended for 
extended use (exceeding 10 minutes) and for young children. Long exposures at higher 
temperatures can result in hyperthermia.

(H) The use of alcohol, drugs, or medication before or during spa use may lead to 

unconsciousness with the possibility of drowning.

(I) Persons using medication should consult a physician before using a spa since some 

medication may induce drowsiness while other medication may affect heart rate, blood 
pressure and circulation.

5

DO NOT DIVE.

Master Spa Parts - 1068 American Drive, Neenah, WI, 54956, USA

Содержание Spas 2008

Страница 1: ...6927 Lincoln Parkway Fort Wayne IN 46804 800 860 7727 www masterspas com pop08ownman Rev 06 08 2008 MASTER SPAS OWNER S MANUAL...

Страница 2: ...__________________________________________________________________________ Address __________________________________________________________________________________ City _____________________________...

Страница 3: ...tenance Non ECO PUR Spa Water Maintenance Start Up 27 Spa Water Maintenance Schedule 28 29 Water Maintenance Trouble Shooting Guide 30 Why Chemicals are Important in a Spa 31 Maintenance Recommendatio...

Страница 4: ...r safety and the safety of anyone who enjoys the use of your spa is our utmost concern The sign should be mounted with screws or another type of permanent fastener Additional or replacement signs can...

Страница 5: ...oad 73 DO NOT DIVE Legend Series Spas Down East Spas Procedure 5 Rinse filters and reinstall SAFETY INSTRUCTIONS IMPORTANT SAFETY INSTRUCTIONS When installing and using this electrical equipment basic...

Страница 6: ...G Install the spa so that water can be easily drained out of the compartment containing electrical components so as not to damage equipment Also when installing spa allow at least 2 feet of clearance...

Страница 7: ...elpful to use a lubricant use silicone based not petroleum based to allow for an easier turn of the diverter handle Rinse the diverter internals and reassemble In the future it is helpful to turn the...

Страница 8: ...rmit any electric appliance such as a light telephone radio or television within five 5 feet of the spa Never operate any electrical appliances from inside the spa or while wet 12 WARNING RISK OF SUFF...

Страница 9: ...e the jets are open and the air controls are open See page 12 4 Check for dirty filters Clean if necessary SAFETY INSTRUCTIONS IMPORTANT SAFETY INSTRUCTIONS CONT 15 A green coloured terminal or a term...

Страница 10: ...PAS TOUTES EN PLACE WARNING PEOPLE USING MEDICATIONS AND OR HAVING AN ADVERSE MEDICAL HISTORY SHOULD CONSULT A PHYSICIAN BEFORE USING A SPA OR HOT TUB AVERTISSEMENT LES PERSONNES QUI PRENNENT DES M DI...

Страница 11: ...UE LUMINAIRE T L PHONE RADIO T L VISEUR ETC MOINS DE 1 5 M DE CETTE CUVE DE RELAXATION CAUTION MAINTAIN WATER CHEMISTRY IN ACCORDANCE WITH MANUFACTURER S INSTRUCTION ATTENTION LA TENEUR DE L EAU EN MA...

Страница 12: ...2 SHOULDER JETS 3 THERAPY JETS 4 MASTER BLASTER FOOT THERAPY JET 1 NECK JETS 2 SHOULDER JETS 3 THERAPY JETS 4 MASTER BLASTER FOOT THERAPY JET 5 JET DIVERTER VALVE Located on the topside of the spa thi...

Страница 13: ...used for an extended period of time turn valve slightly to allow some water to flow when pump is on to prevent stagnent water from developing in the water lines 7 AIR CONTROL VALVES These are located...

Страница 14: ...Legend Series spas have additional remotes which allow the user to control the jet therapy while remaining in his her seat if applicable By pressing the control one time you will activate the pump Pre...

Страница 15: ...interior wall of your spa The on off switch is located on the topside control panel 16 EQUIPMENT CONTROL SYSTEM This houses the wiring and electrical components necessary to operate the spa 17 SPA HEA...

Страница 16: ...ote Control Legend Series only 21 CIRCULATION PUMP This produces water flow through the heater in the spa and provides the water flow necessary to actuate the ozone generator This fractional HP pump r...

Страница 17: ...ts s T Th he e g gr ro ou un nd d w wi ir re e m mu us st t b be e a at t l le ea as st t 6 6 A AW WG G c co op pp pe er r w wi ir re e a an nd d m mu us st t b be e c co on nn ne ec ct te ed d s se e...

Страница 18: ...ering lift to avoid damage to the lift assembly and the TV housing Note Do not sit on television Note The television communicates with the wireless remote via IR Please note that the IR is a line of s...

Страница 19: ...such as stairs ceilings and walls must be taken into consideration Please have your Master Spas dealer or delivery service review site or installation plans prior to delivery 3 Surface Pad Requirement...

Страница 20: ...cations interferences that are not controlled by Master Spas INSTALLATION INSTRUCTIONS 1 Put spa in final position that allows for access to equipment and spa components 2 Remove front side panel This...

Страница 21: ...rd s are damaged if water is entering the Audio Video compartment or any electrical equipment area if the protective shields or barriers are showing signs of deterioration or if there are signs of oth...

Страница 22: ...lt to change the pH 4 pH or potential hydrogen This is a measurement of the active acidity in the water or it is the measurement of the concentration of active hydrogen ions in the water The greater t...

Страница 23: ...nt and the human body A Chlorine 1 Only one type is good for spa use Sodium dichlor which is a granule fast dissolving and pH neutral 2 Chlorine is an immediate sanitizer B Bromine Note Bromine use is...

Страница 24: ...pumps will automatically activate regardless of spa status If the problem persists contact your dealer or service organization May appear temporarily in an overheat situation and disappear when the h...

Страница 25: ...ions that may not be sensed by the standard sensors Aux freeze sensor protection acts similarly except with the temperature thresholds determined by the switch and without a 4 minute delay in turnoff...

Страница 26: ...g for the next use turn the lights off and do not turn back on for at least 5 seconds THE ADVANTAGES OF ECO PUR filtration Legend Series Spas and Down East Spas Helps remove calcium carbonate and hydr...

Страница 27: ...allons 3 TIMES A WEEK Test water using chemical test strips Adjust sanitizer pH and Alkalinity accordingly ONCE A MONTH Soak your filter elements overnight in a bucket with spa Filter Cleaner and then...

Страница 28: ...low action required for HFL message Heating capacity of the spa will not reset automatically you may press any button to reset SPA WATER MAINTENANCE START UP For Spas without Eco Pur Filtration System...

Страница 29: ...NTENANCE Schedule For Spas without Eco Pur Filtration System Day One 1 Test and adjust total alkalinity if necessary to between 80 to 150 ppm using the pH alkalinity increaser or decreaser 1oz at a ti...

Страница 30: ...ity increaser or decreaser 1oz at a time Wait 15 minutes retest and adjust if necessary The pump should be running on high speed during this time with the air controls closed 2 Test and adjust the pH...

Страница 31: ...bs 47 DO NOT DIVE SPA WATER MAINTENANCE TROUBLE SHOOTING GUIDE Problem Possible Causes How To Fix It Chlorine Bromine Odor Excessive Chlorine or Shock water with non chlorine bromine level shock treat...

Страница 32: ...adds more salts minerals and metals In time the water can become saturated with these dissolved solids and can cause stains or scale to form on the walls of the spa or a scale build up inside the equ...

Страница 33: ...message Heating capacity of the spa will not reset automatically you may press any button to reset MAINTENANCE RECOMMENDATIONS Your spa requires periodic draining and cleaning to ensure a safe healthy...

Страница 34: ...ndard with a 24 hour circulation pump that filters and maintains heat as programmed configured Freeze Protection If the temperature sensors detect a drop to below 44 F 6 7 C within the heater the pump...

Страница 35: ...2 button once to activate the pump Press the Jets 2 button again to turn off the pump If left running the pump will automatically turn off after 15 minutes WINTERIZING YOUR SPA Many people find they...

Страница 36: ...reset GFCI per manufacturer s instructions Drain and refill spa per manufacturer s instructions Clean and condition cover per manufacturer s instructions Clean and condition wood per manufacturer s in...

Страница 37: ...rarily in an overheat situation and disappear when the heater cools If the problem persists contact your dealer or service organization May appear temporarily in an overheat situation and disappear wh...

Страница 38: ...temperature thresholds determined by the switch and without a 4 minute delay in turnoff See your dealer for details Locking the Panel PL Press Time Jets 1 then Warm within 3 seconds When locked the PL...

Страница 39: ...s set at 100 F 37 5 C The last measured temperature is constantly displayed on the LCD Note that the last measured spa temperature displayed is current only when the pump has been running for at least...

Отзывы: