


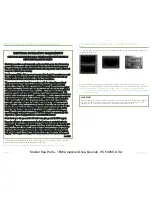

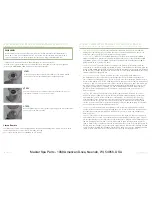


MAX STEREO SYSTEM / SPA THEATER SYSTEM (STS)
Windsor
59
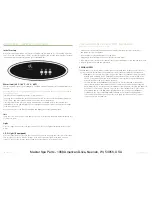
DO NOT DIVE.
Note: Speakers should be in the down position before covering your spa. Failure to do so will result in
damage not covered under the warranty.
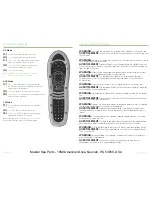
Note: UV rays may interfere with the operation of the remote.
Note: Do not place wet CD’s into the stereo at anytime.
Note: Do not place wet DVD’s into the DVD player at anytime.
Note: AM channels will be very limited in reception and in most cases be unavailable.
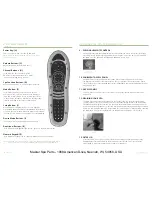
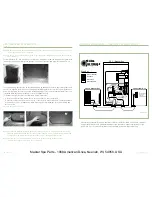
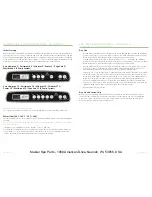
CAUTION –
Risk of Electric Shock. Do not leave compartment door open.
CAUTION –
Risk of Electric Shock. Replace components only with identical components; and
Do not operate the Audio / Video controls while inside the spa.
WARNING –
Prevent Electrocution. Do not connect any auxiliary components (for example
cable, additional speakers, headphones, additional Audio / Video components, etc.) to the system.
NOTE: These units are not provided with an outdoor antennae; when provided, it should be installed
in accordance with article 810 of the National Electrical Code, ANSI / NFPA 70.
NOTE: Do not service this product yourself as opening or removing covers may expose you to dangerous
voltage or other risk of injury. Refer all servicing to qualified service personnel.
NOTE: When the power supply connections or or power supply cord(s) are damaged; if water is
entering the Audio / Video compartment or any electrical equipment area; if the protective
shields or barriers are showing signs of deterioration; or if there are signs of other potential
damage to the unit, turn off the unit and refer servicing to a qualified service personnel.
NOTE: This unit should be subjected to periodic routine maintenance (for example, once every 3 months)
to make sure that the unit is operating correctly.
SITE PREPARATION / GENERAL GUIDELINES
Portable spa installation is simple when properly planned. To that end, it is important that you read the
following information carefully and consult with your Master Spas dealer.
1) Access - The actual dimensions of your new spa will determine the amount of space that is needed in
moving the spa from curbside to its final installation area. Be sure to measure side yard dimensions,
gates or doors and vertical obstructions such as roof overhangs and overhead cables. Any other space
limiting obstacles such as trees or shrubs must be evaluated.
2) If the spa is being installed indoors, dimension limitations such as stairs, ceilings and walls must
be taken into consideration. Please have your Master Spas dealer or delivery service review site
or installation plans prior to delivery.
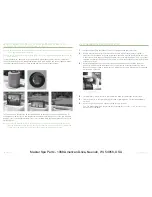
3) Surface/Pad Requirements - When your new spa is filled with water and bathers, it may weigh as
much as several tons. It is imperative that the base beneath the spa can support the actual weight.
The spa must be on a uniformly firm, continuous, and level surface. The recommended foundation
is a concrete pad with a minimum thickness of four (4) inches with steel reinforcement bars crossed
throughout the pad.
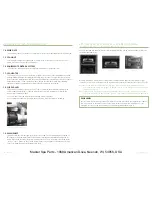
IMPORTANT
When installing your spa indoors, on a wood deck, or balcony, the same load requirements must
be met. Total load may be as much as 90 pounds per square foot. You should speak with a qualified
contractor or your local building department to confirm that your surface is adequate for supporting
a spa. Be sure to locate your spa so that equipment remains above grade and is not subject to
flooding.
The equipment side(s) of the spa must be accessible in the event that future service is needed. Periodical
maintenance checks require entry into the equipment bay. When possible, it is wise planning for the
future to leave access to all sides of the spa in the event your spas plumbing requires maintenance.
Your spa warranty does not cover the cost of providing access for service.
GENERAL CONSIDERATIONS FOR OUTDOOR INSTALLATION
Again, proper planning will increase your total enjoyment factor with your new spa. Listed below are
some additional items to consider when planning your installation.
18
DO NOT DIVE.
• How spa will complement landscaping
and vice versa
• View from inside spa and view of spa from
inside of home
• Exposure to sunlight and shading from trees
• Privacy
• Getting to spa from house and return
• Proximity to dressing rooms and bathrooms
• Storage for spa chemicals
• Local building codes (if applicable)
• Power cable
GENERAL CONSIDERATIONS FOR INDOOR INSTALLATION
Installing your spa indoors creates an entirely different set of considerations. Here again, with proper
planning, no matter what room your spa goes in, it will be your favorite room.
• Work with your Master Spas dealer and
contractor to insure all local building, electrical
and plumbing codes are met
• Plan for a floor drain to drain off excess water
or for draining and cleaning your spa
• A ventilation fan may be necessary due
to high humidity created by your spa
• Finished material in your spa room should also
be capable of withstanding increased humidity
Master Spa Parts - 1068 American Drive, Neenah, WI, 54956, USA


