


20
GX6384
User’s Guide
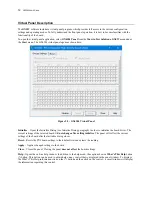
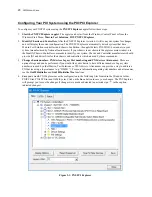
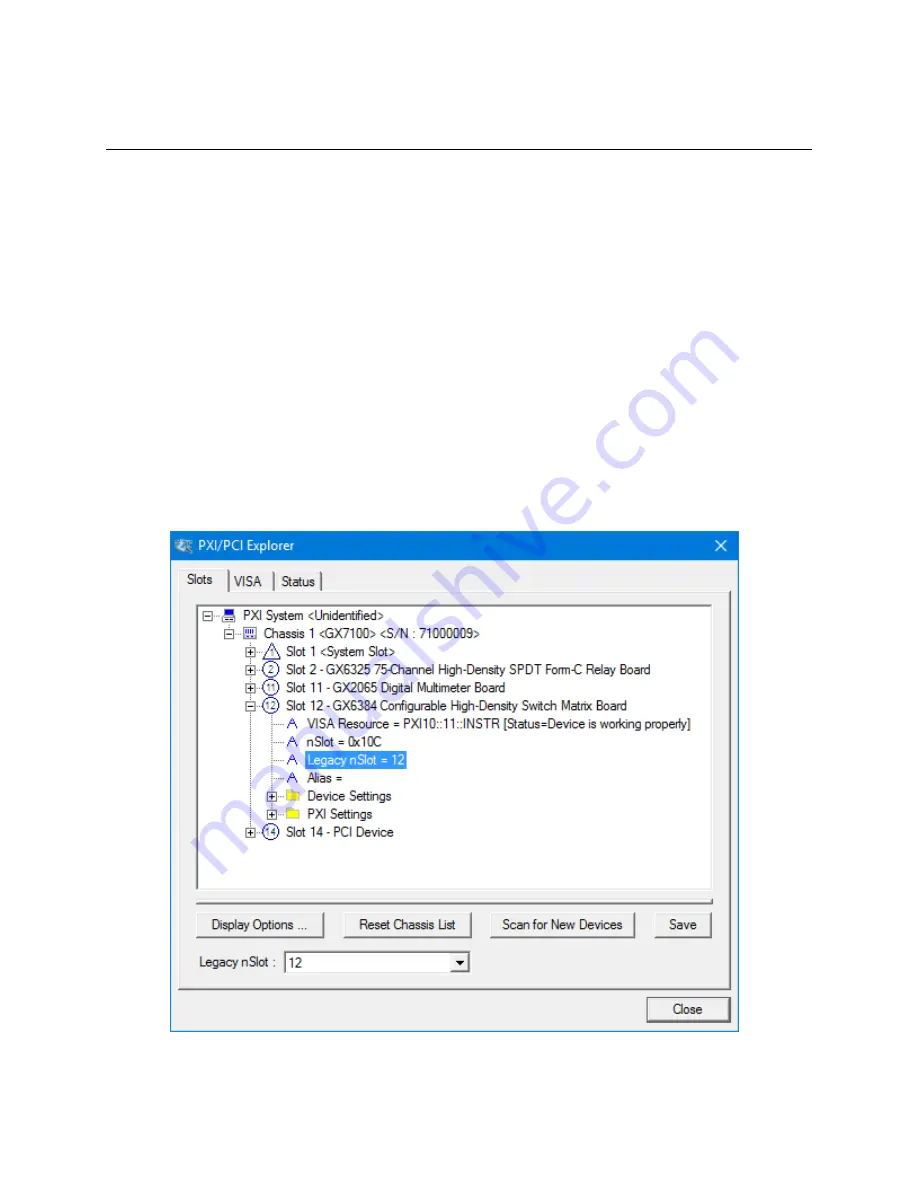
Configuring Your PXI System using the PXI/PCI Explorer
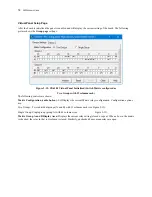
To configure your PXI/PCI system using the
PXI/PCI Explorer
applet follow these steps:
1.
Start the PXI/PCI Explorer applet
. The applet can be start from the Windows Control Panel or from the
Windows Start Menu,
Marvin Test Solutions
,
HW
,
PXI/PCI Explorer
.
2.
Identify Chassis and Controllers
. After the PXI/PCI Explorer is started, it will scan your system for changes
and will display the current configuration. The PXI/PCI Explorer automatically detects systems that have
Marvin Test Solutions controllers and chassis. In addition, the applet detects PXI-MXI-3/4 extenders in your
system (manufactured by National Instruments). If your chassis is not shown in the explorer main window, use
the Identify Chassis/Controller commands to identify your system. Chassis and Controller manufacturers should
provide INI and driver files for their chassis and controllers which are used by these commands.
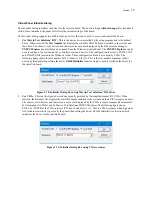
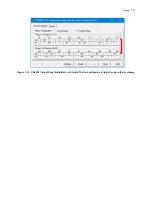
3.
Change chassis numbers, PXI devices Legacy Slot numbering and PXI devices Alias names.
These are
optional steps and can be performed if you would like your chassis to have different numbers. Legacy slots
numbers are used by older Marvin Test Solutions or VISA drivers. Alias names can provide a way to address a
PXI device using a logical name (e.g. “DMM1”). For more information regarding slot numbers and alias names,
see the
Gx6384Initialize
and
Gx6384InitializeVisa
functions.
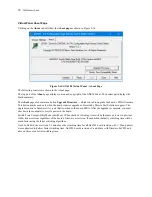
4.
Save your work
. PXI Explorer saves the configuration to the following files located in the Windows folder:
PXISYS.ini, PXIeSYS.ini and GxPxiSys.ini. Click on the
Save
button to save your changes. The PXI/Explorer
will prompt you to save the changes if changes were made or detected (an asterisk sign ‘ *‘ in the caption
indicated changes).
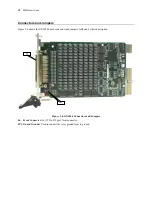
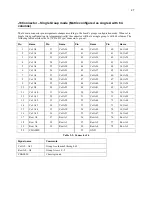
Figure 3-1: PXI/PCI Explorer
Содержание GX6384-1
Страница 2: ......
Страница 7: ...GX6384 User s Guide v Index 55 ...
Страница 8: ...vi GX6384 User s Guide ...
Страница 36: ...28 GX6384 User s Guide ...


