background image


54 


Montage- und Betriebsanleitung 

Installation and Operating Instructions


EN 

N

NOOTTIICCEE


DDaam

maaggee  ccaauusseedd  bbyy  ttooooll  lleennggtthh  aaddjjuussttm

meenntt  w

wiitthh  ccllaam

mppeedd  ttooooll!!  

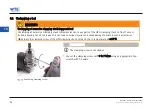
 Do not change the tool length adjustment as long as the tool is clamped. 


IIN

NFFO

ORRM

MAATTIIO

ON

N


The stop screw for radial tool length adjustment is not secured to 
prevent it from falling out. The specified adjusting range cannot be 
exceeded. 


Adjust the HPH clamping chuck to the tool length by turning the screw 
for radial tool length adjustment using an appropriate hex-wrench with 
T-handle. 


IIN

NFFO

ORRM

MAATTIIO

ON

N


The tool length is adjusted by means of a bevel gear unit. Adjust-
ment is performed in several steps: 


Adjust the unclamped tool shank to 00..22  ttoo  00..33  m

mm

m below the 

target length. 


Clamp the tool shank up to the gripping point. 


Adjust the desired tool length. 

The tool shank has to be released again if the tool has to be adjust-
ed again. 


 Adjusting tool length (radial) 


Montage- und Betriebsanleitung 

Installation and Operating Instructions


55 


EN 


W

WAARRN

NIIN

NG

G


IInnssuuffffiicciieenntt  ccllaam

mppiinngg  uupp  ttoo  tthhee  ssttoopp  aanndd  ffaaiilluurree  ttoo  oobbsseerrvvee  tthhee  m

miinniim

muum

m  nnuum

mbbeerr  ooff  ttuurrnnss!!  

Insufficient clamping up to the stop and failure to observe the minimum number of rotations can cause the workpiece to 
fly off like a projectile and cause serious injuries. 

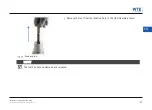
 During clamping, screw in the clamping screw up to the stop, observing the specified minimum number of rotations 

(see 

section 4.4 Technical data). 


IIN

NFFO

ORRM

MAATTIIO

ON

N


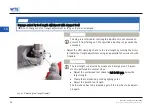
The clamping screw is not captive! 
Ensure that the clamping screw is clean. 


Turn the clamping screw uupp  ttoo  tthhee  ssttoopp using an hex-wrench with T-
handle (see 

Fig. 11: Clamp the tool). 


Set a torque wrench to a tightening torque of 77

  N

Nm

m


Tighten the clamping screw to the stop with the aid of the torque 
wrench. 


RREESSU

ULLTT


The tool is now fully clamped in the HPH clamping chuck and can be used.


 Clamp the tool 


Montage- und Betriebsanleitung

Installation and Operating Instructions

54

EN

Содержание WTE HPH

Страница 1: ...Montage und Betriebsanleitung Installation and Operating Instructions HPH High Performance Holder ...

Страница 2: ......

Страница 3: ...e er rs s 1 11 1 4 4 2 2 B Be es sc ch hr ri if ft tu un ng g d de er r B Be et tä ät ti ig gu un ng gs se el le em me en nt te e 1 13 3 4 4 3 3 B Be en nö öt ti ig gt te e W We er rk kz ze eu ug ge e H Hi il lf fs s u un nd d B Be et tr ri ie eb bs ss st to of ff fe e 1 14 4 4 4 4 4 T Te ec ch hn ni is sc ch he e D Da at te en n 1 14 4 4 4 5 5 P Pr rü üf fu un ng g d de er r S Sp pa an nn nk kr r...

Страница 4: ...e und Betriebsanleitung ist Bestandteil des HPH Spannfutters und muss in unmittelbarer Nähe des HPH Spann futters für das Personal jederzeit zugänglich aufbewahrt werden Grundvoraussetzung für sicheres Arbeiten ist die Einhal tung aller angegebenen Sicherheitshinweise und Handlungsanweisungen in dieser Montage und Betriebsanleitung Darüber hinaus gelten die örtlichen Arbeitsschutzvorschriften und ...

Страница 5: ...n von Werkzeugen auf Maschinen für die Zer spanung in industrieller Anwendung Das HPH Spannfutter ist speziell zum hydraulischen Spannen von rotierenden Werkzeugen auf Werkzeugmaschinen für manuellen und automatischen Werkzeugwechsel konzipiert Das HPH Spannfutter darf nur verwendet werden wenn die Einhaltung aller Angaben dieser Montage und Betriebsan leitung gewährleistet ist Falls auf dem Werkz...

Страница 6: ...Im Falle von eigenmächtigen Veränderungen am HPH Spannfutter oder einer nicht bestimmungsgemäßen Verwendung des HPH Spannfutters erlischt der Gewährleistungsanspruch gegenüber WTE Für Schäden aus einer nicht bestimmungsgemäßen Verwendung haftet der Hersteller nicht 3 3 4 4 G Ge ew wä äh hr rl le ei is st tu un ng g Die Gewährleistung gilt für einen Zeitraum von 2 24 4 M Mo on na at te en n und beg...

Страница 7: ...Mi is ss sa ac ch ht te en n d de er r t te ec ch hn ni is sc ch he en n D Da at te en n u un nd d m ma ax xi im ma al le en n B Be et tr ri ie eb bs sd dr re eh hz za ah hl le en n Das Missachten der technischen Daten und maximalen Betriebsdrehzahlen kann zu schweren Verletzungen des Bedieners und zu Sachschaden führen Die technischen Daten und deren Einhaltung in Kapitel 4 4 beachten Beim Spannv...

Страница 8: ...chweren Verletzungen des Bedieners führen und Maschinen und Zubehör beschädigen Das HPH Spannfutter nicht schrumpfen oder über die angegebene Betriebstemperatur erhitzen W WA AR RN NU UN NG G E En nt ts sp pa an nn ne en n b be ei i z zu u h ho oh he er r S Sp pa an nn nf fu ut tt te er rt te em mp pe er ra at tu ur r Durch das Entspannen bei zu hoher Spannfuttertemperatur können sich Teile des HP...

Страница 9: ...ger auskragender und schwerer Werkzeuge oder beim Einsatz von Verlängerungen kann sich das Werkzeug oder Teile der Werkzeugkombination geschossartig lösen und zu schweren Verletzungen führen Bei langen auskragenden und schweren Werkzeugen oder beim Einsatz von Verlängerungen die Drehzahl gemäß den individuellen Vorgaben und in Verantwortung des Anwenders reduzieren Die individuell festzulegende Ma...

Страница 10: ...B und E DIN 1835 oder Schäfte mit Form HB und HE DIN 6535 kann zu ungenau em Rundlauf und ungenauer Wuchtgüte des Gesamtsystems führen Ausschließlich Schäfte der Form A einsetzen oder das Gesamtsystem feinwuchten H HI IN NW WE EI IS S B Be es sc ch hä äd di ig gu un ng g d de er r v ve er rs si ie eg ge el lt te en n E En nt tl lü üf ft tu un ng gs ss sc ch hr ra au ub be e Bei Beschädigung der ve...

Страница 11: ...raube nur manuell spannen A Al ll lg ge em me ei in ne e I In nf fo or rm ma at ti io on ne en n 4 4 1 1 D Da ar rs st te el ll lu un ng g e ei in ne es s H HP PH H S Sp pa an nn nf fu ut tt te er rs s 4 4 1 1 1 1 H HP PH H S Sp pa an nn nf fu ut tt te er r m mi it t a ax xi ia al le er r W We er rk kz ze eu ug gl lä än ng ge en ne ei in ns st te el ll lu un ng g L Le eg ge en nd de e 1 Aufnahmebo...

Страница 12: ...4 1 1 2 2 H HP PH H S Sp pa an nn nf fu ut tt te er r m mi it t r ra ad di ia al le er r W We er rk kz ze eu ug gl lä än ng ge en ne ei in ns st te el ll lu un ng g L Le eg ge en nd de e 1 Spannschraube 2 Radiale Werkzeuglängeneinstellschraube Einzelne Komponenten des HPH Spannfutters mit radialer Werkzeuglängeneinstellung Montage und Betriebsanleitung Installation and Operating Instructions 12 DE...

Страница 13: ...g gu un ng gs se el le em me en nt te e Beschriftung zur Prüfung der Spannkraft Drei mögliche Positionen auf dem Spannfutter L Le eg ge en nd de e 1 Werkzeug spannen im Uhrzeigersinn 2 Werkzeug lösen gegen Uhrzeigersinn Drehrichtungsangabe zum Lösen und Spannen des Werkzeugs Montage und Betriebsanleitung Installation and Operating Instructions 13 DE ...

Страница 14: ...hnischen Daten und maximalen Betriebsdrehzahlen kann zu schweren Verletzungen des Bedieners und zu Sachschaden führen Die technischen Daten und deren Einhaltung in Kapitel 4 4 beachten Beim Spannvorgang die Spannschraube bis zum Anschlag unter Einhaltung der Mindestumdrehungen eindrehen Die vorgeschriebenen Werte der Mindesteinspanntiefe einhalten Die vorgeschriebenen maximalen Betriebsdrehzahlen ...

Страница 15: ...1 18 83 35 5 Form A B E und nach D DI IN N 6 65 53 35 5 Form HA HB und HE gespannt werden Angabe zur Prüfung der Spannkraft siehe Kapitel 4 2 und 4 5 Richtwerte der maximalen Betriebsdrehzahlen von HPH Spannfutter mit HSK Schnittstelle N Ne en nn ng gr rö öß ße e H HS SK K M Ma ax xi im ma al le e B Be et tr ri ie eb bs sd dr re eh hz za ah hl l m mi in n 1 1 3 32 2 5 50 0 0 00 00 0 4 40 0 4 42 2 ...

Страница 16: ...t tm ma aß ß h h6 6 N Nm m M Ma ax xi im ma al le e B Be et tr ri ie eb bs sd dr re eh hz za ah hl l m mi in n 1 1 l l1 1 1 12 25 5 m mm m l l1 1 1 12 25 5 m mm m 6 6 2 27 7 3 30 0 4 40 0 0 00 00 0 2 20 0 0 00 00 0 8 8 2 27 7 5 50 0 1 10 0 3 31 1 1 10 00 0 1 12 2 3 36 6 1 15 50 0 1 14 4 3 36 6 2 21 10 0 1 16 6 3 39 9 2 28 80 0 1 18 8 3 39 9 3 36 60 0 2 20 0 4 41 1 5 55 50 0 2 20 0 0 00 00 0 1 10 0...

Страница 17: ...n ns st tm ma aß ß h h6 6 N Nm m M Ma ax xi im ma al le e B Be et tr ri ie eb bs sd dr re eh hz za ah hl l m mi in n 1 1 l l1 1 1 12 25 5 m mm m l l1 1 1 12 25 5 m mm m 1 1 4 4 2 27 7 3 30 0 4 40 0 0 00 00 0 2 20 0 0 00 00 0 5 5 1 16 6 2 27 7 5 50 0 3 3 8 8 3 31 1 1 10 00 0 7 7 1 16 6 3 31 1 1 15 50 0 1 1 2 2 3 36 6 2 21 10 0 5 5 8 8 3 39 9 2 28 80 0 3 3 4 4 4 41 1 3 36 60 0 1 1 4 47 7 5 55 50 0 2...

Страница 18: ...s 5 5 1 1 S Sp pa an nn ne en n e ei in ne es s W We er rk kz ze eu ug gs s I IN NF FO OR RM MA AT TI IO ON N Die Betätigung des HPH Spannfutters ist beidseitig möglich Das HPH Spannfutter kann je nach Ausführung ent weder axial oder radial eingestellt werden W WA AR RN NU UN NG G S Sc ch hr ru um mp pf fe en n o od de er r E Er rh hi it tz ze en n d de es s H HP PH H S Sp pa an nn nf fu ut tt te ...

Страница 19: ...lstehender Maschine spannen und entspannen oder das HPH Spannfutter außerhalb der Maschine spannen und entspannen V VO OR RS SI IC CH HT T S Sc ch ha ar rf fe e S Sc ch hn ne ei id dk ka an nt te en n a am m W We er rk kz ze eu ug g Scharfe Schneidkanten können Schnittverletzungen verursachen Beim Werkzeugwechsel Schutzhandschuhe tragen I IN NF FO OR RM MA AT TI IO ON N Nur unbeschädigte und gratf...

Страница 20: ...el 5 1 2 vorgenommen werden 5 5 1 1 1 1 A Ax xi ia al le e W We er rk kz ze eu ug gl lä än ng ge en ne ei in ns st te el ll lu un ng g H HI IN NW WE EI IS S B Be es sc ch hä äd di ig gu un ng g d du ur rc ch h N Ni ic ch ht te ei in nh ha al lt te en n d de er r M Mi in nd de es st te ei in ns sp pa an nn nt ti ie ef fe e b be ei im m H HP PH H S Sp pa an nn nf fu ut tt te er r Die vorgeschriebene...

Страница 21: ... hierzu dre hen Sie die Anschlagschraube zur axialen Werkzeuglängeneinstellung mit Hilfe eines passenden Innensechskantschlüssels mit Quergriff Werkzeuglänge einstellen axial W WA AR RN NU UN NG G U Un nz zu ur re ei ic ch he en nd de es s S Sp pa an nn ne en n b bi is s z zu um m A An ns sc ch hl la ag g u un nd d N Ni ic ch ht te ei in nh ha al lt tu un ng g d de er r M Mi in nd de es st tu um m...

Страница 22: ...tschlüssels auf Anschlag fest E ER RG GE EB BN NI IS S Das Werkzeug ist nun vollständig im HPH Spannfutter gespannt und kann eingesetzt werden 5 5 1 1 2 2 R Ra ad di ia al le e W We er rk kz ze eu ug gl lä än ng ge en ne ei in ns st te el ll lu un ng g H HI IN NW WE EI IS S B Be es sc ch hä äd di ig gu un ng g d du ur rc ch h N Ni ic ch ht te ei in nh ha al lt te en n d de er r M Mi in nd de es st...

Страница 23: ...icht überschritten werden Stellen Sie das HPH Spannfutter auf die Werkzeuglänge ein hierzu dre hen Sie die radiale Werkzeuglängeneinstellschraube mit Hilfe eines pas senden Innensechskantschlüssels mit Quergriff I IN NF FO OR RM MA AT TI IO ON N Die Werkzeuglängeneinstellung erfolgt über ein Kegelradgetriebe Die Einstellung besteht aus mehreren Schritten Den ungespannten Werkzeugschaft 0 0 2 2 b b...

Страница 24: ...der Einhaltung der Mindestumdrehungen eindrehen siehe Kapitel 4 4 Technische Daten I IN NF FO OR RM MA AT TI IO ON N Die Spannschraube ist gegen Herausfallen nicht gesichert Achten Sie darauf dass die Spannschraube schmutzfrei ist Drehen Sie die Spannschraube mit Hilfe eines Innensechskantschlüssels mit Quergriff b bi is s z zu um m A An ns sc ch hl la ag g siehe Abb 11 Werkzeug spannen Stellen Si...

Страница 25: ...e des HPH Spannfutters geschossartig lösen und heißes Öl austreten Dies kann zu schweren Verletzungen führen und Maschinen und Zubehör beschädigen Die Spannschraube des HPH Spannfutters ausschließlich bei Spannfuttertemperatur 3 30 0 C C betätigen I IN NF FO OR RM MA AT TI IO ON N Die Spannschraube ist nicht gegen Herausfallen gesichert Lösen Sie die Spannschraube mit 3 3 b bi is s 7 7 U Um md dr ...

Страница 26: ...ating Instructions DE Entnehmen Sie das Werkzeug aus der Aufnahmebohrung des HPH Spann futters Werkzeug entnehmen E ER RG GE EB BN NI IS S Das Werkzeug ist nun entspannt und gelöst Montage und Betriebsanleitung Installation and Operating Instructions 26 DE ...

Страница 27: ...indestiftbereich abgekühlt ist Das System der Kühlmittelzuführung bei Werkzeughaltern nach DIN ISO 7388 erlaubt es die gängigen Formen der Kühlmit telversorgung in einem maschinenseitigen Grundkörper nach F Fo or rm m A AD D A AF F zu kombinieren Das System ermöglicht die Kombination folgender Ausführungen F Fo or rm m A AD D zentrale Kühlmittelzuführung über durchgehende Bohrung Grundeinstellung ...

Страница 28: ...z zw w J JF F u um ms st te el ll le en n Umstellung von der Grundeinstellung nach Kühlmittelzuführung Form AF W WA AR RN NU UN NG G V Ve er rb br re en nn nu un ng gs sg ge ef fa ah hr r d du ur rc ch h h he ei iß ße en n G Ge ew wi in nd de es st ti if ft tb be er re ei ic ch h Beim Erwärmen und Herausdrehen der Gewindestifte können schwere Verbrennungen und Verletzungen ent stehen Beim Erwärmen...

Страница 29: ...ßlich den Gewindestiftbereich erwärmen Die Erwärmung nur im entspannten Zustand der Hydraulik durchführen Die Umstellung beim WTE Kundenservice veranlassen Stellen Sie die Kühlung des Hydraulikbereichs sicher Erwärmen Sie die Gewindestifte bzw den Gewindestiftbereich bis sich die Gewindestifte herausdrehen lassen W WA AR RN NU UN NG G V Ve er rb br re en nn nu un ng gs sg ge ef fa ah hr r d du ur ...

Страница 30: ...m A AF F J JF F E ER RG GE EB BN NI IS S Die Kühlmittelzuführung ist nach F Fo or rm m A AF F J JF F umgestellt 5 5 3 3 3 3 N Na ac ch h F Fo or rm m A AD D b bz zw w J JD D u um ms st te el ll le en n Umstellung der Kühlmittelzuführung von der Form AF nach Form AD W WA AR RN NU UN NG G V Ve er rb br re en nn nu un ng gs sg ge ef fa ah hr r d du ur rc ch h h he ei iß ße en n G Ge ew wi in nd de es...

Страница 31: ...schlüssel SW 2 5 heraus Entfernen Sie die Klebstoffreste an den Gewindestiften und Gewindeboh rungen Schrauben Sie in den abgekühlten Werkzeughalter an Pos 1 die Gewin destifte mit Schraubensicherung Klebstoff mittelfest ein siehe Abb 16 Kühlmittelzuführung F Fo or rm m A AD D J JD D Entfernen Sie eventuelle Klebstoffreste Kontrollieren Sie nach der Aushärtezeit des Klebers die Gewindestifte auf f...

Страница 32: ...stellung in regelmäßigen Abständen zu reinigen und zu schmieren Reparaturen dürfen ausschließlich im Hause WTE durchgeführt werden Hinweise für das Reinigen in einer Waschanlage Das HPH Spannfutter ausschließlich im entspannten Zustand reinigen Die Spannschraube nur bei einer Futtertemperatur 3 30 0 C C betätigen Die Waschtemperatur darf höchstens 5 50 0 C C betragen Nach der Reinigung ist die Spa...

Страница 33: ......

Страница 34: ...an n H HP PH H c cl la am mp pi in ng g c ch hu uc ck k 4 42 2 4 4 2 2 M Ma ar rk ki in ng g o of f t th he e a ac ct tu ua at ti in ng g e el le em me en nt ts s 4 44 4 4 4 3 3 T To oo ol ls s a an nd d m ma at te er ri ia al ls s r re eq qu ui ir re ed d 4 45 5 4 4 4 4 T Te ec ch hn ni ic ca al l d da at ta a 4 45 5 4 4 5 5 C Ch he ec ck ki in ng g t th he e c cl la am mp pi in ng g f fo or rc c...

Страница 35: ...an integral part of the HPH clamping chuck and must be kept in the imme diate vicinity of the HPH clamping chuck where it is accessible to the personnel at all times A basic precondition for safe working is compliance with all the safety precautions and instructions for working given in these installation and operating instructions The local safety at work regulations and the general safety regula...

Страница 36: ... for holding and clamping tools on cutting machines in industrial appli cations The HPH clamping chuck has been specially designed for hydraulic clamping of rotating tools on machine tools for man ual and automatic tool changing The HPH clamping chuck may only be used when observance of all the instructions given in this manual is assured Should a maximum operating speed exist for the tool it is n...

Страница 37: ...lamping chuck or incorrect use of the HPH clamping chuck will void all and any warranty claims against WTE The manufacturer assumes no liability for accidents or damage resulting from use for other than the correct use 3 3 4 4 W Wa ar rr ra an nt ty y The warranty period is 2 24 4 m mo on nt th hs s from the date of delivery ex works on condition of use for the correct use and observance of the co...

Страница 38: ...oid hazards W WA AR RN NI IN NG G F Fa ai il lu ur re e t to o o ob bs se er rv ve e t th he e t te ec ch hn ni ic ca al l d da at ta a a an nd d m ma ax x o op pe er ra at ti in ng g s sp pe ee ed ds s Failure to observe the technical data can result in serious injury to the operator and in machine damage Observe the technical data given in section 4 4 During clamping screw in the clamping screw ...

Страница 39: ...ause damage to machines and accessories Do not shrink the HPH clamping chuck or heat it above the specified operating temperature W WA AR RN NI IN NG G U Un nc cl la am mp pi in ng g a at t e ex xc ce es ss si iv ve e c cl la am mp pi in ng g c ch hu uc ck k t te em mp pe er ra at tu ur re es s Unclamping at excessive clamping chuck temperatures can cause parts of the HPH clamping chuck to fly off...

Страница 40: ...ing and heavy tools or with extensions can cause the tool or parts of the tool combination to fly off like a projectile and cause serious injuries By long protruding and heavy tools or when an extension is used the max operating speed is to be reduced signifi cantly in accordance with the individual factures Observe also the individually specified maximum length and balancing value of the whole sy...

Страница 41: ...d E DIN 1835 or shanks with HB and HE DIN 6535 can result in radial run out errors and inaccurate balancing value of the whole system Use only shanks with Form A or fine balance the whole system N NO OT TI IC CE E D Da am ma ag ge e t to o t th he e s se ea al le ed d b bl le ee ed de er r s sc cr re ew w In the event of damage to the sealed bleeder screw the HPH clamping chuck is no longer functi...

Страница 42: ...crew only manually 4 4 G Ge en ne er ra al l i in nf fo or rm ma at ti io on n 4 4 1 1 I Il ll lu us st tr ra at ti io on n o of f a an n H HP PH H c cl la am mp pi in ng g c ch hu uc ck k 4 4 1 1 1 1 H HP PH H c cl la am mp pi in ng g c ch hu uc ck k w wi it th h a ax xi ia al l t to oo ol l l le en ng gt th h a ad dj ju us st tm me en nt t K Ke ey y 1 Location bore 2 Sealed bleeder screw 3 Clamp...

Страница 43: ... 4 1 1 2 2 H HP PH H c cl la am mp pi in ng g c ch hu uc ck k w wi it th h r ra ad di ia al l t to oo ol l l le en ng gt th h a ad dj ju us st tm me en nt t K Ke ey y 1 Clamping screw 2 Radial tool length setting screw Individual components of the HPH clamping chuck with radial tool length adjustment Montage und Betriebsanleitung Installation and Operating Instructions 43 EN ...

Страница 44: ...r Kühlmittelzuführung von der Form AF nach Form AD W WA AR RN NU UN NG G V Ve er rb br re en nn nu un ng gs sg ge ef fa ah hr r d du ur rc ch h h he ei iß ße en n G Ge ew wi in nd de es st ti if ft tb be er re ei ic ch h Beim Erwärmen und Herausdrehen der Gewindestifte können schwere Verbrennungen und Verletzungen ent stehen Beim Erwärmen und Herausdrehen der Gewindestifte immer ISO Schutzhandschu...

Страница 45: ...nical data can result in serious injury to the operator and in machine damage Observe the technical data given in section 4 4 During clamping screw in the clamping screw up to the stop observing the specified minimum number of rotations Observe the prescribed values for the minimum clamping depth Observe the prescribed operating speed limits for the machine side connection and the selected tool Ob...

Страница 46: ...1 18 83 35 5 forms A B E and according to D DI IN N 6 65 53 35 5 forms HA HB and HE can be clamped Specification for checking of the clamping force see sections 4 2 and 4 5 Indicative values for operating speed limits for HPH clamping chucks with HSK connection N No om mi in na al l s si iz ze e H HS SK K M Ma ax x o op pe er ra at ti in ng g s sp pe ee ed d r rp pm m 3 32 2 5 50 0 0 00 00 0 4 40 ...

Страница 47: ...h6 6 m mi in ni im mu um m s si iz ze e N Nm m M Ma ax x o op pe er ra at ti in ng g s sp pe ee ed d r rp pm m l l1 1 1 12 25 5 m mm m l l1 1 1 12 25 5 m mm m 6 6 2 27 7 3 30 0 4 40 0 0 00 00 0 2 20 0 0 00 00 0 8 8 2 27 7 5 50 0 1 10 0 3 31 1 1 10 00 0 1 12 2 3 36 6 1 15 50 0 1 14 4 3 36 6 2 21 10 0 1 16 6 3 39 9 2 28 80 0 1 18 8 3 39 9 3 36 60 0 2 20 0 4 41 1 5 55 50 0 2 20 0 0 00 00 0 1 10 0 0 0...

Страница 48: ...k k h h6 6 m mi in ni im mu um m s si iz ze e N Nm m M Ma ax x o op pe er ra at ti in ng g s sp pe ee ed d r rp pm m l l1 1 1 12 25 5 m mm m l l1 1 1 12 25 5 m mm m 1 1 4 4 2 27 7 3 30 0 4 40 0 0 00 00 0 2 20 0 0 00 00 0 5 5 1 16 6 2 27 7 5 50 0 3 3 8 8 3 31 1 1 10 00 0 7 7 1 16 6 3 31 1 1 15 50 0 1 1 2 2 3 36 6 2 21 10 0 5 5 8 8 3 39 9 2 28 80 0 3 3 4 4 4 41 1 3 36 60 0 1 1 4 47 7 5 55 50 0 2 20 ...

Страница 49: ...c cl la am mp pi in ng g c ch hu uc ck k 5 5 1 1 C Cl la am mp pi in ng g a a t to oo ol l I IN NF FO OR RM MA AT TI IO ON N Actuation of the HPH clamping chuck is possible from both sides The HPH clamping chuck can be adjusted either axially or radially depending on the design W WA AR RN NI IN NG G S Sh hr ri in nk ki in ng g o or r h he ea at ti in ng g t th he e H HP PH H c cl la am mp pi in ng...

Страница 50: ...clamp the HPH clamping chuck only with the machine at a standstill or clamp and unclamp the HPH clamping chuck off the machine C CA AU UT TI IO ON N S Sh ha ar rp p c cu ut tt ti in ng g e ed dg ge es s o on n t th he e t to oo ol l Sharp cutting edges may cause cutting injuries Wear protective gloves when changing tools I IN NF FO OR RM MA AT TI IO ON N Clamp only undamaged and burr free tools Cl...

Страница 51: ...y see section 5 1 2 5 5 1 1 1 1 A Ax xi ia al l t to oo ol l l le en ng gt th h a ad dj ju us st tm me en nt t N NO OT TI IC CE E D Da am ma ag ge e f fr ro om m f fa ai il lu ur re e t to o o ob bs se er rv ve e t th he e m mi in ni im mu um m c cl la am mp pi in ng g d de ep pt th h i in n t th he e H HP PH H c cl la am mp pi in ng g c ch hu uc ck k Observe the prescribed values for the minimum ...

Страница 52: ...top screw for the axial tool length adjustment using an appropriate hex wrench with T handle Adjusting tool length axial W WA AR RN NI IN NG G I In ns su uf ff fi ic ci ie en nt t c cl la am mp pi in ng g u up p t to o t th he e s st to op p a an nd d f fa ai il lu ur re e t to o o ob bs se er rv ve e t th he e m mi in ni im mu um m n nu um mb be er r o of f t tu ur rn ns s Insufficient clamping u...

Страница 53: ...R RE ES SU UL LT T The tool is now fully clamped in the HPH clamping chuck and can be used 5 5 1 1 2 2 R Ra ad di ia al l t to oo ol l l le en ng gt th h a ad dj ju us st tm me en nt t N NO OT TI IC CE E D Da am ma ag ge e f fr ro om m f fa ai il lu ur re e t to o o ob bs se er rv ve e t th he e m mi in ni im mu um m c cl la am mp pi in ng g d de ep pt th h i in n t th he e H HP PH H c cl la am mp...

Страница 54: ...adjusting range cannot be exceeded Adjust the HPH clamping chuck to the tool length by turning the screw for radial tool length adjustment using an appropriate hex wrench with T handle I IN NF FO OR RM MA AT TI IO ON N The tool length is adjusted by means of a bevel gear unit Adjust ment is performed in several steps Adjust the unclamped tool shank to 0 0 2 2 t to o 0 0 3 3 m mm m below the target...

Страница 55: ...us injuries During clamping screw in the clamping screw up to the stop observing the specified minimum number of rotations see section 4 4 Technical data I IN NF FO OR RM MA AT TI IO ON N The clamping screw is not captive Ensure that the clamping screw is clean Turn the clamping screw u up p t to o t th he e s st to op p using an hex wrench with T handle see Fig 11 Clamp the tool Set a torque wren...

Страница 56: ...res can cause parts of the HPH clamping chuck to fly off uncon trolled allowing hot oil to escape This can lead to serious injuries and cause damage to machines and accessories Actuate the clamping screw of the HPH clamping chuck only at a chuck temperature of 3 30 0 C C I IN NF FO OR RM MA AT TI IO ON N The clamping screw is not captive Loosen the clamping screw with 3 3 t to o 7 7 t tu ur rn ns ...

Страница 57: ...nd Operating Instructions 57 EN Remove the tool from the location bore of the HPH clamping chuck Removing tool R RE ES SU UL LT T The tool has been unclamped and released Montage und Betriebsanleitung Installation and Operating Instructions 57 EN ...

Страница 58: ...a has cooled down The system for the coolant supply on tool holders to DIN ISO 7388 makes it possible to combine the common forms of cool ant supply into one machine side tool body of F Fo or rm m A AD D A AF F The system makes it possible to combine the following designs F Fo or rm m A AD D Central coolant supply via through bore normal setting F Fo or rm m A AF F Central coolant supply via colla...

Страница 59: ... an ng ge e o ov ve er r t to o F Fo or rm m A AF F o or r J JF F Change over of the normal setting to coolant supply Form AF W WA AR RN NI IN NG G R Ri is sk k o of f b bu ur rn ns s f fr ro om m h ho ot t t th hr re ea ad de ed d p pi in n a ar re ea a Serious burns and injuries can occur during heating and unscrewing the threaded pins Always wear ISO protective gloves when heating and unscrewin...

Страница 60: ...erious injuries to the operator Heat only the area of the threaded pin Carry out heating only with the hydraulics in the unclamped position Have the modification carried out by WTE After sales Service Ensure that the area of the hydraulics is cooled adequately Heat the threaded pins or the threaded pin area until the threaded pins can be unscrewed W WA AR RN NI IN NG G R Ri is sk k o of f b bu ur ...

Страница 61: ...ply F Fo or rm m A AF F J JF F R RE ES SU UL LT T Coolant supply is changed over to F Fo or rm m A AF F J JF F 5 5 3 3 3 3 C Ch ha an ng ge e o ov ve er r t to o F Fo or rm m A AD D o or r J JD D Change over of the coolant supply from Form AF to Form AD W WA AR RN NI IN NG G R Ri is sk k o of f b bu ur rn ns s f fr ro om m h ho ot t t th hr re ea ad de ed d p pi in n a ar re ea a Serious burns and...

Страница 62: ... from the threaded pins and threaded bores Screw the threaded pins with medium strength thread locking compound adhesive into the cooled tool holder at Pos 1 see Fig 16 Coolant Supply F Fo or rm m A AD D J JD D Remove any adhesive residues After the curing time of the adhesive check the threaded pins for secure fitting and rebalance the tool holder if necessary Use a pull stud with coolant bore fo...

Страница 63: ...nd lubricated at regular in tervals Repairs must only be performed at WTE Instructions for cleaning in a washing facility Clean the HPH clamping chuck only in the unclamped position Only actuate the clamping screw at a chuck temperature of 3 30 0 C C The washing temperature must not exceed 5 50 0 C C After cleaning regrease the clamping screw By subsequent storage attention is to be paid to corros...

Страница 64: ...erarbeitet werden No part of this manual is allowed to be copied or processed using electronic systems in any form print photocopy microfilm or any other method without the written approval of WTE Präzisionstechnik GmbH Ehrenfriedersdorf Germany Alle in diesem Handbuch genannten Bezeichnungen von Erzeugnissen sind Warenzeichen der jeweiligen Firmen All the product names stated in this manual are t...

Отзывы: