42
Montage- und Betriebsanleitung
Installation and Operating Instructions
EN
N
NOOTTIICCEE
W
Weeaarr dduuee ttoo uussee ooff aa ppoow
weerr ssccrreew
wddrriivveerr ffoorr ttiigghhtteenniinngg tthhee ccllaam
mppiinngg ssccrreew
w!!
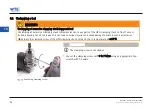
Use of a power screwdriver for tightening the clamping screw will result in increased wear of the clamping set.
Tighten the clamping screw only manually.
44
G
Geenneerraall iinnffoorrm
maattiioonn
44..11
IIlllluussttrraattiioonn ooff aann H
HPPH
H ccllaam
mppiinngg cchhuucckk
44..11..11
H
HPPH
H ccllaam
mppiinngg cchhuucckk w
wiitthh aaxxiiaall ttooooll lleennggtthh aaddjjuussttm
meenntt
KKeeyy
1
|
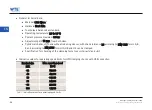
Location bore
2 |
Sealed bleeder screw
3 |
Clamping screw
4 |
Taper of the HPH clamping chuck
l
1
|
Projection length
Individual components of the HPH clamping chuck with
axial tool length adjustment
Montage- und Betriebsanleitung
Installation and Operating Instructions
43
EN
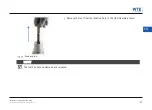
KKeeyy
1 |
Stop screw for axial tool length adjustment
View of the HPH clamping chuck from below
44..11..22
H
HPPH
H ccllaam
mppiinngg cchhuucckk w
wiitthh rraaddiiaall ttooooll lleennggtthh aaddjjuussttm
meenntt..
KKeeyy
1
|
Clamping screw
2 |
Radial tool length setting screw
Individual components of the HPH clamping chuck with
radial tool length adjustment
Montage- und Betriebsanleitung
Installation and Operating Instructions
43
EN
Содержание WTE HPH
Страница 1: ...Montage und Betriebsanleitung Installation and Operating Instructions HPH High Performance Holder ...
Страница 2: ......
Страница 33: ......


