15
INSTALLING THE PVR (HARD DISK DRIVE) For models with PVR ready
We recommend Samsung, IBM and Fujitsu type Hard Disks. Other Hard Disks may cause interference with
the receivers tuning function.
FITTING THE HARD DISK DRIVE
WARNING!
DO NOT FIT THE HARD DISK WHILST THE RECEIVER IS POWERED ON. DISCONNECT FROM
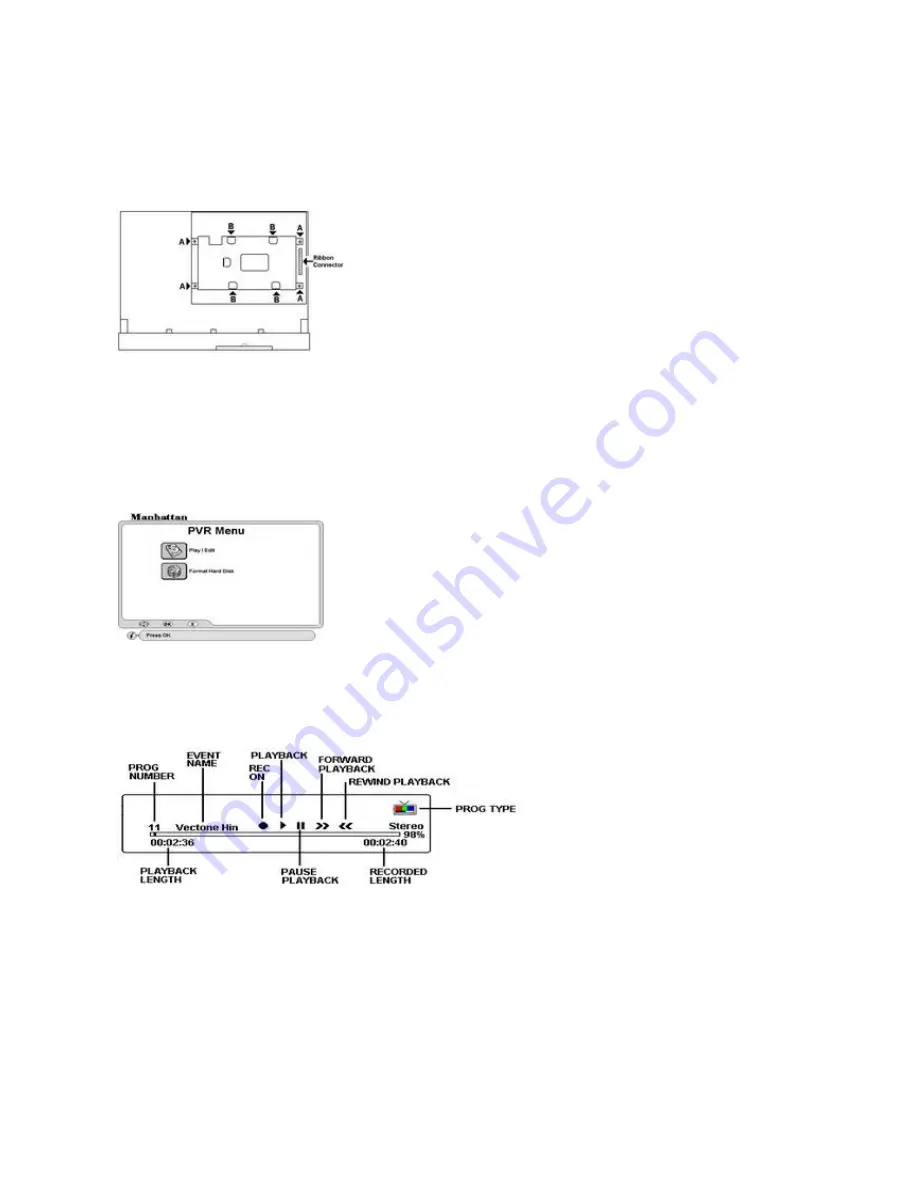
MAINS POWER PRIOR TO FITTING. For fitting see diagram below
Re fit the hard disk bracket using screws
A.
Check that the connecting cables are not trapped. Please set
jumper of the hard disk to Master.
Connect the ribbon (Data) and the supply connectors to the hard disk.
Finally re fit the top cover.
FORMATTING THE HARD DISK FOR FIRST TIME USE
Connect power to the receiver and allow 30 seconds for the Hard Disk to initialize. Then press PVR key and below menu
will appear.
TO RECORD PROGRAMS
To start recording, press REC key. The record banner will appear as below. Please note that the picture will appear
paused for a few seconds initially although there will be no pause in the actual recording. During recording you are
actually watching the playback and therefore a pause is noticed before it begins. The recording will remain on until
you press STOP key.
TO WATCH A DIFFERENT FTA (free to air) CHANNEL WHILST RECORDING ANOTHER
You can watch a different Free To Air channel, but within the same TP whilst recording. Press OK key for channel list and
select a free to air channel within the same TP. To resume to the channel being recorded, press PLAY key.
NOTE: If you are recording a scrambled channel with the aid of a CAM then it is not possible to view another
scrambled channel though from the same TP. This is because the CAM cannot decode two channels at the
same time.
TO RECORD TIMED PROGRAMS
Follow steps described in Event Timer. The recording will start automatically at the time when the events come on.
Format Hard Disk: After fitting Hard Disk or to erase previously recorded
events, press OK on this menu. A message Formatting will erase all data will
come up. To format press OK.
Play / Edit: When you want to playback or edit the events recorded, press OK
on this menu and follow steps in PLAYBACK AND EDITTING section below.
Remove the top cover by undoing three screws. Two located, on the
left and right sides and one at the top centre at the back.
Carefully remove the four screws marked
A
located on the hard disk
bracket.
Remove the bracket and fit the hard disk to the bracket with screws
B
supplied. Ensure that the connectors of the hard disk are nearer
the ribbon connector.


