


27
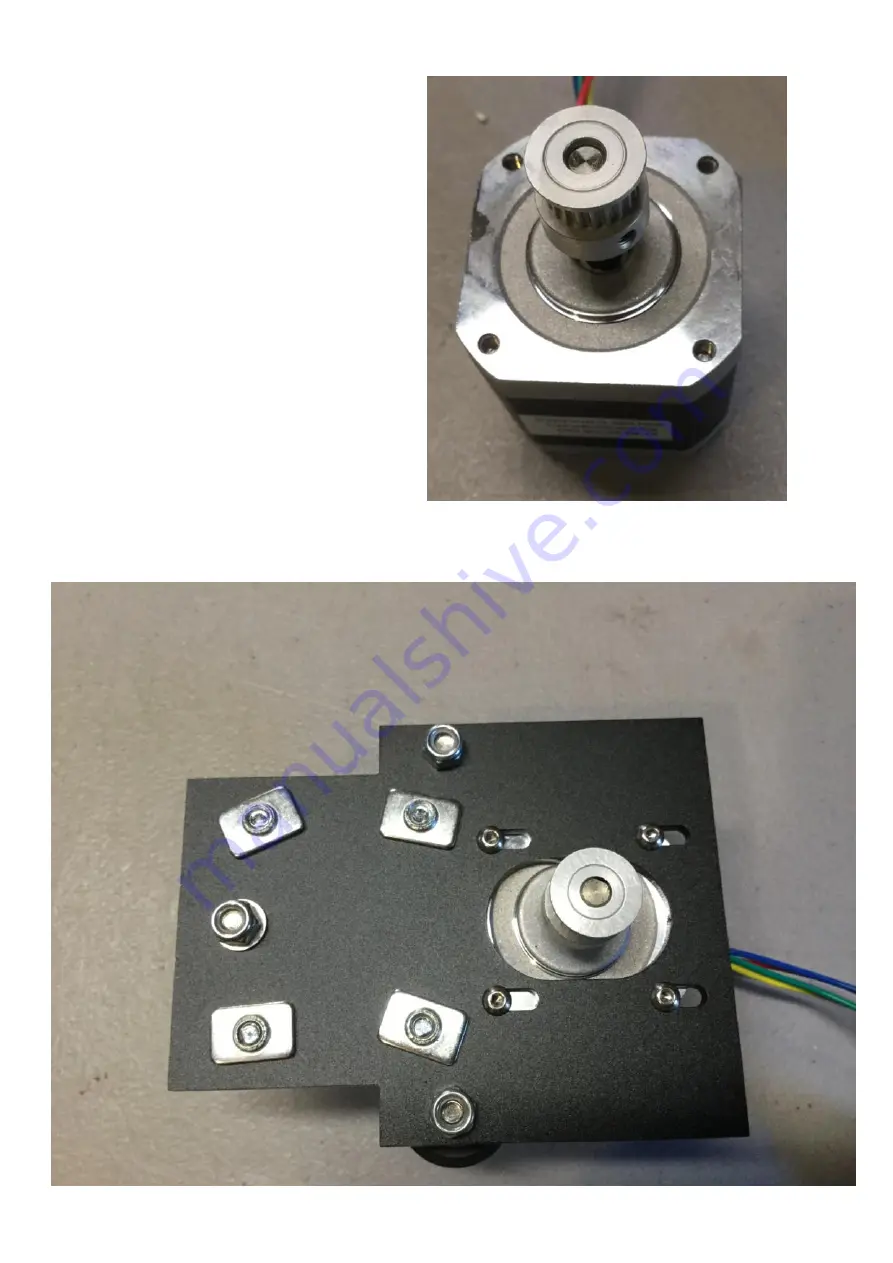
Install the GT2 Gear onto the Motor
using the set screw, make sure the set
screw hits the flat spot of the motor
shaft.
Flip the metal piece back over, install
the motor using the 4 M3x6mm bolts,
but leave the bolts some what loose at
this time. Have your motor wires come out of the side of the X Motor Bracket.
Содержание Pegasus 12
Страница 1: ...Updated 6 19 17 ...
Страница 5: ...5 ...
Страница 6: ...6 ...
Страница 19: ...19 Installl the two Z motors into the Z mounts using 4 M3x6mm bolts on each motor ...
Страница 41: ...41 Belts 4 x Zip Ties 2 x M3x25mm Bolts 2 x M3 Nylon Lock Nut 1 x GT2 Belt ...
Страница 47: ...47 For the Endstops follow the endstop guide by clicking on the Picture below ...
Страница 48: ...48 This page intentionally left blank ...
Страница 49: ...49 Optional LCD 1 x Wood LCD Mount 4 x M3x25mm Bolt 4 x M3 Lock nuts 1 x LCD Interface ...
Страница 52: ...52 Then install the LCD using the 3 bolts ...
Страница 54: ...54 Extruder Click on the image of the Extruder you have to open the build guide for that Extruder ...
Страница 63: ...63 Next plug in the Z Motors Now plug in the Y Motor ...
Страница 69: ...This page intentionally left blank ...
Страница 70: ...This page intentionally left blank ...
Страница 71: ...This page intentionally left blank ...
Страница 72: ......