41
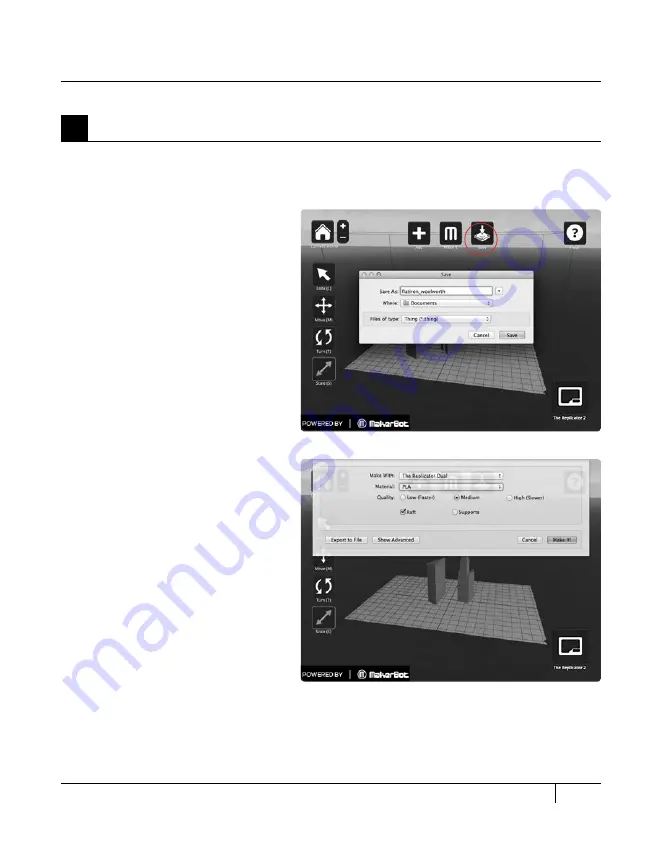
5a. Select the Save button. Specify a name and location for the file. For example, you could
name the file flatiron_woolworth.thing. Select the Make It button. The Make dialog appears:
5
Save and Make Your file
[1] mAKE wiTh: Select MakerBot
Replicator 2, if not already selected.
[2] QUALiTy: Specify the quality
of your object. Higher quality
means lower layer height numbers.
[3] rAFT: Select this checkbox if
you want your object to sit on a raft.
Rafts provide a base for supports
and help your object stick to the
build plate if the build plate is not
exactly level. You can easily remove
rafts after making the object.
[4] SUPPOrTS: Select this
checkbox if you want your object
to include removable support
structures for overhanging
elements.
[5] ExPOrT TO FiLE:
MakerWare sends your model
to the Replicator 2 as a set of
instructions in the S3G format.
Export to file allows you to save
the S3G file or GCode file [an
intermediate format] to your
computer or an SD card.
[6] CANCEL: Cancel this process.
[7] mAKE iT!: Send the file to the
Replicator 2 for making.
USiNg mAKErBOT mAKErwArE
CONTINUED
D
MAkING AN OBJECT WITH MAkERBOT MAkERWARE
Содержание Replicator 2
Страница 1: ...USER MANUAL SINGLE EXTRUSION ...
Страница 2: ......
Страница 4: ...Welcome Let s get started A ...
Страница 10: ...Setting Up Your MakerBot Replicator 2 Desktop 3D Printer B ...
Страница 20: ...Startup Process Leveling Loading Testing C ...
Страница 34: ...Making an Object with MakerBot MakerWare D ...
Страница 35: ...35 How to make an object using a computer and MakerBot MakerWare D Making an Object with MakerBot MakerWare ...
Страница 43: ...NOTES ...
Страница 44: ...E Troubleshooting Diagnostics and Maintenance ...
Страница 60: ...MakerBot 87 3rd Avenue Brooklyn NY USA support makerbot com makerbot com ...


