background image

26

LEvELiNg ThE BUiLD PLATFOrm

   CONTINUED

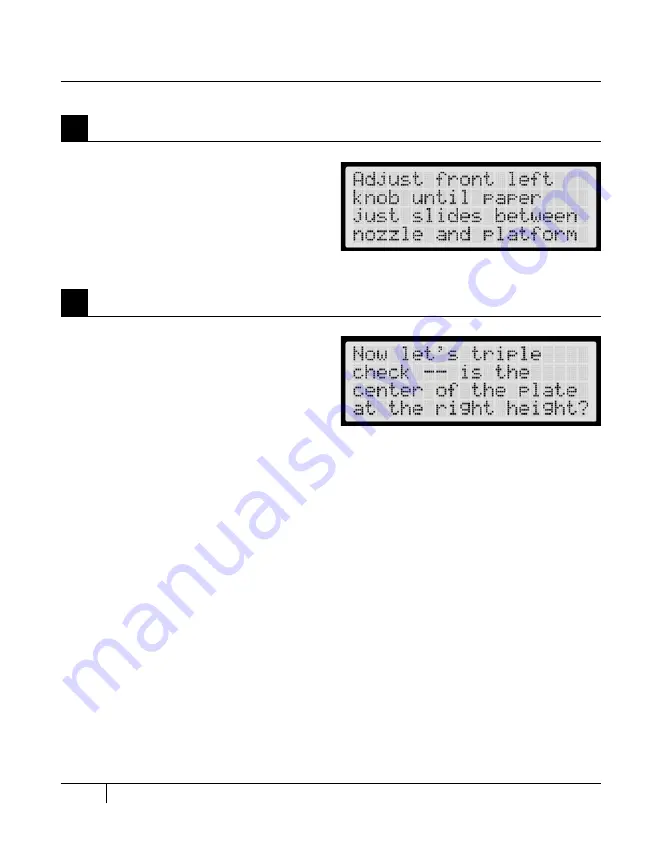
When directed, adjust the front left knob  
until the Support card just slides between 
nozzle and build plate.

7

Adjust the Left Knob Again

C

  STARTUP PROCESS: LEVELING, LOADING, TESTING

When directed, check that the Support card 
just slides between the nozzle and build plate 
when the nozzle is at the center of the plate.

NOTE: If at any time you have problems or if you 
need to level your build platform again, you can 
use the arrow buttons to navigate through the 
LCD menus until you find the Utilities menu. Press 
the M button to select this menu. Use the arrow 
buttons to navigate through the menu options until 
you find Level Build Plate. Press the M button to 
select this menu option.

8

Confirm Your Adjustment

Содержание Replicator 2

Страница 1: ...USER MANUAL SINGLE EXTRUSION ...

Страница 2: ......

Страница 3: ...pply and Powering On 19 C STARTUP PROCESS Leveling loading testing 20 Leveling the Build Platform 22 Loading MakerBot PLA Filament 27 Making a Test Object from the SD Card 32 D Making an Object with MakerBot MakerWare 34 E Troubleshooting Diagnostics and Maintenance 44 Troubleshooting 46 Diagnostics 47 LCD Panel Top Level Menu 47 LCD Panel Utilities Menu 48 LCD Panel Info and Settings Menu 49 Main...

Страница 4: ...Welcome Let s get started A ...

Страница 5: ...f in the right direction Even if you are familiar with earlier MakerBot machines it is essential that you read through this guide as there are several important and exciting updates with the MakerBot Replicator 2 Desktop 3D Printer In chapters A and B you will learn the basics of the MakerBot Replicator 2 Desktop 3D Printer how to unbox safely and how to get set up Chapters C E will take you throu...

Страница 6: ...dows 7 Linux Ubuntu 12 04 Mac OS X 10 6 10 7 10 8 Physical Dimensions Without Spool 19 1x12 8x14 7in 49x32x38cm WithSpool 19 1x16 5x14 7in 49x42x38cm Shipping Box 23 x 21 5 x 17 in 59 x 55 x 43 cm Weight 25 4 lbs 11 5 kg Shipping Weight 32 0 lbs 14 5 kg TEMPERATURE Ambient Operating 15 32 C 60 90 F Temperature StorageTemperature 0 32 C 32 90 F Electrical AC Input 100 240V 2amps 50 60Hz PowerRequir...

Страница 7: ...ent Your 3D design files are translated into instructions for the MakerBot Replicator 2 and sent to the machine via USB cable or SD Card Then the MakerBot Replicator 2 heats the MakerBot PLA Filament and squeezes it out through an extruder to make a solid object layer by layer This method is called Fused Filament Fabrication FFF HOW DOES IT WORK ...

Страница 8: ...extruder GCode A computer language used to describe the toolpath your MakerBot Replicator 2 will use to build an object GCode is converted to S3G before being sent to your machine Heat sink An active heat sink that dissipates heat from the cartridge heater It looks like an aluminum plate with fins LCD control panel The liquid crystal display in the front lower right corner of the MakerBot Replicat...

Страница 9: ... 2 Spacers Plastic pieces that keep the extruder fan and heat sink secure and in place Spool holder A part that attaches to the back of the MakerBot Replicator 2 and holds the spool of MakerBot PLA Filament The spool holder ensures that the MakerBot PLA Filament is fed evenly to the MakerBot Replicator 2 thing A file format used by MakerWare that allows you to print multiple 3D models on the same ...

Страница 10: ...Setting Up Your MakerBot Replicator 2 Desktop 3D Printer B ...

Страница 11: ...d very carefully at the MakerBot BotCave We hope you ll take your time and be just as careful unpacking it and getting it set up Do not force or tear anything during unpacking and setup This may damage the MakerBot Replicator 2 Desktop 3D Printer B Setting up Your MakerBot Replicator 2 Desktop 3D Printer ...

Страница 12: ...ent guide tube Power supply and cable Hex wrenches PTFE based grease Spool holder USB A to USB B cable Support card Blue tape sheets SD card 1 1 1 1 1 4 1 1 3 WHAT S IN THE BOX MakerBot PLA Filament 1lb Spool 1 Build plate 1 More options available at makerbot com store ...

Страница 13: ...esktop 3D Printer MAKERBOT REPLICATOR 2 DIAGRAM 8 10 2 11 3 7 5 6 4 9 1 1 Gantry System 2 LCD Panel 3 Key Pad 4 Threaded z axis Rod 5 Build Plate 6 Build Platform 7 Filament Guide Tube 8 Extruder Cable 9 Extruder 10 Filament Spool 11 Spool Holder ...

Страница 14: ...fully lift the reusable bag containing the MakerBot Replicator 2 and gently place the bag on the ground 2b Remove the cardboard inserts from the reusable bag Grasp the MakerBot Replicator 2 by the outside of the frame lift it out of the bag and place it on a stable work surface 1 Opening the Box 1 2 Removing MakerBot Replicator 2 Desktop 3D Printer from the Box B Setting up Your MakerBot Replicato...

Страница 15: ...far up as it will go 4b Remove the remaining cardboard inserts from the MakerBot Replicator 2 NOTE Your MakerBot Replicator 2 Desktop 3D Printer should now be fully unpacked We recommend that you keep the box cardboard sleeves and cardboard inserts in case you need to transport your Replicator 2 in the future 3 Removing the Accessory Sleeve from the Box 1 4 Raising the Build Platform B Setting up ...

Страница 16: ...d plate between the two pegs at the front of the build platform 5b To remove the build plate push the small flexible tab on the build plate toward the back of the build platform to release the tab from the pegs Lift the build plate from the build platform 6a Use scissors to cut the three bands that hold the extruder in place Discard the bands NOTE Operate scissors with care 5 Installing the Build ...

Страница 17: ...en viewed from the back on the back of the MakerBot Replicator 2 Make sure that the end of the filament guide tube is flush with the bottom of the guide tube holder The filament guide tube should not hang down past the bottom of the guide tube holder 8a Locate the spool holder Install the spool holder on the left side of the MakerBot Replicator 2 when viewed from the back Tilt and fit the spool ho...

Страница 18: ...e box containing the MakerBot PLA Filament Remove the spool from its bag 9b Fit the spool onto the spool holder Ensure that the MakerBot PLA Filament unwinds counterclockwise when viewed from the back Squeeze the spool holder and push the spool on until it locks 9c Spin the spool so that the end of the MakerBot PLA Filament will unwind from the bottom of the spool 9d Do not plug the AC power cord ...

Страница 19: ...POWERING ON 12a Plug the AC power cord into an electrical outlet 12b Turn the power ON 12c The MakerBot Replicator 2 will display welcome text on the LCD panel This is the beginning of the startup script that will guide you through initial calibration and your first build NOTE The socket outlet shall be installed near the equipment and shall be easily accessible 12 Power On the MakerBot Replicator...

Страница 20: ...Startup Process Leveling Loading Testing C ...

Страница 21: ...under Utilities When you see Run Startup Script select the M button in the center of the keypad to select this option You can return to the Startup Script at any time by navigating through the menus on the LCD panel Follow the instructions in the LCD panel to set up your MakerBot Replicator 2 for the first time If you have problems or questions refer to the troubleshooting chapter in this manual o...

Страница 22: ... the build plate should be about the thickness of the MakerBot Support card included with your MakerBot Replicator 2 in the accessory sleeve To level the build platform you must adjust the three knobs under the build platform These three knobs lower and raise the build platform Tightening the knobs turning them to the right moves the build platform away from the extruder nozzle Loosening the knobs...

Страница 23: ... knobs until you can pass the MakerBot Support card between the plate and the extruder nozzle You should feel some friction on the MakerBot support card but still be able to easily pass the card between the plate and the extruder nozzle without tearing or damaging the card LEVELING THE BUILD PLATFORM continued What You Will Do C Startup PROCESS leveling loading testing Leveling Knobs Support Card ...

Страница 24: ...e Some Room Between the Build Plate and the Nozzle When directed adjust the front right knob until the Support card just slides between nozzle and build plate 3 Adjust the Right Knob When directed adjust the rear knob until the Support card just slides between the nozzle and build plate 2 Adjust the Rear Knob C Startup PROCESS leveling loading testing ...

Страница 25: ...d plate 4 Adjust the Left Knob C Startup PROCESS leveling loading testing When directed adjust the rear knob until the Support card just slides between nozzle and build plate When directed adjust the front right knob until the Support card just slides between nozzle and build plate 5 6 Adjust the Rear Knob Again Adjust the Right Knob Again ...

Страница 26: ...es between the nozzle and build plate when the nozzle is at the center of the plate NOTE If at any time you have problems or if you need to level your build platform again you can use the arrow buttons to navigate through the LCD menus until you find the Utilities menu Press the M button to select this menu Use the arrow buttons to navigate through the menu options until you find Level Build Plate...

Страница 27: ...You Will Do Remove the end of the filament guide tube from the hole in the top of the extruder Feed the free end of the MakerBot PLA Filament from the spool into the end of the filament guide tube that is on the back of the MakerBot Replicator 2 Push the MakerBot PLA Filament all the way through the filament guide tube Insert the free end of the MakerBot PLA Filament into the hole in the top of th...

Страница 28: ...ment jams ensure that the MakerBot PLA Filament feeds from the bottom of the spool toward the top of the spool Ensure that the MakerBot PLA Filament is mounted on the left spool holder when viewed from the back and that it unspools clockwise 2 Feed the Filament Through the Filament Guide Tube C Startup PROCESS leveling loading testing Locate where the filament guide tube attaches to the top of the...

Страница 29: ...anel will prompt you to load the MakerBot PLA Filament into the extruder Click through the message until your MakerBot Replicator 2 asks you to press the M when you see plastic extruding The LCD menu will display the following OK I m ready First we ll load the extruder Push filament in the extruder block until you feel the motor tugging the plastic in When filament is extruding out of the nozzle p...

Страница 30: ...n let go 5 Push the Filament into the Extruder Loading MakerBot PLA filament continued C Startup PROCESS leveling loading testing Watch the nozzle of the extruder After a few moments you should see a thin string of the MakerBot PLA Filament that you loaded come out of the nozzle Press the M button to stop extrusion NOTE Don t be surprised if the filament that initially comes out of the nozzle is n...

Страница 31: ...ve plastic clinging to the extruder nozzle This can cause newly extruded plastic to stick to the nozzle instead of the build platform NOTE If you have problems or need to load the MakerBot PLA Filament again you can use the arrow buttons to navigate through the LCD menus until you find the Utilities menu Press the M button to select this menu Use the arrow buttons to navigate through the menu opti...

Страница 32: ...models on the SD card 2b To select a model press M 2c The MakerBot Replicator 2 Desktop 3D Printer will begin to make your object You can use the LCD panel to monitor the temperature of the extruder and the status and progress of your object MAKING a TEST Object from the SD Card 2 Selecting a Project from the SD Card The Replicator 2 package includes an SD card that is already loaded with files fo...

Страница 33: ...t and Bolt Set File Name Nut and Bolt Make Time 55 minutes Design By aubenc Thingiverse 9095 Comb File Name Comb Make Time 30 Minutes Design By repraprook Thingiverse 1140 Mr Jaws File Name Mr Jaws Make Time 25 minutes Design By Mahoney Thingiverse 14702 Stretchy Bracelet File Name Stretchlet Make Time 40 minutes Design By Emmett Thingiverse 13505 NAME File Name Make Time Design By Thingiverse Spa...

Страница 34: ...Making an Object with MakerBot MakerWare D ...

Страница 35: ...35 How to make an object using a computer and MakerBot MakerWare D Making an Object with MakerBot MakerWare ...

Страница 36: ...and download the MakerBot MakerWare installer to your local computer 1c Execute the installer and follow the directions to install the software 1d Use the supplied USB cable to connect your MakerBot Replicator 2 to the computer where you installed MakerBot MakerWare 1 Download and Install MakerBot MakerWare MakerBot MakerWare is software that prepares digital 3D designs to be made by the MakerBot ...

Страница 37: ... button 2d Your search results should include Minimalist NYC buildings by JonMonaghan Click on the link 2e On the page for Minimalist NYC buildings go to the Downloads section in a bar on the left side of the page 2f Click on the link for FlatIron stl and save the file to your local computer 2g Click on the link for Woolworth stl and save the file to your local computer Using MAKERBOT MAKERWARE co...

Страница 38: ...o select the Change Rotation submenu to rotate the object by a specific number of degrees Right click and drag with this function selected to rotate your view 6 Scale With this function selected you can click and drag to enlarge or shrink the object You can also select the Change Dimensions submenu and manually change the dimensions of the object 7 Add Clicking on this button allows you to add an ...

Страница 39: ...39 Using MAKERBOT MAKERWARE continued 3 Open MakerBot MakerWare Continued 1 2 7 8 9 10 11 3 6 4 5 D Making an Object with MakerBot MakerWare Mechanical Animals Design By sconine Thingiverse 11980 ...

Страница 40: ...Woolworth Building models in your virtual build space 4d Now you can decrease the size of both models simultaneously Click on the Flatiron Building to select it Hold down the shift key and click on the Woolworth Building Now release the shift key Both files should be selected 4e Select the Scale button Click and drag to change the size of both models 4 Open stl files in MakerBot MakerWare Using MA...

Страница 41: ... for supports and help your object stick to the build plate if the build plate is not exactly level You can easily remove rafts after making the object 4 Supports Select this checkbox if you want your object to include removable support structures for overhanging elements 5 Export to File MakerWare sends your model to the Replicator 2 as a set of instructions in the S3G format Export to file allow...

Страница 42: ...o view manipulate and edit files from www thingiverse com and to send files to your Replicator 2 To download the ReplicatorG software go to replicat org download To configure the ReplicatorG software to work with your Replicator 2 go to www makerbot com docs replicator software 5 Save and Make Your File Continued Using MAKERBOT MAKERWARE continued D Making an Object with MakerBot MakerWare ...

Страница 43: ...NOTES ...

Страница 44: ...E Troubleshooting Diagnostics and Maintenance ...

Страница 45: ... This chapter describes basic troubleshooting and maintenance tasks For details on more advanced troubleshooting and maintenance tasks go to makerbot com docs E Troubleshooting Diagnostics and Maintenance ...

Страница 46: ...gonally After you feel the motor grab the Filament continue to maintain pressure on the Filament for another five seconds Extruder makes a clicking noise when loading MakerBot PLA Filament Try cleaning the drive gear as explained in the Maintenance section of this chapter If that doesn t help adjust the plunger also as explained in this chapter PROBLEM SOLUTION Object is stuck to build plate Use a...

Страница 47: ...er nozzle If you continue to have problems you can run the leveling script from the LCD menu at Utilities Level Build Plate Can t remove MakerBot PLA Filament from extruder when unloading Build from SD Displays the list of models on the SD card Select one to start a build Preheat Allows you to preheat the extruder Utilities Tools that allow you to configure and maintain your MakerBot Replicator 2 ...

Страница 48: ...es the stepper motors You cannot manually move the build platform or the extruder when the stepper motors are engaged This option appears only when the stepper motors are disengaged Disable Steppers Disengages the stepper motors You can manually move the build platform or the extruder only when the stepper motors are disengaged This option appears only when the stepper motors are engaged Blink LED...

Страница 49: ...use the arrow buttons to choose Yes or No General Settings Optional settings and information Sound Turns the Replicator 2 s indicator sounds on and off LED Color Lets you turn off the LED lights or select a color Choices are Blue Green Pink Orange Purple White and Off Accelerate Turn acceleration on or off Note that with Acceleration off you should not use build speeds faster than 45mm s Help Text...

Страница 50: ... pulley 1 Find the tube of PTFE based grease included with your Replicator 2 2 Grab both sides of the build platform and push it gently to the bottom of the MakerBot Replicator 2 3 Use a clean lint free rag or your finger to spread the PTFE based grease onto the top section of the threaded rod 4 Make sure you get the grease inside of the threads themselves 5 Grabbothsidesofthe build platform and m...

Страница 51: ...top left side The idler pulley is one of the pulleys that allow the rubber belt to move the extruder from left to right The pulley at the other end of the belt is called the timing pulley and does not require lubrication 8 Squeeze a small amount of the PTFE based grease directly onto the exposed area of the dowel inside the idler pulley and manually move the pulley back and forth to spread the gre...

Страница 52: ...der To start the script for unloading the MakerBot PLA Filament go to the LCD panel and select Utilities Filament Options Unload 2 Unscrew the two bolts at the lower corners of the fan guard using the 2 5 mm hex key included with your MakerBot Replicator 2 Desktop 3D Printer As one piece remove the fan guard the fan the heat sink and spacers Keep these pieces together and set them aside 3 Unclip t...

Страница 53: ... Drive Gear Continued 6 Reseat the motor assembly 7 Plug in the motor wires 8 Add the fan guard the fan the heat sink and spacers to the front of the extruder and bolt them on 9 Reload the MakerBot PLA Filament To do this go to the LCD panel and select Utilities Filament Options Load ...

Страница 54: ...e drive gear If the plunger wears down and is no longer putting pressure on the MakerBot PLA Filament the MakerBot Replicator 2 may stop extruding You can solve this problem by making a small adjustment to the plunger 1 Unbolt the active cooling fan The active cooling fan is located on the left side of the extruder Use the 2 5mm hex wrench included with your Replicator 2 to remove the two bolts th...

Страница 55: ...k Insert the 2mm hex wrench included with your Replicator 2 into the hole until you feel it seat itself in the set screw inside 4 Turn the hex wrench very slightly clockwise no more than an eighth of a turn 5 Remove the hex wrench 6 Reseat the active cooling fan being careful of the fan wires 7 Use the 2 5mm hex wrench to bolt the active cooling fan onto the extruder Sometimes a new issue comes up...

Страница 56: ...nd sale of any item purchased from this Website By placing an order you represent that the products ordered will be used only in a lawful manner 3 ShippingandDelivery Whenanorderisplaced itwillbeshippingtoanaddressdesignatedby thepurchaseraslongasthatshippingaddressiscompliantwiththeshippingrestrictionscontained onthisWebsite AllpurchasesfromthisWebsitearemadepursuanttoashipmentcontract Asa result...

Страница 57: ...affiliates are responsible for any content materials or other information located on or accessible from any other website Neither we nor any of our respective affiliates endorse guarantee or make any representations or warranties regarding any other websites or any content materials or other information located or accessible from any other websites or the results that you may obtain from using any...

Страница 58: ...D ON OR THROUGH THIS WEBSITE MAY BE OUT OF DATE AND NEITHER MAKERBOT INDUSTRIES NOR ANY OF ITS RESPECTIVE AFFILIATES MAKES ANY COMMITMENT OR ASSUMES ANY DUTY TO UPDATE SUCH INFORMATION MATERIALS OR SERVICES THE FOREGOING EXCLUSIONS OF IMPLIED WARRANTIES DO NOT APPLY TO THE EXTENT PROHIBITED BY LAW PLEASE REFER TO YOUR LOCAL LAWS FOR ANY SUCH PROHIBITIONS ALL PRODUCTS AND SERVICES PURCHASED ON OR T...

Страница 59: ...updating thisposting You should visit thispagefromtimetotimetoreviewthe thencurrenttermsofservicebecausethey arebinding onyou Certainprovisionsofthesetermsof servicemaybesuperseded by legal noticesor termslocatedonparticularpagesofthisWebsite 13 ChoiceofLaw Jurisdiction Thesetermsofservicesupersedeanyotheragreementbetweenyou andMakerBotIndustriestotheextentnecessarytoresolveanyinconsistencyorambig...

Страница 60: ...MakerBot 87 3rd Avenue Brooklyn NY USA support makerbot com makerbot com ...

Отзывы: