


CALIBRATION PG. 2
LAST UPDATE 06.07.19
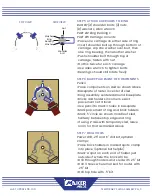
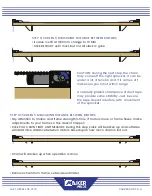
STEP 2: CHANGE EXTEND CHAIN DISTANCE
• Go to SETTINGS at top left of screen
• Find Extend Chain Distance
• Click MASLOW SETTINGS at top of screen
• Click ADVANCED SETTINGS
• Find EXTEND CHAIN DISTANCE, set to 1651
• If using an alternate setup, setting should
be a multiple of 63.5 MM, approximate
distance from motor sprocket to where
ring sled will rest in center of plywood.
STEP 3: CONNECT PORT
• Go to ACTIONS->PORT
• Click on the port that you set up
previously when you set up the
electronics
• If you don’t see the correct port, click
UPDATE LIST
• Once port is selected, click CONNECT
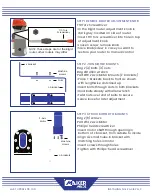
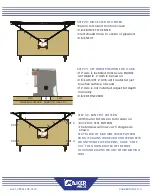
STEP 1: OPEN GROUND CONTROL TO BEGIN!
STEP 4: INTRODUCTION
• Read instructions,
• Click BEGIN
NOTE: For a variety of reasons you may
have to run the calibration process more
than once. If so, there are some steps
you can skip. This manual will give you
guidance on which you can skip and
which you can’t. YOU MAY ONLY SKIP STEPS
IF IT’S NOT YOUR FIRST TIME CALIBRATING
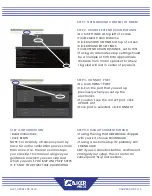
STEP 5: CHAIN ATTACHMENT METHOD
• If using the ring that MakerMade shipped
with your kit, choose TRIANGULAR
• If using a custom setup, it’s probably still
TRIANGULAR
SKIP if you’ve done this before, and haven’t
changed your setup. This is true for all
subsequent “Skip” instructions.


