


INSTALLING THE Z AXIS PG. 3
LAST UPDATE 06.11.19
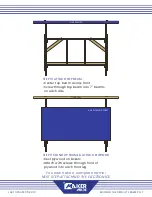
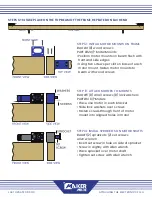
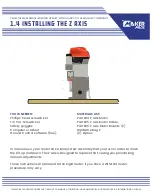
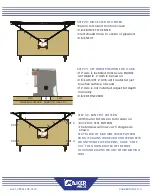
STEP 5 ATTACH Z AXIS TO ROUTER AND SLED
Bag Z (6) wood screws
Bag #8 allen wrench
Phillips-head screwdriver
• Slide free end of shaft coupler over
adjustment screw on router
• Use allen wrench to tighten 2 set screws to
engage shaft coupler with router
• If unable to reach a screw, leave it for later
when the motor gets rotated
• Adjust/slide L-brackets so bottom bracket
rests on sled
• Insert wood screws through small holes in
bottom of L-bracket, screw into wood of
sled
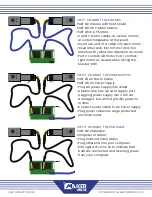
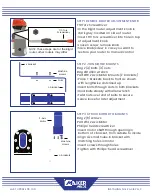
STEP 6 ATTACH MOTOR CABLE
Bag #2 ziptie
Part #15 Z Axis Motor Cable
• Insert one end of motor cable into end of
Z Axis motor
• Insert other end of cable into MP2 slot on
Arduino
• Use ziptie to secure cable to motor to
provide relief from strain as sled moves
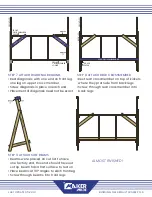
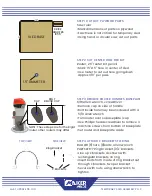
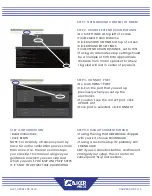
STEP 4 ATTACH THE SHAFT COUPLER
Bag Z shaft coupler
Bag #8 allen wrench
• Shaft coupler has a larger hole on one end,
a smaller hole on the other end
• Slide end with smaller hole over motor shaft
• Use allen wrench to tighten set screw
nearest to motor
• Leave other 2 set screws as is until Step 5
Wood
screws
Z-Axis
Motor
Cable
Ziptie


