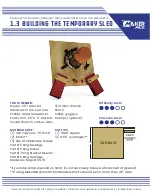
TEMPORARY SLED ASSEMBLY PG. 3
LAST UPDATE 06.11.19
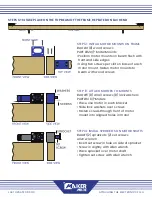
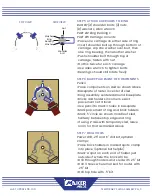
Shoulder
bolt
Ring
bearing
Washer
Washer
Nut
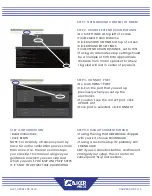
TOP VIEW
SIDE VIEW
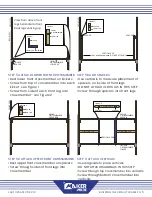
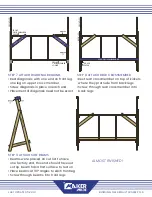
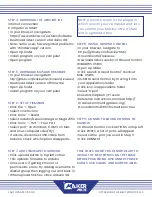
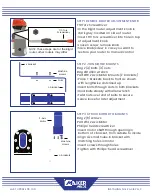
STEP 6 MARK PLACEMENT OF COMPONENTS
Pencil
• Place components on sled as shown above
• Baseplate of router in center of sled
• Ring assembly centered around baseplate
• Bricks and holders in corners, exact
placement not critical
• Use pencil to mark 3 holes in baseplate
• Mark placement of ring and brick holders
• Mark .5” circle as shown, middle of sled,
halfway between top edge and ring
• If using Z-axis with temporary sled, leave
room for that as marked above
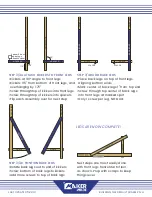
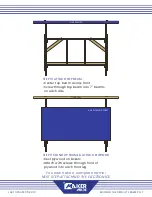
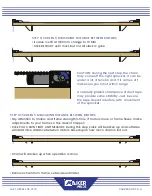
STEP 5 ATTACH CARRIAGES TO RING
BAG #7 (4) shoulder bolts, (4) nuts,
(8) washers, allen wrench
PART #2 Ring Bearings
PART #5 Carriage mounts
• Place one carriage on either side of ring
• Insert shoulder bolt up through bottom of
carriage, slip one washer over bolt, then
one ring bearing, then another washer
• Push shoulder bolt through top of
carriage, fasten with nut
• Do this twice for each carriage
• Use allen wrench to tighten bolts
• Bearings should still rotate freely
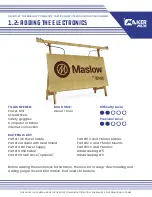
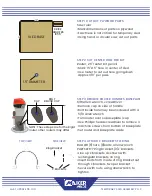
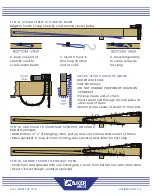
STEP 7 DRILL HOLES
Power drill, .25” and .5” drill bit, optional
clamps
• Place brick holders in marked spots, clamp
into place (optional but helpful)
• Mark a spot on each end of holder just
outside of where the brick will be
• Drill through holders and sled with .25” bit
• Drill 3 holes where marked for router with
.25” bit
• Drill top hole with .5” bit

