background image

|

L A D E N M Ü H L E N

S H O P   G R I N D E R

5. Set-up and Basic Adjustment

5.1 Setting-up Area

Place the grinder on a level surface free from vibration.

Never operate the grinder in moist, or even worse, in 
wet surroundings.

5.2 Installation

You have received your grinder in operating condition. Now you only 
need to connect it to a power supply system. Proceed as follows:

Protect your device with a separate pre-fuse (not in-
cluded in the scope of supplies) according to the infor-
mation provided in para. 2 „Technical data“. 

Make sure that the pre-fuse is not overloaded by oth-
er consuming devices (e.g. fan-forced heaters, deep 
freezers).
 
Determine whether the mains voltage and frequency 
correspond to the information on the rating plate.

Insert the plug into the available grounded outlet.

5.3 Initial operation

A grinding test run is carried out on each grinder in the manufacturer‘s 
factory. This is why you may find ground material residue in the grinding 
mechanism!

page 7

4. Safety devices

Thermal overload circuit breaker 

(not for 115V/60Hz and 100V/60Hz)

The motor of the grinder is protected by an overload circuit breaker, 
which interrupts the electric circuit of the motor when the device is sub-
jected to electric overloading. To be able to re-start the grinder, the reset 
button on the back side of the casing must be pressed (Pos.7).

The user has no influence whatsoever on this opera-
tion. In case of repeated tripping of the circuit break-
er, an expert must be consulted since this could cause 
damage to the motor winding.

Motor protector (winding shield) 

(only 115V / 60Hz)

The grinder is protected against thermal overloading by a motor protec-
tor (thermostat, inserted in the winding). Whenever the winding of the 
motor heats up to an impermissible level, the motor protector interrupts 
the electric circuit of the motor.
Following a cool-off phase (at least 100 minutes) the motor protector is 
switched on again automatically and the grinder can be re-started

Finger protector / Magnet holder

A combined finger protector / magnet holder is fitted in the hopper of 
the grinder. It is supposed to prevent the user from reaching into the 
running grinding mechanism. At the same time, it also prevents ferrous 
foreign objects from getting into the grinding mechanism. Every now 
and then you should clean the magnet since adhering foreign objects 
could be hanging from the magnet.

Never remove the finger protection!

Coffee Laboratory 589 Rappahannock Drive White Stone Va 22578 TEL (866) 244-1578 www.coffeelabequipment.com

Содержание Guatemala K32S

Страница 1: ...O P G R I N D E R The professional art of grinding since 1924 Operating Instructions Guatemala K32S K22S the casual one Coffee Laboratory 589 Rappahannock Drive White Stone Va 22578 TEL 866 244 1578 w...

Страница 2: ...L A D E N M H L E N S H O P G R I N D E R Coffee Laboratory 589 Rappahannock Drive White Stone Va 22578 TEL 866 244 1578 www coffeelabequipment com...

Страница 3: ...llation 7 5 3 Initial operation 7 6 Operation 8 page 3 7 Operating Faults 8 8 Recalibration of the Grind Adjustment 10 9 Cleaning 10 9 1 Cleaning with GRINDZ Grinder Cleaner 11 9 2 Cleaning of the Gri...

Страница 4: ...t proper supervision Never immerse the grinder in water and do not oper ate it with wet hands page 4 1 Safety Please read and observe the following operating in structions carefully Non observance can...

Страница 5: ...cious basis is also expected 2 Technical Data Description Guatemala K32S K22S Voltage Frequency 220 240V 50 60Hz 115V 60Hz 100V 50 60Hz Rotation 50 Hz 2850 rpm 60 Hz 3400 rpm Sound emission idle opera...

Страница 6: ...ith lid Pos 2 Grind adjustment Pos 3 Spout Pos 4 Bag holder Pos 5 Tray for residues Pos 6 On Off Switch Pos 7 Reset button for current overload back Pos 8 Bag holder handle Pos 9 Casing with motor and...

Страница 7: ...c circuit of the motor when the device is sub jected to electric overloading To be able to re start the grinder the reset button on the back side of the casing must be pressed Pos 7 The user has no in...

Страница 8: ...1 By moving the rotary knob set the required grind degree to the left for coarse coffee powder to the right for ner coffee powder 2 Only ll unground materials for which the grinder is set up for into...

Страница 9: ...let Check to determine wheth er the reset button of the circuit breaker has jumped out Press the reset button in again if appropriate In case of repeated tripping of the circuit breaker contact your...

Страница 10: ...n objects fall into the grinding mechanism Adjusting spindle 8 Recalibration of the Grind Adjustment The grinder has been precisely adjusted by the manufacturer However if the ground material is no lo...

Страница 11: ...e grinding mechanism Pull out the power supply plug 1 Rotate the rotary knob 11 to coarse 2 Unscrew the two screws 13 on the grinder casing cover 12 and then remove this cover 3 Take the carrier 10 ou...

Страница 12: ...authorised experts Please contact an authorised customer service centre or your local dealer 10 1 Grinding Disc Replacement If the grind capacity decreases and the ground coffee is hot and of irregu...

Страница 13: ...r MAHLK NIG GmbH Co KG Tilsiter Stra e 142 D 22047 Hamburg Tel 49 0 40 69 69 40 0 Fax 49 0 40 69 39 72 1 hereby declares that the below mentioned product product type device for food processing machin...

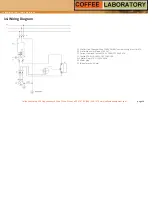
Страница 14: ...K1 Motor Start Relay Klixon 2CR3 207 F1 Current Overload Switch ETA 2 5700IG1 P10 1050 7A S1 Switch ETA 3120 F30F G701 SGRX 20A M1 Motor Elnor 270 CII 230V 50Hz X1 Mains plug X2 Blade Terminal 6 3mm...

Страница 15: ...L A D E N M H L E N S H O P G R I N D E R Notes Coffee Laboratory 589 Rappahannock Drive White Stone Va 22578 TEL 866 244 1578 www coffeelabequipment com...

Страница 16: ...GmbH Co KG Tilsiter Stra e 142 D 22047 Hamburg Germany Tel 49 0 40 69 69 40 0 Fax 49 0 40 69 39 721 of ce mahlkoenig de www mahlkoenig de March 2014 Subject to be changed without prior notice Coffee L...

Отзывы: