background image

25

English

Disc Operations

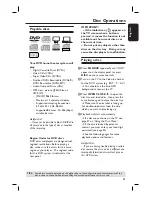
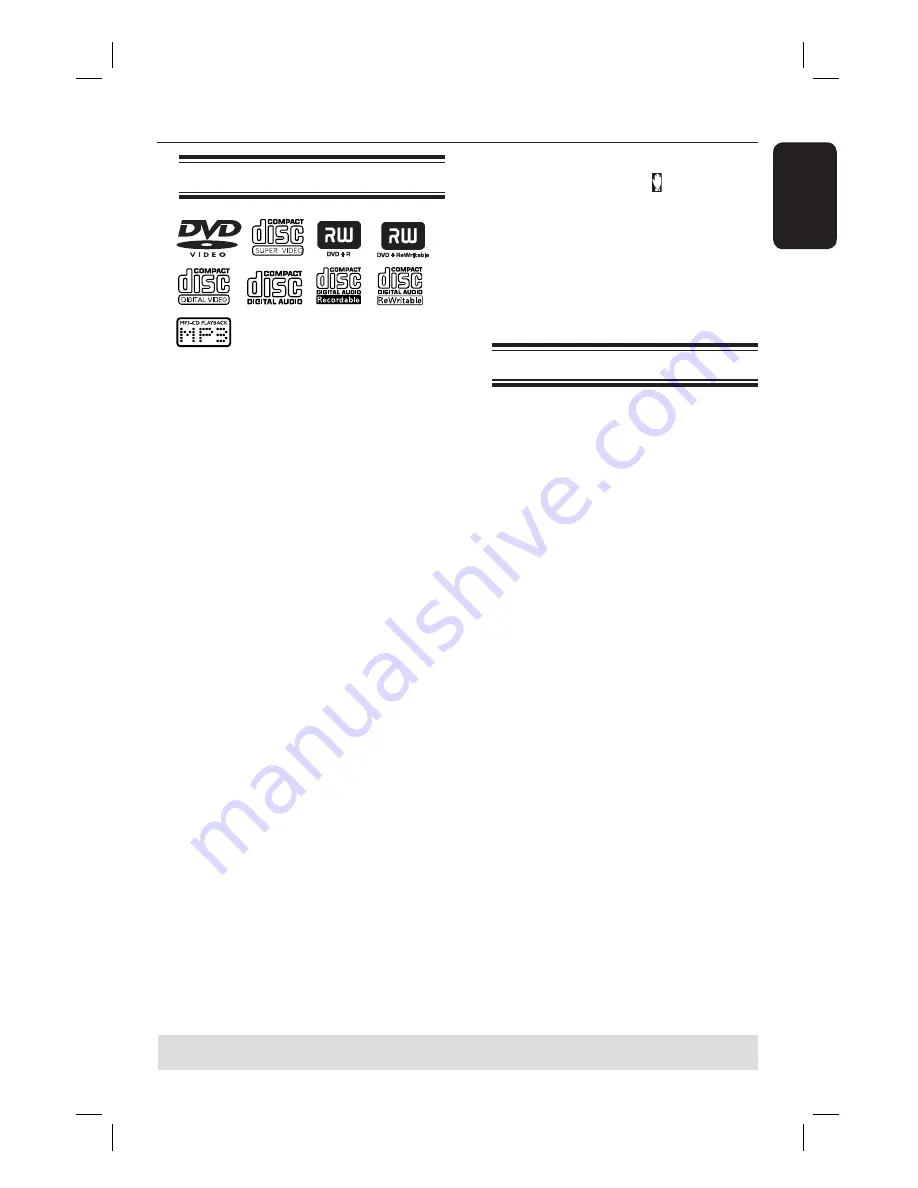
Playable discs

Your DVD home theater system will 
play:

–  Digital Versatile Discs (DVDs)
– Video 

CDs 

(VCDs) 

–  Super Video CDs (SVCDs)
–  Finalized DVD+Recordable (DVD±R),  
 DVD+Rewritable 

(DVD±RW)

–  Audio Compact Discs (CDs)
–  MP3 discs, picture (JPEG) fi les on 
    CD-R(W)
 

–  JPG/ISO 9660 format


–  Maximum 12 characters display


–  Supported sampling frequencies : 


   32 kHz, 44.1 kHz, 48 kHz


–  Supported Bit-rates : 32~256 (kbps),  


   variable bit rates

Helpful Hint:
–  It may not be possible to play CD-R/RW in 
all cases due to the type of disc or condition 
of the recording.

Region Codes for DVD discs

DVD discs and players are designed with 
regional restrictions. Before playing a 
disc, make sure the disc is for the same 
region as your player.  The regional code 
for this DVD system is indicated at the 
rear panel.

IMPORTANT! 
  – If the inhibit icon (   ) appears on 
the TV screen when a button is 
pressed, it means the function is not 
available on the current disc or at 
the current time.
–  Do not put any objects other than 
discs on the disc tray.  Doing so may 
cause the disc player to malfunction.

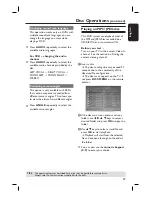
Playing a disc

A

 Press 

SOURCE

 repeatedly until “DISC” 

appears on the display panel (or press 

DISC

 on the remote control).

B

 Turn on the TV to the Video In channel 

for the DVD system (e.g. ‘EXT’, ‘0’, ‘AV’). 

 You should see the blue DVD 

background screen on the TV.

C

 Press 

OPEN CLOSE


ç

 to open the 

disc tray and load a disc, then press the 
same button again to close the disc tray.


Make sure the disc label is facing up. 

For double-sided discs, load the side 
which you want to play facing up.

D

 Playback will start automatically. 

 If a disc menu shows on the TV, see 

page 27 on "Using the Disc Menu".

 If the disc is locked by parental 

control, you must enter your four-digit 
password (see page 35).

 See the following pages for more 

playback options and features.

Helpful Hint:
–  If you are having trouble playing a certain 
disc, remove the disc and try a different one.  
Improperly formatted discs will not play on 
this DVD system.

TIPS: 

Some discs cannot be played on this player due to the confi guration and characteristics of the 
disc, or due to the condition of recording and authoring software that was used.

Содержание MRD100

Страница 1: ...User Manual S M A R T V E R Y S M A R T User Manual 6 Manual del usuario 44 Manual do Usu rio 82...

Страница 2: ...tac n 110 127V 220 240V 50 60Hz Consumo 35W Importador Philips Mexicana S A de C V Domicilio Av La Palma No 6 Col San Fernando La Herradura Huixquilucan Edo de Mexico C P 52784 Mexico Localidad y Tel...

Страница 3: ...HAT NOT ALL HIGH DEFINITION TELEVISION SETS ARE FULLY COMPATIBLE WITH THIS PRODUCT AND MAY CAUSE ARTIFACTS TO BE DISPLAYED IN THE PICTURE IN CASE OF 525 OR 625 PROGRESSIVE SCAN PICTURE PROBLEMS IT IS...

Страница 4: ...4 English Language Code...

Страница 5: ...English 5 Espa ol B Portugu s Index English 6 Espa ol 44 B Portugu s 82...

Страница 6: ...ce 18 Connecting digital audio equipment 18 Basic Setup Getting Started 19 24 Step 1 Turning on the DVD system 19 Turning off to standby mode 19 Step 2 Finding the correct viewing channel 19 Step 3 Se...

Страница 7: ...1 Accessing the DVD setup menu 32 picture setup page 33 Sound setup Page 34 Feature Setup Page 35 Radio Tuning Tuner Operations 36 37 Tuning to radio stations 36 Presetting radio stations 36 Using aut...

Страница 8: ...ces of danger on the apparatus e g liquid filled objects lighted candles General Information Accessories supplied 1 passive subwoofer 4 satellite speakers 1 center speaker 1 remote control with batter...

Страница 9: ...d System display panel e u PLAY PAUSE DISC starts pauses playback TUNER starts auto tuner installation for first time setup f SOURCE Selects the relevant active source mode DISC TUNER FM AM TV AUX or...

Страница 10: ...operation DISC stops playback or clears programed track TUNER erase the current preset radio station e DISC MENU For DVD enter or exit disc contents menu For VCD 2 0 enter digest menu f TITLE Access...

Страница 11: ...he current status or disc information u Numeric Keypad 0 9 Enters a track title number of the disc Enters a number of a preset radio station v REPEAT A B Repeats a specific section on a disc w REPEAT...

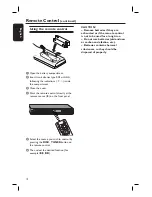
Страница 12: ...on the front panel E Select the source you wish to control by pressing the DISC TUNER button on the remote control F Then select the desired function for example m M CAUTION Remove batteries if they a...

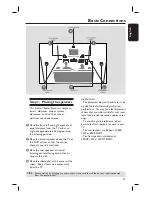
Страница 13: ...r hang on the wall D Place the subwoofer at the corner of the room Keep at least one meter away from the TV Helpful Hints The placement diagram shown here is only a guideline that will provide great s...

Страница 14: ...ugs and jacks are matched Helpful Hint To prevent unwanted noise do not place the rear speakers too close to the DVD system AC power adapter TV or any other radiation sources TIPS Before making or cha...

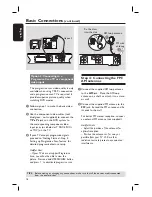
Страница 15: ...ystem connect the AUDIO IN TV IN jacks to the corresponding AUDIO output jacks on the TV using an audio cable Press TV AUX DI on the remote control to select TV when watching the TV programs TIPS Befo...

Страница 16: ...e signals proceed to Getting Started Step 5 Setting up Progressive Scan feature for detailed progressive feature setup Helpful Hint If your TV does not support Progressive Scan you will not be able to...

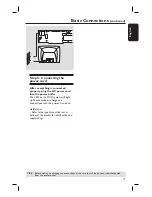
Страница 17: ...ntinued AC MAINS Step 5 Connecting the power cord After everything is connected properly plug the AC power cord into the power outlet The LED on the DVD system will light up Never make or change any c...

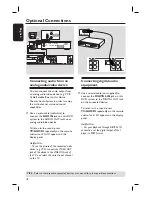
Страница 18: ...io from an analog audio video device You can connect the audio output from an analog audio video device e g VCR Cable Satellite Box to this Home Theater Audio System in order to enjoy the multi channe...

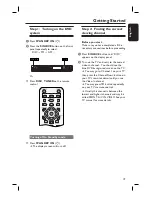
Страница 19: ...pleted all the necessary connections before proceeding A Press SOURCE button until DISC appears on the display panel B Turn on the TV and set it to the correct video in channel You should see the blue...

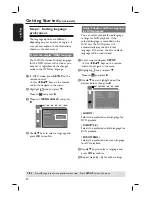
Страница 20: ...e previous menu item Press SETUP to exit the menu Audio Subtitle and Menu language for DVD playback You can select your preferred language settings for DVD playback If the selected language is recorde...

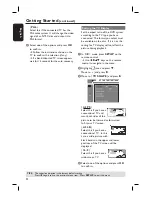
Страница 21: ...ecting the matching color system The color system of the DVD system DVD and TV should match Only then will it be possible to play a DVD on this system Before changing the TV system determine the color...

Страница 22: ...VD system according to the TV type you have connected The format you select must be available on the disc If it is not the setting for TV display will not affect the picture during playback A In DISC...

Страница 23: ...menu E Highlight icon and press Move to and press F Move to PROGRESSIVE select ON in the menu and press OK to confirm G Read the notification message on the TV and confirm your action by selecting th...

Страница 24: ...ow at a time then press CNTR DELAY Select this to set the delay time in relation to the listening position distance from the center speaker 5ms 3ms 2ms 1ms or OFF REAR DELAY Select this to set the del...

Страница 25: ...cts other than discs on the disc tray Doing so may cause the disc player to malfunction Playing a disc A Press SOURCE repeatedly until DISC appears on the display panel or press DISC on the remote con...

Страница 26: ...y to choose a repeat play mode DVD RPT CHP repeat chapter RPT TIT repeat title RPT OFF exit repeat mode VCD SVCD CD RPT ONE repeat track RPT DIS repeat disc RPT OFF exit repeat mode MP3 RPT ONE repeat...

Страница 27: ...ack To clear programmed track press STOP twice Helpful Hint If the DVD system is disconnected from the power supply it will erase the program Other playback features Using the Disc Menu Depending on t...

Страница 28: ...e disc has not been ejected Press u to resume playback from the last stopped point To cancel the resume mode When play is stopped press again Helpful Hint Opening the disc tray or disconnecting the DV...

Страница 29: ...back most of the MP3 and JPEG files recorded on a CD R RW disc or commercial CD Before you start Turn on your TV to the correct Video In channel See the section on Finding the correct viewing channel...

Страница 30: ...tics of the disc or due to the condition of recording and authoring software that was used Playing MP3 music and JPEG pictures simultaneously You can create a musical slide show if the disc contains b...

Страница 31: ...D FRX1 FRX2 FRX3 FRX4 PLAY FAST FORWARD FF DVD MP3 FFX2 FFX4 FFX6 FFX8 PLAY VCD CD FFX1 FFX2 FFX3 FFX4 PLAY Select a search speed FR backward FF forward The volume will be muted To resume normal playb...

Страница 32: ...ess to enter the menu D Use keys to navigate in the menu and press OK to confirm your selection Instructions and explanations of the options are provided in the following pages If the option in the me...

Страница 33: ...have connected this DVD system to your TV using the Y Pb Pr jacks OFF Disables the progressive scan mode ON Turns on progressive scan mode Read the instructions on the TV and confirm your action by pr...

Страница 34: ...from the center speaker Use keys to set the delay times 5ms 3ms 2ms 1ms or OFF and press OK to confirm REAR DELAY Set the delay time in relation to the listening position distance from the rear speak...

Страница 35: ...vel indication so parental control has no effect on these type of discs PASSWORD The password is used for the Parental Control Enter your four digit password to play a prohibited disc or when prompted...

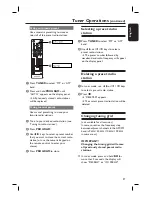
Страница 36: ...preset Helpful Hints If no radio station is found after searching from FM to AM band CHECK ANTENNA appears Press any keys to exit the tuner preset mode If you attempt to program more than 40 preset ra...

Страница 37: ...to enter your choice D Press PROGRAM to store Selecting a preset radio station A Press TUNER to select FM or AM band B Use or keys to select a preset radio stations The preset number followed by wave...

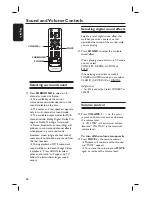
Страница 38: ...DIO to select other audio track will appear on TV Follow the instructions to get sound output Selecting digital sound effects Select a preset digital sound effect that matches your disc s content or t...

Страница 39: ...ntdown of 10 seconds is displayed To check or change the setting Press SLEEP once to show the remaining time before switching off If you continue pressing the SLEEP button the next sleep timer option...

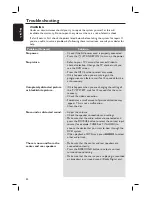
Страница 40: ...on to select disc mode If this happens when you are turning on the progressive scan feature wait for 15 seconds for the auto recovery If this happens when you are changing the setting of the TV SYSTEM...

Страница 41: ...disc Press SETUP to turn off the system setup menu screen You may need to enter the password in order to unlock the disc for playback Moisture may have condensed inside the system Remove the disc and...

Страница 42: ...ith Dolby Surround Pro Logic II decoders sound tracks will be able to be encoded specifically to take full advantage of Pro Logic II playback including separate left and right surround channels Such m...

Страница 43: ...System PAL NTSC Video Format 4 3 16 9 Video S N 56 dB minimum Composite Video Output 1 0 Vp p 75 Audio DAC 24 Bits 96 kHz Frequency Response 4 Hz 20 kHz 44 1 kHz 4 Hz 22 kHz 48 kHz MAIN UNIT Power Su...

Отзывы: