background image

22

Sound

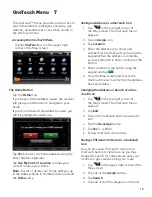
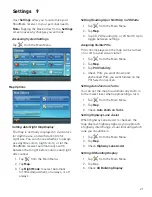
Setting Volume from Settings

1. Tap

 from the Main Menu. 

2. Tap 

Sound

.

3. Slide the volume slider bar to the desired

volume level.

Turning Button Sounds On/Off

1. Tap

 from the Main Menu.

2. Tap 

Sound

.

3. Tap Button Sounds to activate (checked)

or de-activate (unchecked) audible

sounds when a button is tapped.

Turning Smart Volume On/Off

Smart Volume adjusts sound levels based on 

road noise caused by vehicle speed, which can 

make the speaker harder to hear.

1. Tap

 from the Main Menu.

2. Tap 

Sound

.

3. Tap Smart Volume to activate (checked) or

de-activate (unchecked) Smart Volume.
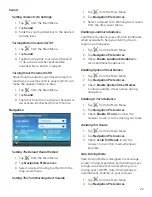
Navigation

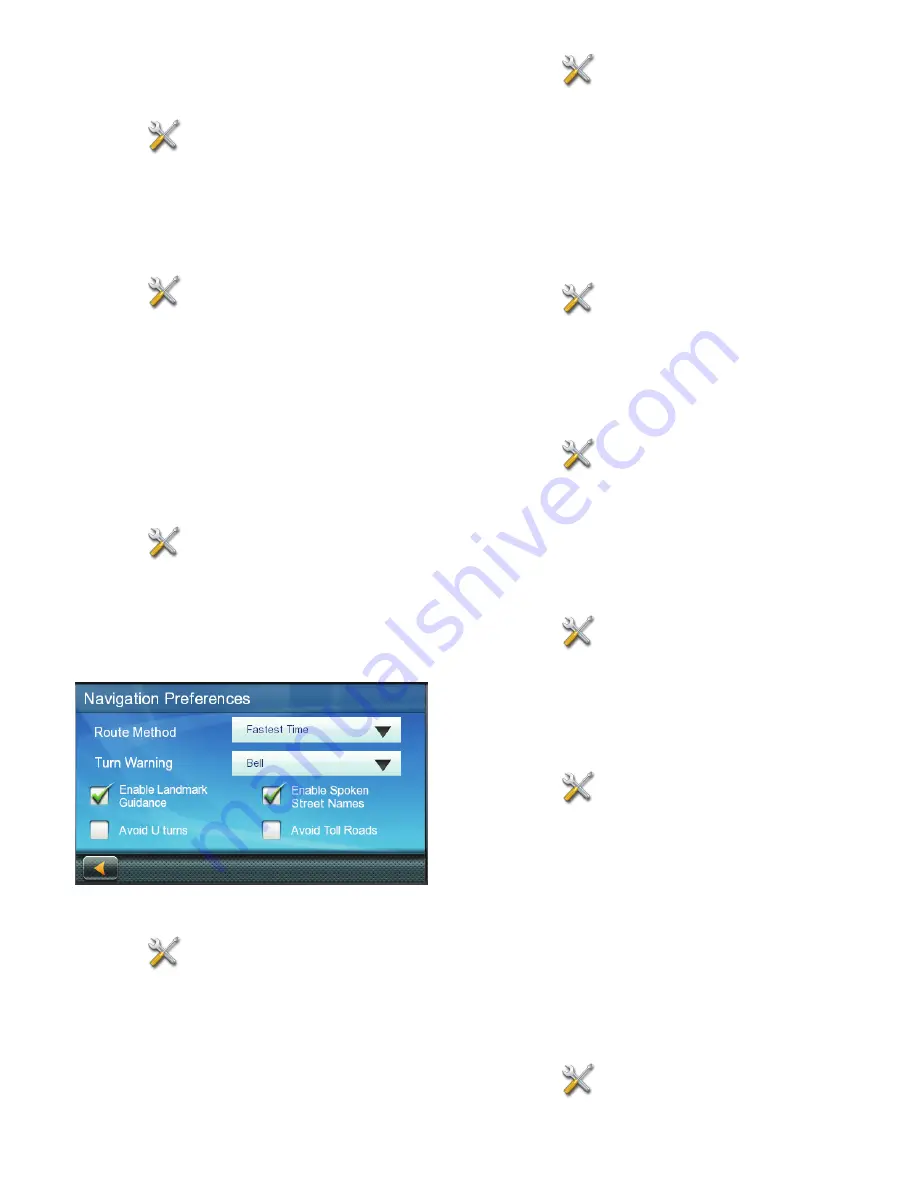
Setting The Default Route Method

1. Tap

 from the Main Menu.

2. Tap 

Navigation Preferences

.

3. Select a default routing method from the

drop-down menu.

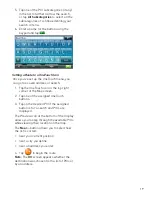
Setting The Turn Warning Alert Sounds

1. Tap

 from the Main Menu.

2. Tap 

Navigation Preferences

.

3. Select a default Turn Warning Alert sound

from the drop-down menu.

Enabling Landmark Guidance

Landmark Guidance uses common landmarks 

when available to help you identify streets 

requiring a maneuver. 

1. Tap

 from the Main Menu. 

2. Tap 

Navigation Preferences

.

3. Check 

Enable Landmark Guidance

 to

turn Landmark Guidance on.

Enabling Spoken Street Names

1. Tap

 from the Main Menu.

2. Tap 

Navigation Preferences

.

3. Check 

Enable Spoken Street Names

to allows audible street names during

navigation.

Enabling U Turn Guidance

1. Tap

 from the Main Menu.

2. Tap 

Navigation Preferences

.

3. Check 

Enable U Turns

 to allow the

receiver to use U-turns during your route.

Avoiding Toll Roads

1. Tap

 from the Main Menu.

2. Tap 

Navigation Preferences

.

3. Check 

Avoid Toll Roads

 to tell the

receiver to avoid toll roads whenever

possible.

Safe-Driving Mode

Safe-Driving Mode is designed to encourage 

a safer driving experience by disabling access 

to high-involvement activities while you’re 

driving over 10 MPH. Safe-Driving Mode is 

automatically enabled on your receiver.

1. Tap

 from the Main Menu.

2. Tap 

Navigation Preferences

.

Содержание RoadMate 9600-LM

Страница 1: ...Magellan RoadMate User Manual 2016...

Страница 2: ...RoadMate receiver is a vehicle navigation aid designed to assist you in arriving at your selected destinations When using the Magellan RoadMate receiver these safety rules must be followed to prevent...

Страница 3: ...se harmful interference and 2 this device must accept any interference received including interference that may cause undesired operation FCC Caution Any changes or modifications not expressly approve...

Страница 4: ...et 2 l utilisateur de l appareil doit accepter tout brouillage radio lectrique subi m me si le brouillage est susceptible d en compromettre le fonctionnement 2016 MiTAC International Corporation The M...

Страница 5: ...ocated at nearby highway exits Personalize your Magellan RoadMate receiver in the Settings menu Receive traffic information to avoid delays in your travel select models only Create and customize route...

Страница 6: ...e vehicle power adapter cable or optional AC power adapter The USB connection is also used for connecting your receiver to a personal computer for map and software updates using the Magellan Content M...

Страница 7: ...RoadMate receiver has an internal battery that charges whenever the receiver is connected to external power Note The battery can only be serviced by authorized Magellan repair facilities Viewing the...

Страница 8: ...seconds This prolongs battery life between charges Main Menu The Main Menu screen is the RoadMate s central hub of activity containing icons for all of the receiver s major functions Accessing the Ma...

Страница 9: ...s previously entered Tap on a city from the displayed list to select that city Zip Code Enter City only Displays a numeric keypad to quickly enter a city s zip code List Enter City only Press the List...

Страница 10: ...The Smart City Search feature attempts to predict the city you are looking for based on your position and cities you ve gone to before Whenever entering or searching for an address the Enter City Nam...

Страница 11: ...vailable only while on a highway freeway H Access Volume controls I Access One Touch menu Provides instant access to your saved search criteria and favorite destinations Your position and the time are...

Страница 12: ...exists Replace Destination The next destination is cleared and replaced with the one selected from the Pan screen Go There Now The selected location is inserted in the route as an intermediate destin...

Страница 13: ...maneuver at the top Accessing the Maneuver List Tap the Maneuver icon in the top left corner of the Map screen when actively on a route Avoiding a Maneuver This feature modifies the route to possibly...

Страница 14: ...Tap Zip Code to switch to the numeric keyboard and enter the ZIP code Tap to bring up a list of cities with the zip code entered 3 Enter the Street name With the city selected the keyboard will be dis...

Страница 15: ...Zip Code to switch to the numeric keyboard and enter the ZIP code Tap to bring up a list of cities with this zip code 3 Enter the Street name With the city selected the keyboard will be displayed pro...

Страница 16: ...cess the list of Previous Destinations 2 Tap Delete All 3 Tap Yes to confirm the deletion and clear the list Address Book Saving a Destination to Your Address Book Whenever you create a destination yo...

Страница 17: ...ur address book 2 Tap on the desired address book entry A screen appears with address of the selected location estimated time of arrival ETA distance to travel routing method e g Fastest Time Note Tap...

Страница 18: ...ways 7 Tap to begin navigating to the selected POI on the Map screen Creating a Route to a POI by Name 1 Tap from the Main Menu 2 Tap Search By Name 3 Enter the name of the POI to be used as the desti...

Страница 19: ...bol to get a list of related POIs near the exit 3 Select a POI from the list and tap The GO screen appears with address of the selected POI estimated time of arrival ETA distance to travel routing met...

Страница 20: ...fy the route to possibly avoid a particular maneuver 1 Access the Maneuver List 2 Tap for the maneuver you want to avoid 3 Tap Yes to confirm The RoadMate receiver recalculates the route and returns y...

Страница 21: ...m that you want to cancel the route OR 4 Tap the OneTouch icon from the Map screen to display the OneTouch menu 5 Tap Cancel Trip 6 Tap Yes to confirm that you want to cancel the route Detouring off a...

Страница 22: ...The OneTouch menu appears 2 Tap an Assign icon 3 Tap Location 4 Enter the address city street and number for the OneTouch icon using the keypad When the address is complete you are prompted to enter...

Страница 23: ...icon in the top right corner of the Map screen 2 Tap one of the assigned OneTouch buttons 3 Tap on the desired POI if the assigned button is for a search and POIs are displayed The Preview icon at th...

Страница 24: ...n routing if a traffic event e g incident s slow traffic will delay your arrival the traffic icon on the Map screen will display the computed traffic delay in minutes in the red box below the traffic...

Страница 25: ...orth Up in 2D Mode 1 Tap from the Main Menu 2 Tap Map 3 Tap 3D 2D Heading Up or 2D North Up to toggle between settings Assigning Visible POIs POI icons displayed on the map can be turned on or off to...

Страница 26: ...rt sound from the drop down menu Enabling Landmark Guidance Landmark Guidance uses common landmarks when available to help you identify streets requiring a maneuver 1 Tap from the Main Menu 2 Tap Navi...

Страница 27: ...Break Reminder option enables your receiver to alert you when you may need to pause after a long drive 1 Tap from the Main Menu 2 Tap Navigation Preferences 3 Move the Driving Break Reminder slider fr...

Страница 28: ...ance allows you to manually select an area to avoid along your route 1 Tap from the Main Menu 2 Tap Route Area Avoidance 3 Tap Add to select a new area to avoid Note If you haven t yet added any areas...

Страница 29: ...and registered trademarks are property of their respective owners MiTAC Digital Corporation 279 E Arrow Hwy San Dimas CA 91773 USA www magellanGPS com Connect with us MagellanGPS Need Technical Suppor...

Отзывы: