


24
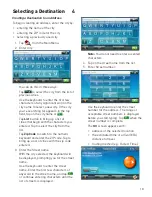
Speed Warnings
Setting Speed Warning Options
1. Tap
from the Main Menu.
2. Tap
Speed Warning
.
3. Set
Audible Warning
on or off.
4. Set
Visible Warning
on or off. This
determines if the speed limit icon is
displayed on the screen.
5. Set the number of miles above the speed
limit you want to receive the warnings.
Viewing the GPS Status
1. Tap
from the Main Menu.
2. Tap
GPS
.
3. Tap
Status
.
Note:
You can also access the GPS Status
screen by tapping on the satellite signal
indicator in the upper right corner of the
OneTouch screen.
Auto Power Off
Setting Auto Power Off
Auto Power is the duration of time that the
Magellan RoadMate receiver automatically
turns off after remaining idle.
1. Access the System Settings menu.
2. Tap
Auto-Off
.
3. Tap on the desired duration.
4. Tap the back arrow.
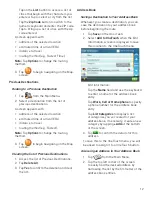
Default System Settings
Restoring All Default System Settings
1. Access the System Settings menu.
2. Tap
Restore Default
.
3. Confirm that you want to proceed in
restoring all the system defaults.
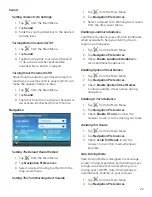
Route Area Avoidance
Route Area Avoidance allows you to manually
select an area to avoid along your route.
1. Tap
from the Main Menu.
2. Tap
Route Area Avoidance
.
3. Tap
Add
to select a new area to avoid.
Note:
If you haven’t yet added any areas to
avoid,
Add
is the only accessible option.
4. Pan around and zoom in and out of the map
to select an area within the red box to avoid.
5. Tap
Select
to choose the areas you want to
avoid, or the Back icon to cancel the action.
6. Tap
Confirm
on the message that appears,
Cancel Area Avoidance
to cancel the
selection, or the Back icon to select a
different area.
The area you selected is now accessible from
your Route Area Avoidance list.
Note:
Your route will still include freeways and
highways in the areas that you choose to avoid.
Once you’ve created one or more areas to
avoid, you can:
• Edit
the details of these areas.
• Add
new areas to avoid.
• Select
one or more areas to avoid during a
route.
• Remove
any of these areas from your list.
Note:
You can only edit one area at a time.
When you select multiple areas, the Edit
function is disabled.
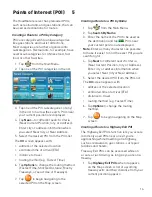
Product Information
Viewing Product Information
1. Tap
from the Main Menu.
2. Tap
Product Information
.
3. Scroll down the page to view the Serial
Number and Software Version.
Содержание RoadMate 9600-LM
Страница 1: ...Magellan RoadMate User Manual 2016...


