


12
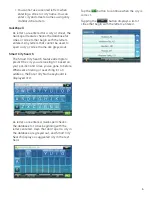
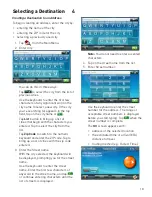
Tap on the
List
button to access a list of
cities that begin with the characters you
entered. Tap to select a city from the list.
Tap the
Zip Code
button to switch to the
numeric keyboard and enter the ZIP code.
Tap to bring up a list of cities with the zip
code entered.
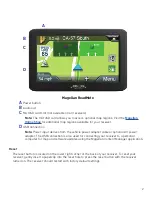
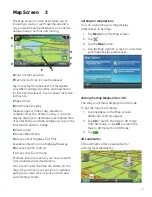
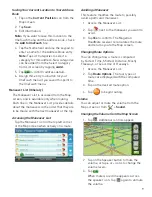
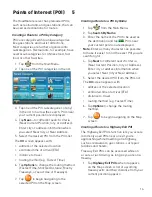
A screen appears with:
• address of the selected location
• estimated time of arrival (ETA)
• distance to travel
• routing method (e.g. Fastest Time).
Note:
Tap
Options
to change the routing
method.
3. Tap
to begin navigating on the Map
screen.
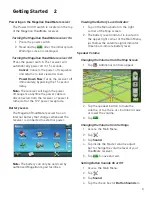
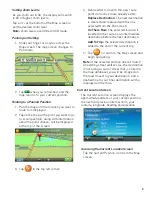
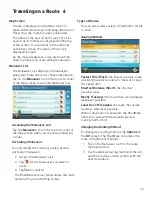
Previous Destinations
Routing to a Previous Destination
1. Tap
from the Main Menu.
2. Select a destination from the list of
previous destinations.
A screen appears with:
• address of the selected location
• estimated time of arrival (ETA)
• distance to travel
• routing method (e.g. Fastest).
Note:
Tap
Options
to change the routing
method.
3. Tap
to begin navigating on the Map
screen.
Clearing the list of Previous Destinations
1. Access the list of Previous Destinations.
2. Tap
Delete All
.
3. Tap
Yes
to confirm the deletion and clear
the list.
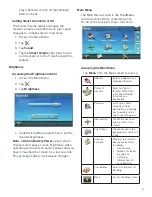
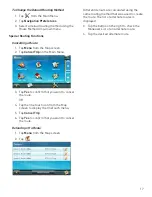
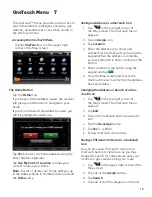
Address Book
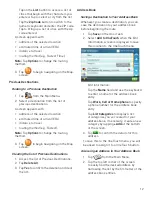
Saving a Destination to Your Address Book
Whenever you create a destination, you can
save the destination to your address book
before beginning the route.
1. Tap
Save
on the Go screen.
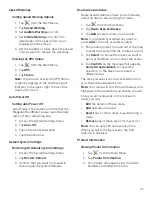
2. Select
Add to OneTouch
when the Edit
Information screen is displayed to save
this location to the OneTouch menu.
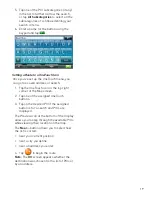
Edit information:
Tap the
Name
field and use the keyboard
to enter a name for the address book
entry.
Tap
Work, Cell or Home phone
to specify
a phone number for the address book
entry.
Tap
List Categories
to display a list
of categories you’ve created for your
address book. If necessary, create a new
category by tapping
+ Add
at the bottom
of the screen.
3. Tap
to confirm the details for this
address.
To save this to the OneTouch menu, you will
be asked to assign it to a OneTouch button.
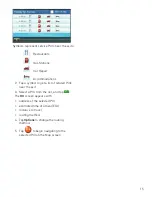
Accessing an Address in Your Address Book
1. Tap
from the Main Menu.
2. Tap the top left corner of the screen
to easily find the desired address by
narrowing the list by the first letter of the
address book entries.
Содержание RoadMate 9600-LM
Страница 1: ...Magellan RoadMate User Manual 2016...


