Customizing the workspace
31
Customizing the workspace
If you are interested in configuring the workspace to more readily support the way
you work, you can start by viewing a list of the functions that are available in
H for Dreamweaver MX, to see if you are using the program to its full
potential.
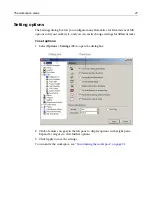
To view a list of H for Dreamweaver MX functions:
1
Select
Options > Customize
.
2
In the Customize dialog box, on the Toolbars tab, review the contents of the
Toolbuttons list.
3
(Optional) Add a toolbutton for a function to a toolbar. For more information, see
“Customizing toolbars” on page 32
.
4
Click Close.
There are many ways to customize the look and functionality of your workspace,
including setting the display and positioning of toolbars and tabs in the Resources
window; assigning shortcut keys for commands, code snippets, and scripts; and
creating custom toolbuttons.
For advanced customizations, such as editing tag editors and creating new ones, use
the Visual Tools Markup Language (VTML). For more information, see
“Customizing
the Development Environment” on page 197
.
You can extend or change the program’s functionality by scripting the Visual Tools
Object Model (VTOM). For more information, see
“Scripting the Visual Tools Object
Model” on page 223
.
Managing application toolbars and the QuickBar
The application toolbars and the QuickBar are divided by location, function, and the
level of customization available.
The application toolbars, on the left of the workspace, provide standard Windows
commands, and access to tools such as external browsers, the Style Editor, Code
Validation, and the Link Checker.
The QuickBar, on the right of the workspace, lets you insert tags from any of the
supported languages.
You can change the order of tabs on the QuickBar, hide a default toolbar, show a
toolbar that is hidden by default, or move a toolbar.
To change the order of tabs in the QuickBar:
1
In the workspace, right-click in any toolbar or the QuickBar, and select Organize
QuickBar.
2
In the Organize QuickBar dialog box, select names of tabs and press the Up and
Down arrow keys until you are satisfied with the order of the tabs.
Содержание HOMESITE
Страница 11: ...Contents xi Table of CommandID values 310 Table of SettingID values 314 Glossary 323...
Страница 12: ...xii Contents...
Страница 20: ...xx About This Book...
Страница 28: ...8 Chapter 1 Setting Up the Product...
Страница 70: ...50 Chapter 4 Managing Files...
Страница 88: ...68 Chapter 5 Writing Code and Web Content...
Страница 116: ...96 Chapter 6 Editing Pages...
Страница 148: ...128 Chapter 7 Using Web Development Languages...
Страница 190: ...170 Chapter 11 Deploying Files...
Страница 210: ...190 Chapter 12 Testing and Maintaining Web Pages...
Страница 216: ...196 Chapter 13 Extending the Help System...
Страница 350: ...330 Glossary...
Страница 358: ...338 Index...

