Hydra LAN User Guide
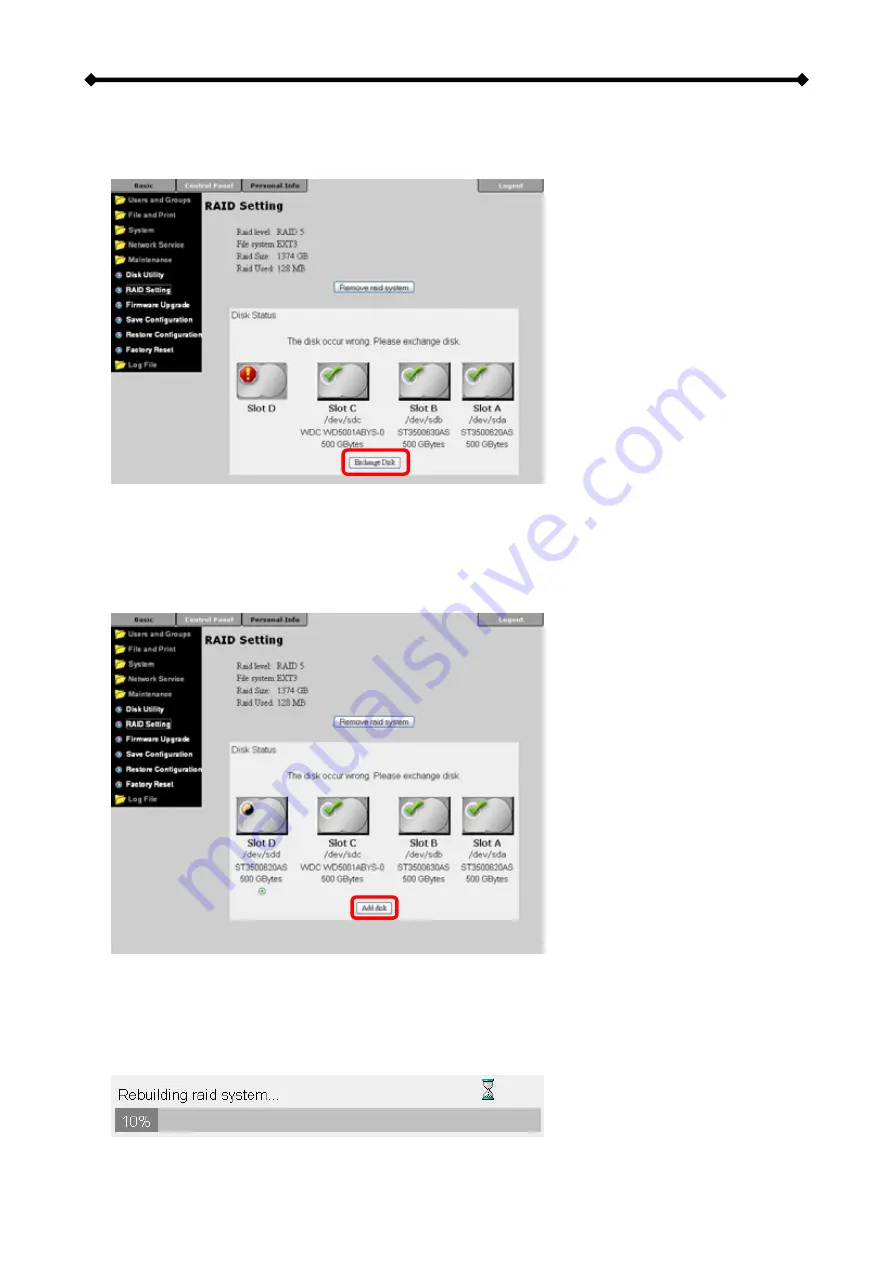
3. Eject the faulty drive, either by pressing the corresponding button (A, B, C, D) or by
pressing the “Exchange Disk” button using the web interface.
4. Remove the defective hard drive and install the new one.
5. Wait for about 10 seconds until the new hard drive is spinning and ready.
6. Press the corresponding button (A, B, C, D) for the new drive to start rebuilding the
RAID system or if you prefer using the web interface, press the “Scan new disk” button
followed by the “Add disk” button.
7. During the Rebuild process, the RAID and ACCESS LED will be blinking. Once it is
done, both ERROR and the corresponding HDD LED will turn off.
8. Depending on the HDD capacity, the rebuild process will take several hours. During this
time, the data can still be accessed but the performance will be slower than usual. The
computer can be shut down and the Hydra LAN will rebuild the data automatically.
Page 9 / Chapter 2 - System Setup


