3. OPERATION
3.1 Recording - Local
Local recording is achieved through the LED’s and buttons
located on the top of the MacFi-se unit. Please reference the
Manual Button & LED Configuration section of this manual for
additional information on functions.
Step 1
– Make all desired power, audio in, audio out,
configuration switch and I/O connections to the unit and power
up. Unit will initiate self test and default to idle mode (approx. 2
seconds).
Step 2
– Depress Record Setup button, Record LED will blink
Step 3
– Use Select button to determine message location to
record to. Message Number Display shows the selected
message, both decimals blink when the location is occupied.
Step 4
– Listen to record source through the audio output and/or
reference Sense and Overdrive LED's to verify level.
Step 5
– Depress Start/Stop button to begin recording and start
audio so
urce. Message and Record LED’s will remain solid
during recording.
Step 6
– Depress Start/Stop button to end recording and exit.
NOTE: Record Setup will time out after 1 minute of inactivity.
3.2 Recording - Remote Control
Remote Control recording is achieved through the I/O
connections located on the endplate of the MacFi-se unit. This
process is only applicable to the first eight messages on the
system. Please reference the Hardware Configuration section of
this manual for additional information on available connections.
Step 1
– Make all desired power, audio in, audio out,
configuration switch and I/O connections to the unit and power
up. Unit will initiate self test and default to idle mode
Step 2
– Provide a maintained input signal between the Record
Input and common, this will blink the Record LED.
Step 3
– Provide a maintained input signal between the message
activation input desired and common. Both the Record and
corresponding message on the Message Number Display will
remain solid during recording
Step 4
– Start audio source.
Step 5
– Release message activation input to stop recording.
Step 6
– Release recording input to exit record mode.
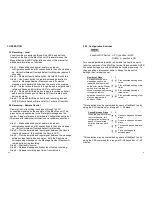
2.2.2. Configuration Switches
8 position DIP Switch: UP ( ) position is OFF.
DOWN ( ) position is ON.
This user adjustable dip switch is provided to allow the user to
tailor the operation of the MacFi-se to meet their demands. NOTE:
Dip switch settings are only established at system power up. To
change settings, disconnect power, change the dip switch
settings, then re-apply power.
Number of Plays
For applications where
messages need to be
repeated due to ambient
noise or for clarity. Global
setting for all messages.
When message is activated
through the remote
activation connector, it will
play the programmed
number of times.
1
2
Play activated message one
times
Play activated message two
times
Play activated message
three times
Play activated message four
times*
*This selection may be customized by users of the MacFi-se by
using the PLS command for a range of 1 - 99 plays.
Pause Between Plays
When the number of plays
is more than one, this
configuration will insert a
pause of the selected
duration between each
play.
3
4
One second pause between
plays
Five second pause between
plays
Ten second pause between
plays
Thirty second pause
between plays*
*This selection may be customized by users of the MacFi-se by
using the PAS command for a range of 0 - 99 seconds or 0 - 99
minutes.
20
9
Содержание MacFi-se
Страница 14: ...14 15...


