

Colibri II
– Flight recorder and navigation instrument
Page 10
If auto next mode is selected for a task TP then the navigation will switch to next TP automatically upon
zone entry. For AAT, auto mode should not be used and the switch to the next TP must be done
manually (refer to Task TP navigation section below).
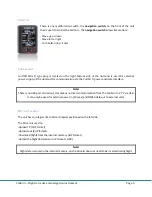
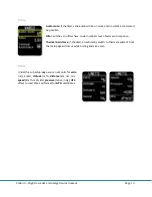
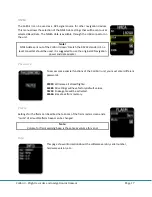
Buttons:
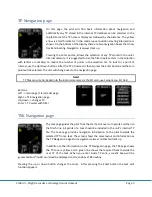
Left -> TSK navigation page
Right -> GPS info page
Up, down -> changes zoom
Enter -> Task edit menu
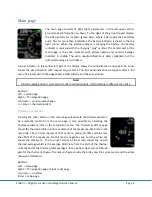
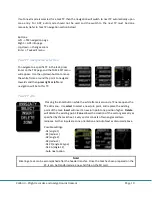
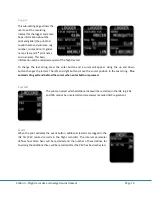
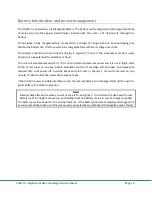
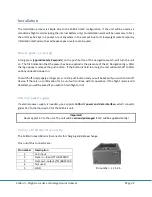
Task TP navigation selection
To navigate to a specific TP in the task, press
Enter on the TSK page and the TASK EDIT menu
will appear. Use the up/down button to move
the white frame around the point to navigate
towards and then
press right or left
and
navigation will be to this TP.
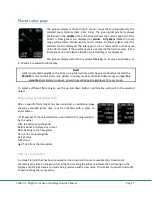
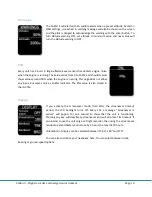
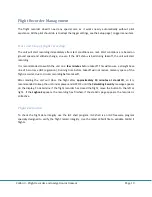
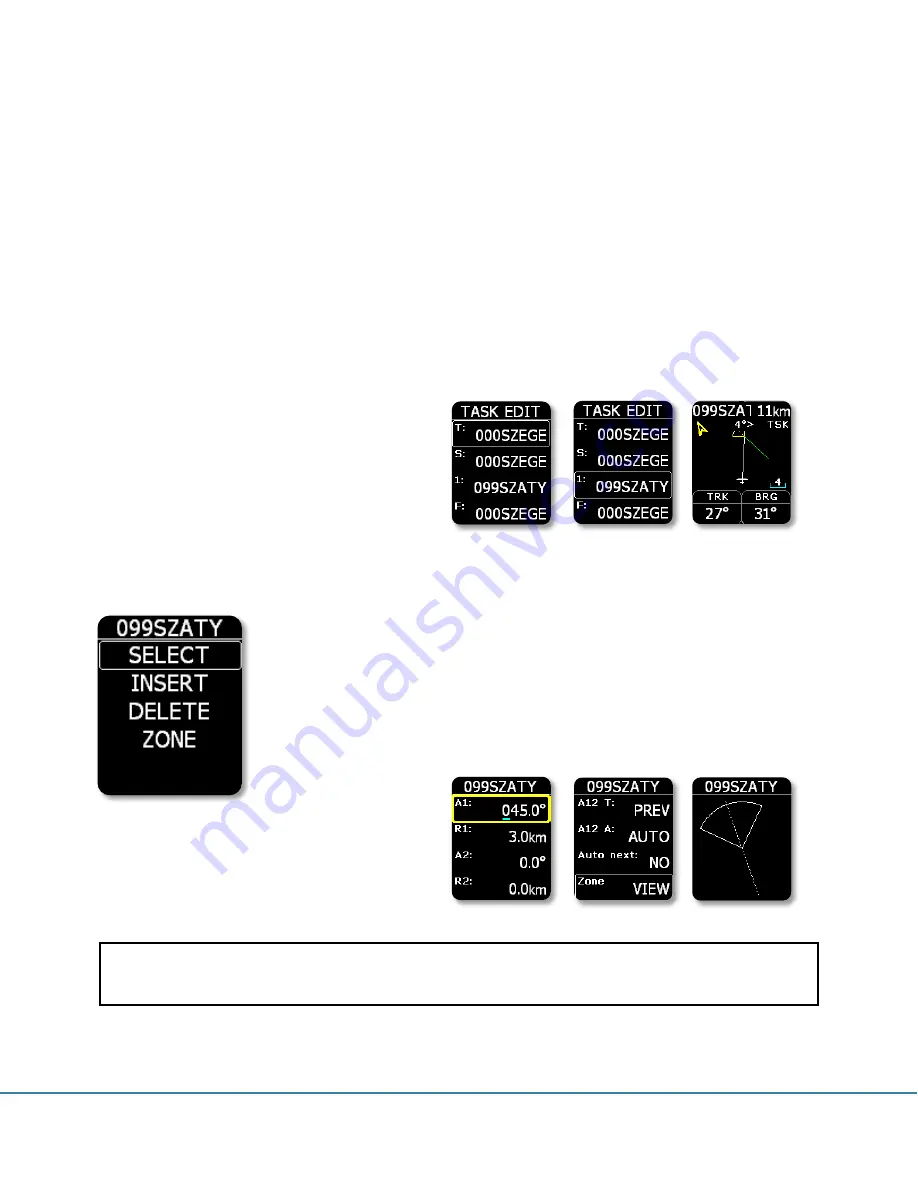
Task TP edit
Pressing the Enter button while the white frame is around a TP name opens the
TP edit menu. Use
select
to select a new turn point, and replace the existing
point of the task.
Insert
will insert a new turn point one position higher.
Delete
will delete the existing point.
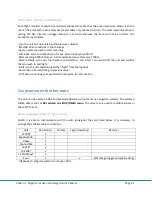
Zone
allows the creation of the sector geometry as
specified by the task sheet. Every sector consists of two angles and two
radiuses. Further inputs are zone orientation and Auto Next as discussed above.
Possible settings:
-A1 (angle 1)
-R1 (radius 1)
-A2 (angle 2)
-R2 (radius 2)
-A12 T (angle 12 type)
-A12 A (angle 12)
-Auto next option
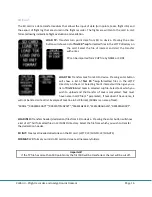
Note!
Entering a task can be accomplished after the header transfer. Once the task has been prepared on the
PC, it can be transferred via a new .hdr file on the SD card.


