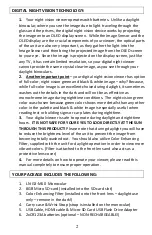
background image


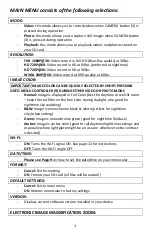
Your unit is also equipped with electronic zoom function, which allows you to 
change image magnification from 6x to 36x.  To increase the image magnification 
rotate the Menu Super Controller (9) to the right (clockwise) and look into the 
ocular – you will see the image magnification increase with each rotation click by 
3x.  See below the magnification chart according to each rotation:   


6.0x – 9.0x – 12.0x – 15.0x – 18.0x – 21.0x – 24.0x – 27.0x – 30.0x – 33.0x – 36.0x 


You can observe the current magnification level on the bottom left corner of the 
image display once you start rotating the Super Controller.  To decrease the image 
magnification, rotate the Super Controller to the left (counter-clockwise) and 
image magnification will decrease by 3x with each rotation.  Factory default setting 
is 6x 


NOTE: During any image magnification adjustments, please avoid pressing 
onto the Super Controller, as this may activate the device main menu. 

 
SHORTCUTS (MULTIPLE BUTTON FUNCTIONS): 


The three top buttons can be used to skip the main menu navigation and provide 
quick shortcuts to the most popular functions: 


POWER & IR BUTTON (4): 

a)


Initial short-press – turns the power ON 

b)


When power is ON, single short press activates 1

st


power level of IR illuminator. There are 3 IR power 
levels – each consecutive short-press increases the 
power by one level. 4

th

 short-press turns the IR 

illuminator OFF 

c)


When power is ON, long-press shuts the power OFF 

CAMERA BUTTON (3) 

a)


Factory default setting is VIDEO. Short-press 
activates video recording 

b)


Long-press activates Mode selection. Once 
activated each single long-press selects between 
VIDEO / PHOTO / PLAYBACK modes 

c)


Once selection is changed single short-press on this 
button will either activate Video recording, Still 
Image capture or Playback function 

IMAGE BUTTON (2) 

a)


Default function – OLED display brightness. Each 
short-press increases the display brightness by one 
level. There are 7 brightness levels and the factory 
default setting is level-2. See page-11 for more 
image brightness adjustment information 

Содержание LN-G3-M50

Страница 1: ...1 LN G3 M50 GEN 3 HD DIGITAL TECHNOLOGY DAY NIGHT MONOCULAR 6 36x50 INSTRUCTION MANUAL SOFTWARE VERSION M5 2021 06 17 IMPORTANT Please read this manual in its entirety prior to using this device...

Страница 2: ...image during nighttime conditions The night vision green color was chosen because green color shows more details than any other color in the palette and black white image is especially useful when rea...

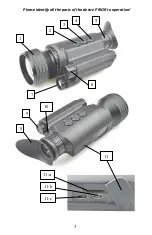
Страница 3: ...3 Please identify all the parts of the device PRIOR to operation 2 9 5 1 8 6 3 4 7 10 11 11 c 11 b 11 a...

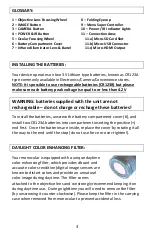
Страница 4: ...hargeable do not charge or recharge these batteries To install the batteries unscrew the battery compartment cover 6 and install two CR123A batteries into compartment inserting the positive end first...

Страница 5: ...correctly We suggest to always replace the daytime color filter protective lens cover after the unit is turned off and no longer in use IMPORTANT When turning the unit ON or when switching between var...

Страница 6: ...Wheel 1 focusing at the object you are trying to view until the image is at its best You may have to repeat fine tune the process again until the image is sharp and clear Once the clear image is obtai...

Страница 7: ...rmal Image is displayed in Full Color best for daytime or well lit room keep the red filter on the front lens during daylight also good for nighttime sky watching B W Image is monochrome black white p...

Страница 8: ...ain menu SHORTCUTS MULTIPLE BUTTON FUNCTIONS The three top buttons can be used to skip the main menu navigation and provide quick shortcuts to the most popular functions POWER IR BUTTON 4 a Initial sh...

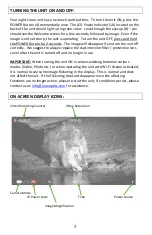
Страница 9: ...menu by pressing Super Controller 9 for approximately 2 seconds Once set the time will be displayed on the bottom of the OLED image display IMPORTANT in order to preserve the set date time do not rem...

Страница 10: ...d mounting you can utilize any of the two gold sockets Please note that due to the monocular shape a special riser plate will be required to mount our illuminator please e mail us at info lunaoptics c...

Страница 11: ...available ambient and artificial light In addition a manual Image Brightness Button 2 allows you to fine tune the image brightness to the most comfortable level Please note that during daylight you wi...

Страница 12: ...or recording in daylight with color filter on when highest video resolution is necessary Also good for recording at nighttime without the color filter when monocular is stationary on a tripod and no s...

Страница 13: ...d locate the Micro SD Card Slot 11 a Gently push onto the micro SD card and it will pop out If your computer has a direct micro SD slot you can insert the card directly to the slot bypassing the above...

Страница 14: ...ngle press onto the Super Controller activates either Video or Photo capture depending on the selected mode Repeat press deactivates video 9 If the App shuts down during normal use please re start it...

Страница 15: ...re the batteries are fresh 2 The light indicator is working but you cannot see the image You may be turning the unit on in a dark area without utilizing the IR illuminator Please also remove the Dayti...

Страница 16: ...jective Lens _____________________________________________F1 0 50mm Focusing Distance_______________________________________ 80cm 2 6ft Viewing Distance daylight 6x ___________________________ 1000m 1...

Отзывы: