Setup Your Printer
8.
Before proceeding make sure that the four red shipping clamps on the
Z axis smooth rods have been removed.
9. Move the X axis carriage to the center of the smooth rods. If you
have not already done so, remove the foam from between the X axis
carriage and the left hand X axis end. Locate and remove, with the
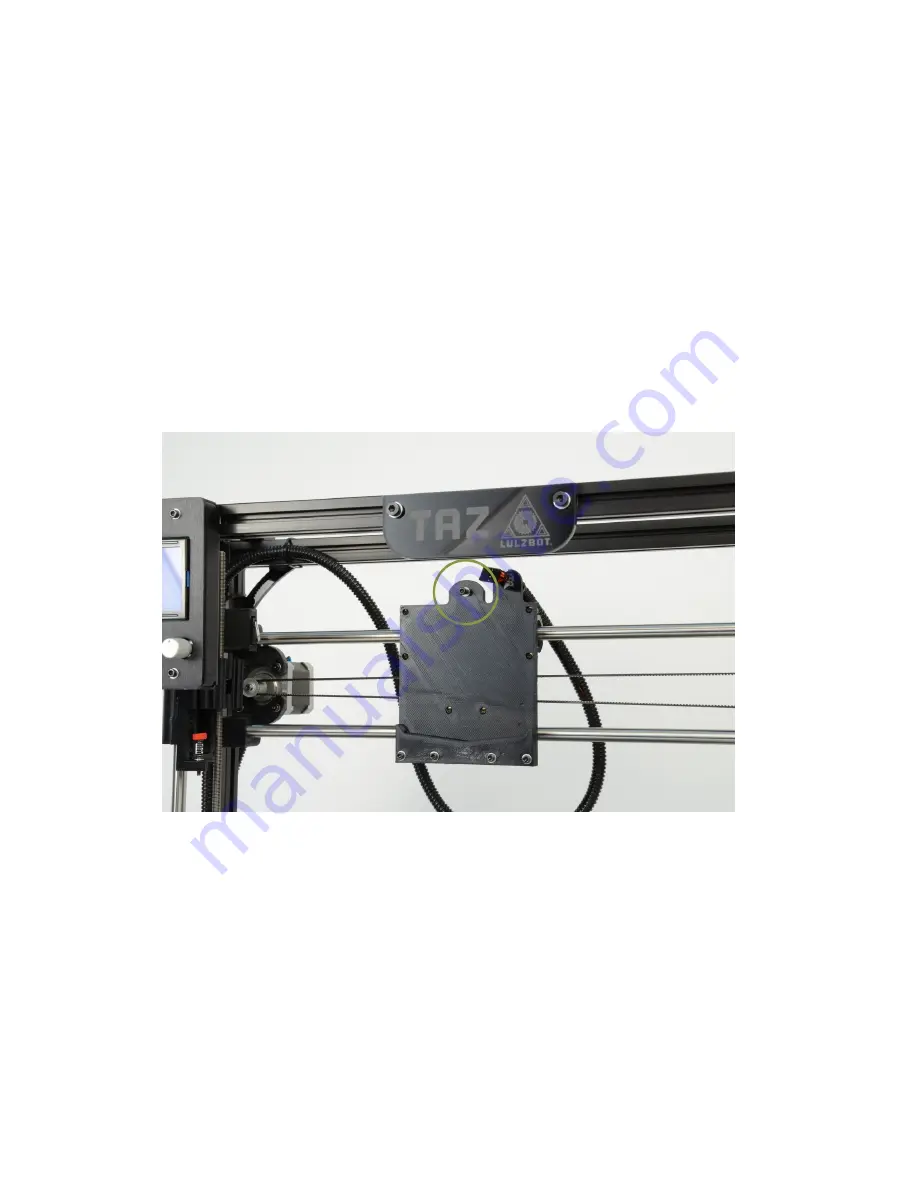
included 2.5mm hex driver, the tool head M3 screw in top center of
the X axis carriage (Fig. 1.11, page 24). Place the extruder tool head
mount onto the X axis carriage bottom first. The extruder mount
will slide into the bottom portion of the carriage and self center (Fig.
1.12, page 25).Make sure that the tool head mount is fully seated. Use
the 2.5mm driver and the previously removed M3 screw to secure the
extruder tool head onto the X axis carriage.
Figure 1.11: Remove the tool head screw
10. Connect the stepper motor and the hot end to the existing wiring
harness located at the top of the X axis carriage. Connect the extruder
assemblies’ 4-pin connectors: match the orange/red wire connector
pair for the hot end and the mixed color wired connector pair for the
extruder motor (Fig. 1.13, page 25). Connect the matching pairs
together so they lock and click.
24
Содержание TAZ 3.0
Страница 1: ...TAZ 3 0 User Manual Aleph Objects Inc...
Страница 5: ...CONTENTS Index 155 Glossary 159 v...
Страница 10: ......
Страница 11: ...WARNINGS Safety Information...
Страница 14: ......
Страница 15: ...Setup Your Printer...
Страница 17: ...1 1 HARDWARE SETUP Figure 1 2 Locate the four Y axis bolts Figure 1 3 Remove the four Y axis bolts 17...
Страница 25: ...1 1 HARDWARE SETUP Figure 1 12 Mount the extruder tool head Figure 1 13 Connect the two tool head connectors 25...
Страница 27: ...1 1 HARDWARE SETUP Figure 1 14 Power and USB receptacles Figure 1 15 Power supply 27...
Страница 30: ...Setup Your Printer Figure 1 19 Filament Guide Mount Figure 1 20 Filament Guide Setting 30...
Страница 31: ...1 1 HARDWARE SETUP Figure 1 21 Axes movement directions Figure 1 22 End stop locations 31...
Страница 33: ...Loading Filament...
Страница 36: ......
Страница 37: ...3D Printer Software...
Страница 47: ...Your First 3D Print...
Страница 55: ...4 5 Z PRINT HEIGHT Figure 4 5 Nozzle height Figure 4 6 Z end stop trigger 55...
Страница 58: ......
Страница 59: ...Slic3r...
Страница 131: ...Printing with the Graphic LCD...
Страница 138: ...Printing with the Graphic LCD GLCD Controller Menu Diagram Figure 6 4 Configuration Menu 138...
Страница 139: ...Maintaining Your 3D Printer...
Страница 143: ...Advanced Usage...
Страница 148: ......
Страница 149: ...Hardware and Software Source Code...
Страница 151: ...3D Printer Support...
Страница 153: ...Contact Information...
Страница 161: ......
Страница 162: ...Colophon Created with 100 Free Libre Software GNU Linux L A TEX Memoir...


